Growing up, peanut butter muffins were a Saturday morning staple, warm and gooey, with that unmistakable salty-sweet aroma filling the kitchen. Now, I’ve tweaked that old family recipe to include a bit more depth—think roasted peanuts, a touch of honey, and whole wheat flour for a nuttier, more textured bite.
Making these feels like a small act of rebellion, a way to reclaim childhood comfort while sneaking in wholesome ingredients. They’re a reminder that simple pleasures—crusty edges, sticky centers—don’t need to be complicated.
A nostalgic journey into childhood mornings, reimagined with a healthier, more complex peanut butter twist.
Why These Muffins Matter to Me
- I love how these muffins smell—rich, nutty, with a hint of honey.
- They remind me of lazy weekend mornings, still in pajamas, with a cup of coffee.
- Sometimes I add a handful of chocolate chips—I can’t resist the extra decadence.
- Reheating one in the microwave makes it feel like freshly baked, warm and gooey.
- These are my go-to when I want a quick, satisfying snack that feels homemade.
My Inspiration for these Muffins
I first made these after a trip to a small bakery that served peanut butter scones. I loved how the peanut butter gave a rich, savory note to baked goods. One afternoon, I was experimenting with healthier snacks, craving comfort but wanting more nutrition. The batter came together quickly, smelling of roasted peanuts and honey—such a cozy, inviting aroma.
A little history and fun facts about peanut butter muffins
- This recipe is inspired by traditional American brunch treats, adapted for whole grains and natural peanut butter.
- Peanut butter muffins gained popularity in school lunchboxes during the mid-20th century.
- The combination of peanut butter and honey is a nod to classic American snack sandwiches.
- Using whole wheat flour adds fiber and a richer, nuttier flavor—more satisfying than white flour.
- This muffin style is a versatile base—add chocolate chips, bananas, or even a sprinkle of sea salt on top.
Ingredient Breakdown and Tweak Tips

- Peanut butter: I prefer natural, runny peanut butter for better mixing. For chunkier texture, use crunchy.
- Whole wheat flour: Adds a nutty flavor and fiber. Switch to all-purpose for a lighter crumb.
- Honey: Brings moisture and sweetness. Maple syrup works well as a substitute.
- Eggs: Bind ingredients and add richness. Use flax eggs for vegan options.
- Milk: Keeps batter moist. Almond or oat milk can replace dairy here.
Spotlight on Peanut Butter and Whole Wheat Flour
Peanut Butter:
- Its oily, sticky texture helps bind the muffins. Roasted flavor deepens during baking.
- It can become oozy and slightly smoky when heated, adding depth.
Whole Wheat Flour:
- Provides a denser, chewier crumb than white flour. Nutty aroma intensifies as it bakes.
- It absorbs moisture differently, so avoid overmixing to keep muffins tender.
Ingredient Substitutions for Different Needs
- Dairy-Free: Use almond or coconut milk for a creamier, slightly sweeter muffin.
- Sugar-Free: Swap honey with maple syrup or agave nectar for a different sweetness.
- Gluten-Free: Replace wheat flour with a gluten-free blend. Expect a slightly denser crumb.
- Vegan: Use flax eggs instead of eggs, and plant-based milk.
- Extra Nutty: Add chopped roasted peanuts or toasted coconut for texture and flavor.
Equipment & Tools
- Mixing bowls: Combine ingredients smoothly.
- Whisk or spatula: Mix and fold ingredients.
- Muffin tin: Shape the muffins.
- Paper liners or greased tin: Prevent sticking.
- Toothpick: Test doneness.
Step-by-step guide to peanut butter muffins, from mixing to cooling
- Preheat your oven to 180°C (350°F). Grease or line a muffin tin with paper liners.
- In a large bowl, whisk together 1 cup whole wheat flour, 1/2 cup sugar, and 1 tsp baking powder.
- In a separate bowl, mix 1/2 cup natural peanut butter, 1/2 cup milk, 2 eggs, and 2 tbsp honey until smooth.
- Pour the wet ingredients into the dry, gently folding until just combined. Do not overmix.
- Spoon batter into muffin cups, filling each about 3/4 full.
- Bake for 15-18 minutes, or until the tops are golden and a toothpick inserted comes out clean.
- Remove from oven, let cool in the tin for 5 minutes, then transfer to a wire rack.
- Let the muffins cool slightly before serving—hot muffins can be fragile.
Cool muffins on a wire rack for 5 minutes before serving. For best flavor, let them rest 10 minutes more.
How to Know It’s Done
- Muffin tops turn golden brown.
- Toothpick inserted in center comes out clean.
- Muffins feel springy but hold their shape.
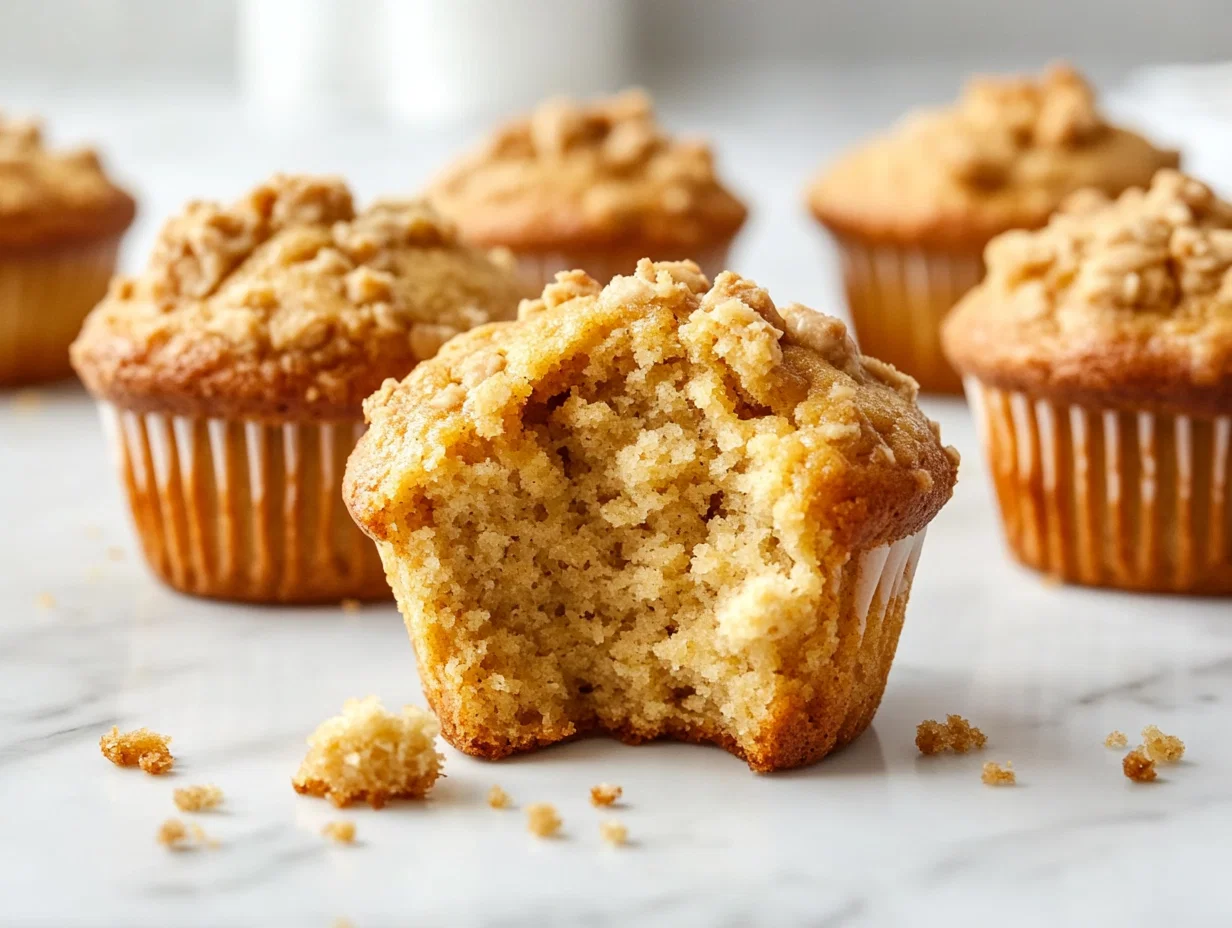
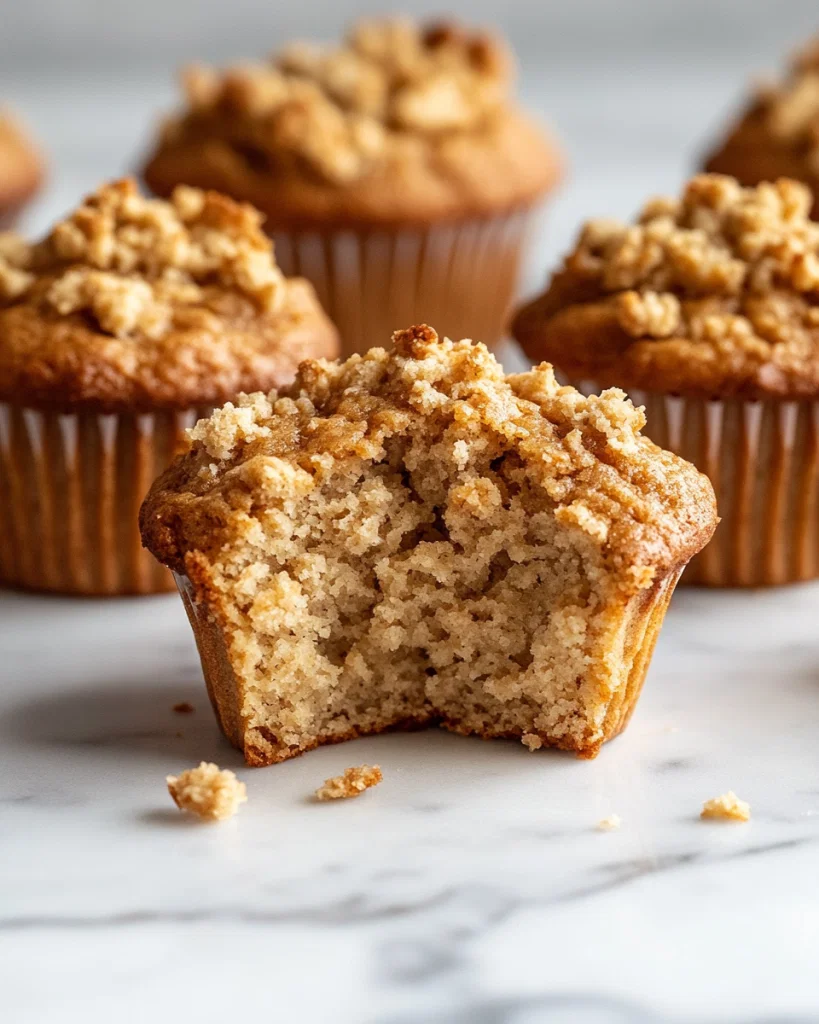
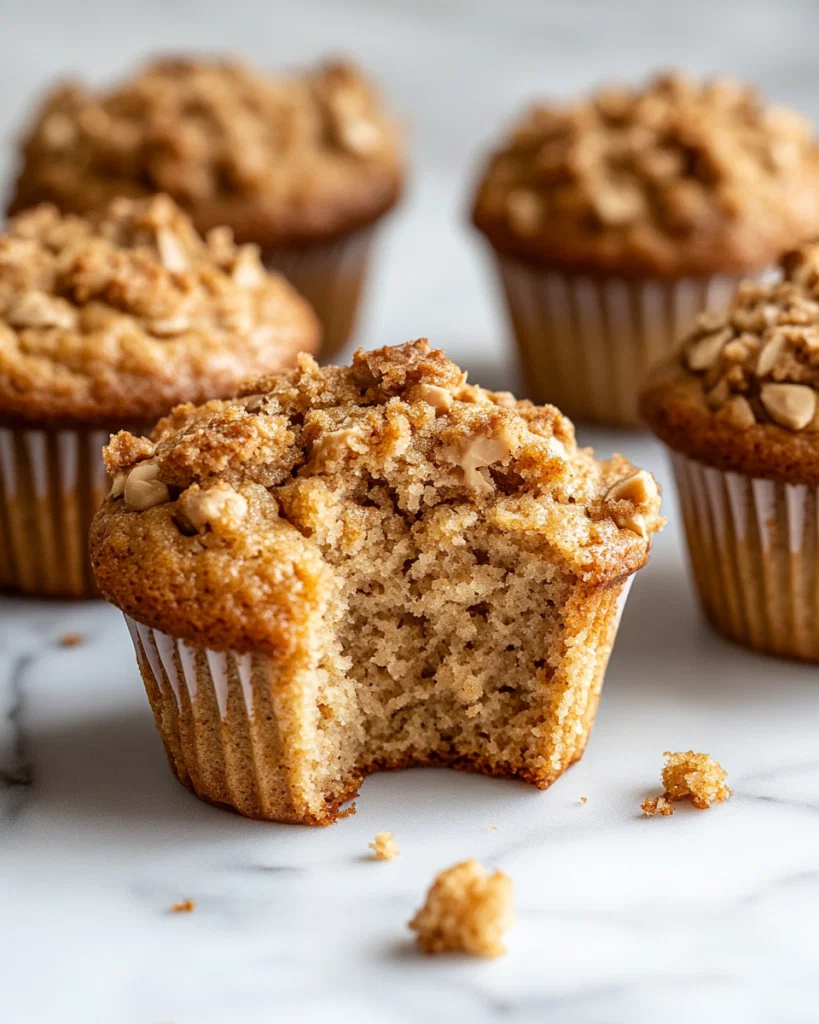
Peanut Butter Muffins with Whole Wheat Flour
Equipment
- Whisk or spatula
- Muffin Tin
- Paper liners or greased muffin tin
- Toothpick
Ingredients
- 1 cup whole wheat flour
- 1/2 cup granulated sugar
- 1 tsp baking powder
- 1/2 cup natural peanut butter runny or crunchy based on preference
- 1/2 cup milk dairy or plant-based
- 2 eggs
- 2 tbsp honey
Instructions
- Preheat your oven to 180°C (350°F). Line a muffin tin with paper liners or lightly grease it.
- In a large bowl, whisk together the whole wheat flour, sugar, and baking powder. This creates a uniform dry mixture to combine with the wet ingredients.
- In a separate bowl, stir the peanut butter, milk, eggs, and honey until the mixture is smooth and slightly frothy, with a fragrant nutty aroma filling the air.
- Pour the wet mixture into the dry ingredients and gently fold everything together using a spatula or whisk, just until combined. Be careful not to overmix; the batter should be slightly lumpy but well incorporated.
- Spoon the batter into the prepared muffin tin, filling each cup about three-quarters full. The batter should look slightly thick but scoopable, with a matte finish.
- Bake in the preheated oven for 15-17 minutes, or until the muffins turn golden on top and a toothpick inserted in the center comes out clean with no wet batter clinging.
- Remove the muffins from the oven, and let them cool in the tin for about 5 minutes. Then transfer them to a wire rack to cool completely or enjoy warm while the centers are still sticky and gooey.
- Once cooled slightly, enjoy these moist, nutty muffins with crusty edges and tender centers—perfect for snacking or breakfast.
Nutrition
Cooking Tips & Tricks for Perfect Muffins
- Measure ingredients accurately for consistent results.
- Gently fold wet and dry ingredients—do not overmix.
- Use room temperature eggs to ensure better batter emulsion.
- For a moister muffin, add a tablespoon of yogurt or sour cream.
- Toast your peanuts beforehand for an extra smoky flavor.
Common Mistakes & How to Fix Them
- FORGOT to preheat? Turn on oven early, so it’s ready when you are.
- DUMPED too much flour? Next time, level off the measuring cup for accuracy.
- OVER-TORCHED the edges? Cover with foil and lower oven temp slightly.
- UNDERBAKED? Extend baking time by 3-5 minutes, check for doneness.
Quick Fixes for Muffin Mishaps
- When muffins are flat, gently fold in a tablespoon of baking soda for lift.
- Splash a little milk on top before baking to enhance browning.
- Patch dry muffins with a drizzle of honey or jam.
- Shield muffins with foil if edges brown too quickly.
- When the batter is too thick, add a splash more milk to loosen.
What to Serve With Peanut Butter Muffins
- Fresh fruit
- Greek yogurt or plant-based yogurt
- Coffee
- Tea
- Smoothie
Make-Ahead and Storage Tips
- Prepare the batter the night before, cover and refrigerate for up to 12 hours.
- Bake fresh muffins in the morning for the best texture and aroma.
- Store cooled muffins in an airtight container at room temperature for 1-2 days.
- Reheat in the microwave for 10-15 seconds until warm and fragrant.
10 Practical Q&As About Peanut Butter Muffins
1. Can I use crunchy peanut butter?
Use natural peanut butter for a richer, more complex flavor. Avoid overly oily brands to prevent greasiness.
2. Can I substitute with almond or sunflower butter?
Yes, but the muffins will be chunkier and have more texture. Great if you like bites of peanut in every bite.
3. What’s the best way to store leftover muffins?
Absolutely. These add a different nutty flavor but keep the muffins moist and tender.
4. Can I freeze these muffins?
Keep them in an airtight container at room temp for 1-2 days, or refrigerate up to a week. Reheat briefly before eating.
5. How do I tell when they’re done?
Yes, wrap tightly and freeze for up to 3 months. Thaw at room temp, then warm for a cozy snack.
6. What if my muffins are too dense?
They’re golden brown on top, a toothpick inserted comes out clean, and they feel springy yet firm.
7. Can I add extras like chocolate chips or bananas?
Don’t overmix the batter. Mix just until ingredients are combined to keep them light and fluffy.
8. Should I use plain or sweetened peanut butter?
Yes, fold in add-ins gently at the end of mixing. They add fun flavor and texture.
9. Can I make these gluten-free?
Plain, unsweetened peanut butter keeps the muffins balanced, not overly sweet, and lets the peanut flavor shine.
10. Are these muffins suitable for kids?
Yes, substitute with a gluten-free flour blend. The texture might differ slightly, but they’ll still be tasty.
These muffins aren’t just a breakfast anymore. They’re a little messy, a little sweet, and perfect for grabbing on a hectic morning or a lazy afternoon. They remind me that sometimes, the best recipes are the ones that carry a bit of history and a lot of heart.
Maybe you’ll find your own story in that first warm bite, that familiar smell, or the way the peanut butter sticks to your fingertips.

hi there,
i’m Austin
A photographer who loves to cook. During the day, I take pictures, but at night, I dive into the world of flavors and recipes.
know more