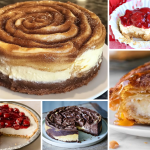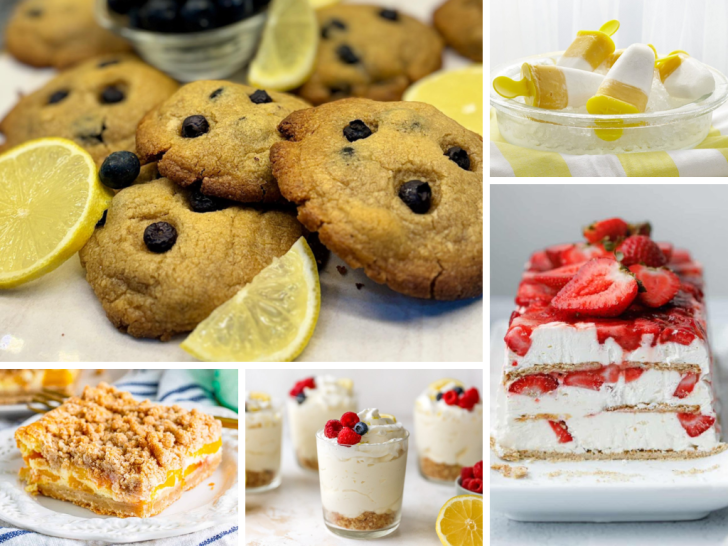
Summer desserts don’t have to be complicated to be memorable. Fresh fruit, cool treats, and simple bakes are often all it takes to create something everyone looks forward to sharing.
After reviewing the inspiration articles, the biggest trends include berry desserts, peach favorites, no-bake treats, frozen desserts, bars, and easy cakes that can be made ahead for gatherings. This collection brings together those seasonal favorites with a fresh mix of crowd-pleasing recipes.
Whether you’re planning a backyard barbecue, a family picnic, or a relaxing weekend at home, these easy summer desserts make the most of the season with bright flavors and minimal effort.
1. Lemon Blueberry Cheesecake Cookies

A soft, fruit-filled cookie is always a welcome treat during berry season. Lemon Blueberry Cheesecake Cookies combine tender lemon cookie dough with juicy blueberries and a creamy cheesecake filling, creating a dessert that brings together bright citrus and rich cheesecake flavors in every bite.
They’re a wonderful choice for spring celebrations, summer picnics, bake sales, or an afternoon coffee break. Made with fresh seasonal ingredients, they’re just as enjoyable for sharing with guests as they are for keeping on the dessert table at home.
The cookies bake up soft and chewy with bursts of sweet blueberries throughout, while the creamy cheesecake center adds a smooth, velvety texture. Fresh lemon zest brightens every bite, creating a balanced dessert that’s light, flavorful, and perfect for warm-weather baking.
View Recipe2. Pineapple Cake
A slice of pineapple cake brings bright tropical flavor to any dessert table. Pineapple Cake is a soft, moist cake made with sweet pineapple that adds natural fruitiness and a light, refreshing taste in every bite.
It’s a wonderful choice for summer gatherings, birthday celebrations, or an afternoon treat with coffee or tea. Served chilled or at room temperature, it’s an easy dessert that fits both casual family meals and special occasions.
The cake has a tender, fluffy crumb with juicy pineapple throughout, creating a moist texture that’s never too heavy. Sweet tropical notes and a delicate vanilla flavor come together in a simple dessert that’s perfect for enjoying all season long.
View Recipe3. Lemon Pie

A chilled lemon pie is a refreshing dessert that’s always welcome on a warm day. Lemon Pie features a buttery graham cracker crust filled with a smooth, creamy lemon filling that delivers bright citrus flavor in every slice.
It’s a wonderful choice for summer picnics, backyard barbecues, or family gatherings when an easy make-ahead dessert is needed. Served straight from the refrigerator, it’s cool, light, and perfect for sharing throughout the season.
The filling is silky and creamy with a sweet-tart balance that pairs beautifully with the crisp, buttery crust. Fresh lemon adds a vibrant finish, creating a simple dessert that’s refreshing, satisfying, and ideal for warm-weather celebrations.
View Recipe4. Double Chocolate Fudge
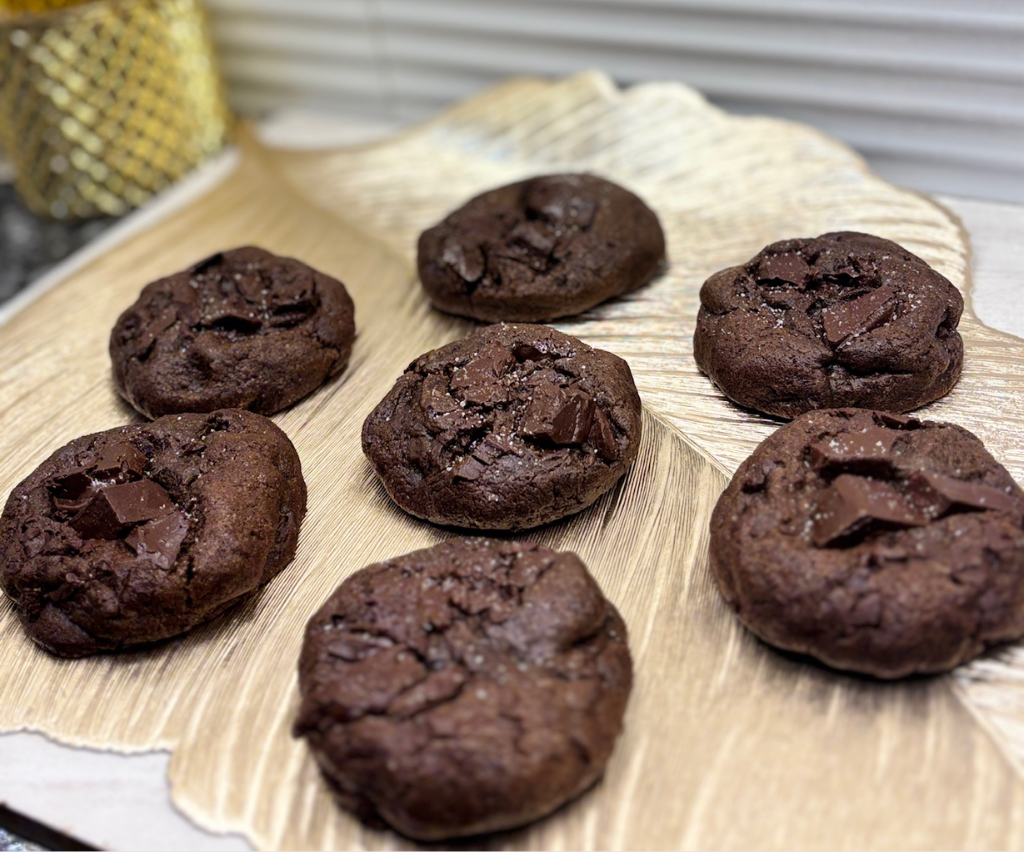
A rich chocolate dessert is always a welcome addition to the table. Double Chocolate Fudge combines melted chocolate and cocoa into a smooth, bite-sized treat with deep chocolate flavor that’s perfect for sharing or enjoying one piece at a time.
It’s a wonderful choice for summer parties, holiday gatherings, dessert platters, or whenever an easy make-ahead sweet is needed. Chill it in advance and serve it straight from the refrigerator for a simple treat that travels well.
Each square has a soft, creamy texture that melts in your mouth, while layers of chocolate create a rich and satisfying finish. Every bite delivers smooth, fudgy goodness that’s sure to please anyone who loves classic chocolate desserts.
View Recipe5. Strawberry Cheesecake Icebox Cake
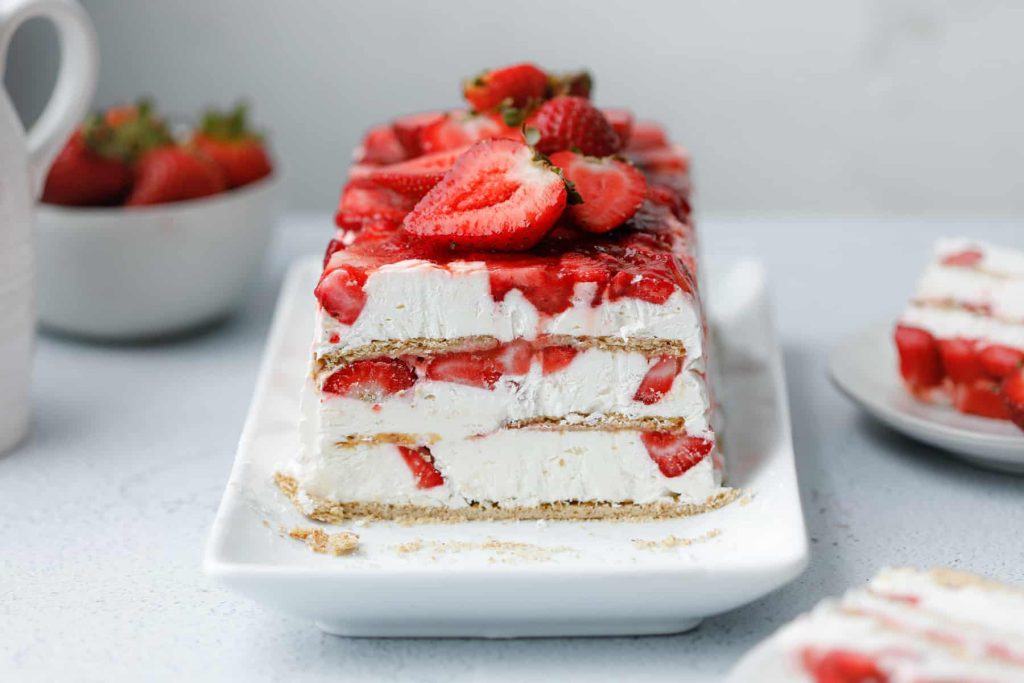
A cool, no-bake dessert is always a welcome treat on a warm summer day. Strawberry Cheesecake Icebox Cake layers fresh strawberries, a creamy cheesecake filling, and graham crackers that soften as they chill, creating an easy dessert that’s perfect for berry season.
It’s a wonderful choice for backyard barbecues, family gatherings, or make-ahead entertaining when keeping the oven off is a bonus. Prepare it in advance and let the refrigerator do the work until it’s ready to slice and serve.
Each layer is smooth and creamy with juicy strawberries adding fresh bursts of flavor throughout. The graham crackers become soft and cake-like as they chill, giving every bite a light, refreshing texture that’s ideal for summer celebrations.
View Recipe6. Peach Cobbler Cheesecake Bars
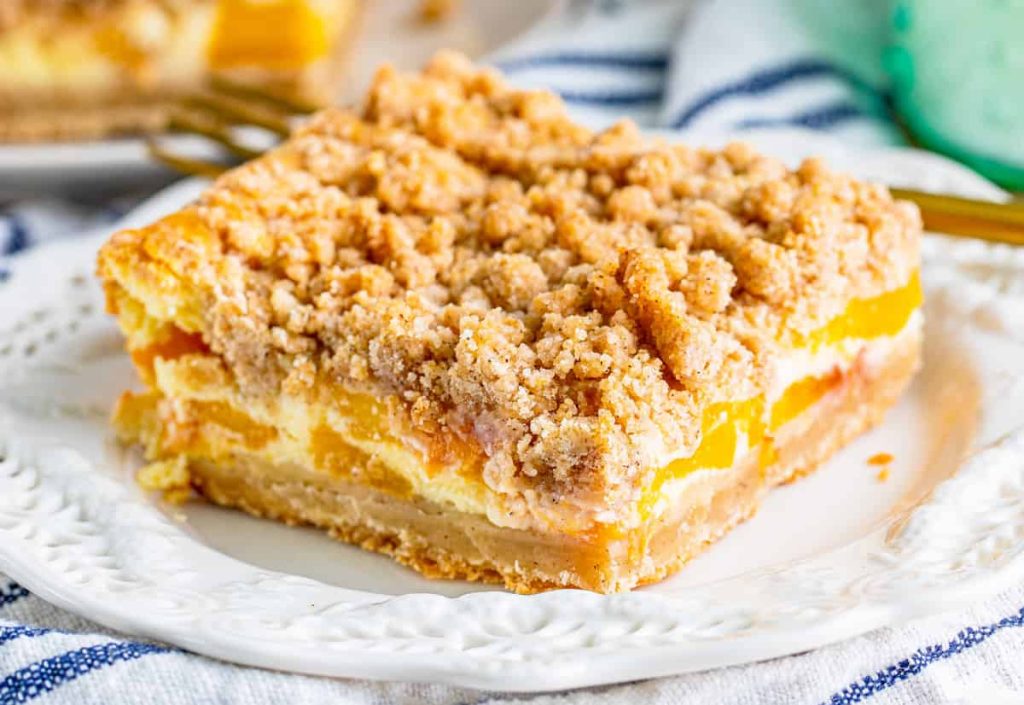
Fresh peaches make these dessert bars especially inviting during the warmer months. Peach Cobbler Cheesecake Bars combine juicy peaches, a creamy cheesecake layer, a buttery crust, and a golden cobbler-style crumble for a dessert that brings together two classic favorites in one bite.
They’re a wonderful choice for summer picnics, family gatherings, or weekend baking when peaches are at their sweetest. They can be made ahead, chilled until serving, and sliced into easy-to-share bars for any occasion.
Each bar has a smooth, creamy cheesecake filling balanced by tender peaches and a buttery crumb topping with a hint of cinnamon. The contrast of crisp crumble, soft fruit, and rich cheesecake creates a comforting dessert that’s perfect for enjoying all season long.
View Recipe7. No-Bake Lemon Cheesecake Cups
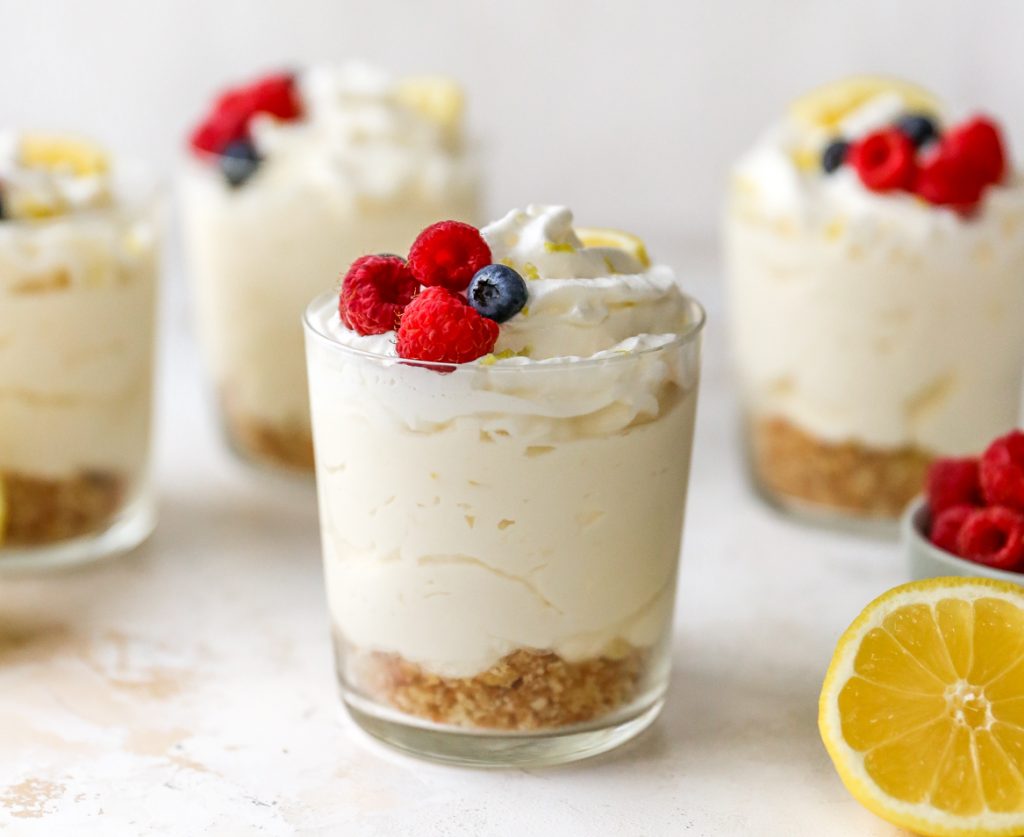
A chilled lemon dessert is always a refreshing way to end a summer meal. No-Bake Lemon Cheesecake Cups combine a buttery cookie crumb base with a light, creamy lemon cheesecake filling for an easy treat that comes together without turning on the oven.
They’re a wonderful choice for backyard barbecues, picnics, or warm-weather gatherings when a make-ahead dessert makes entertaining easier. Served in individual cups, they’re simple to portion and perfect for sharing with family and friends.
The filling is smooth, fluffy, and packed with bright lemon flavor, while the cookie layer adds a buttery crunch beneath every spoonful. Fresh lemon zest and a cool, creamy texture make these cheesecake cups a light and satisfying dessert for sunny days.
View Recipe8. Mixed Berry Shortcake Trifle

A layered berry dessert is always a beautiful addition to a summer table. Mixed Berry Shortcake Trifle combines tender shortcake pieces with fresh strawberries, blueberries, raspberries, whipped cream, and a creamy filling for a colorful dessert that’s perfect for sharing.
It’s a wonderful choice for backyard barbecues, holiday celebrations, or weekend gatherings when fresh berries are in season. Prepared ahead of time and served in a trifle bowl, it makes entertaining both simple and impressive.
Each spoonful brings together soft shortcake, juicy berries, and light, fluffy cream in every layer. The combination of sweet fruit, tender cake, and creamy filling creates a refreshing dessert that’s made for warm summer days.
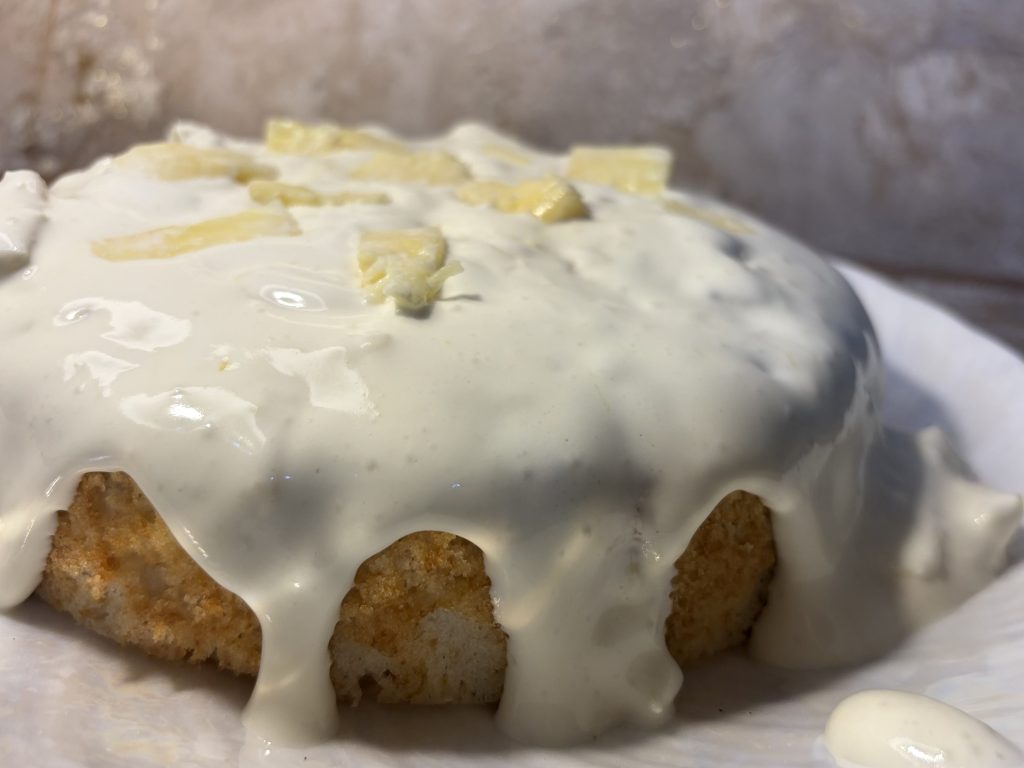
View Recipe9. Frozen Key Lime Pie
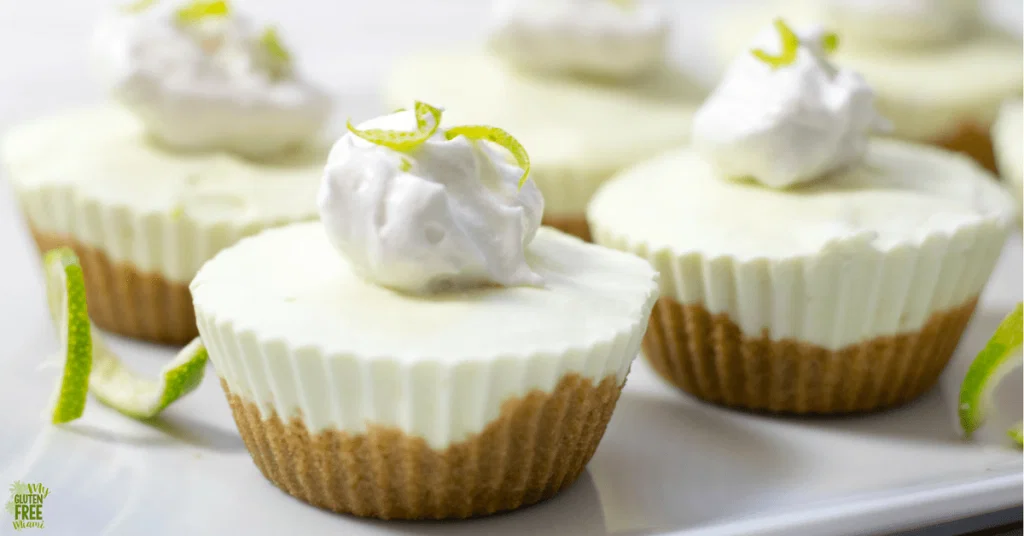
Bright citrus and a cool, creamy filling make this pie a natural choice for hot summer days. Frozen Key Lime Pie blends tangy key lime juice with a smooth, frozen filling nestled inside a buttery graham cracker crust for a refreshing dessert that’s easy to love.
This pie works beautifully for cookouts, pool parties, and family gatherings because it can be prepared well in advance and kept in the freezer until it’s time to serve. A few fresh lime slices or whipped cream make a simple finishing touch.
Every slice is light and creamy with a crisp crust that adds just the right amount of crunch. The sweet-tart lime flavor keeps the dessert refreshing from the first bite to the last, making it an easy favorite throughout the season.
View Recipe10. Mango Coconut Popsicles
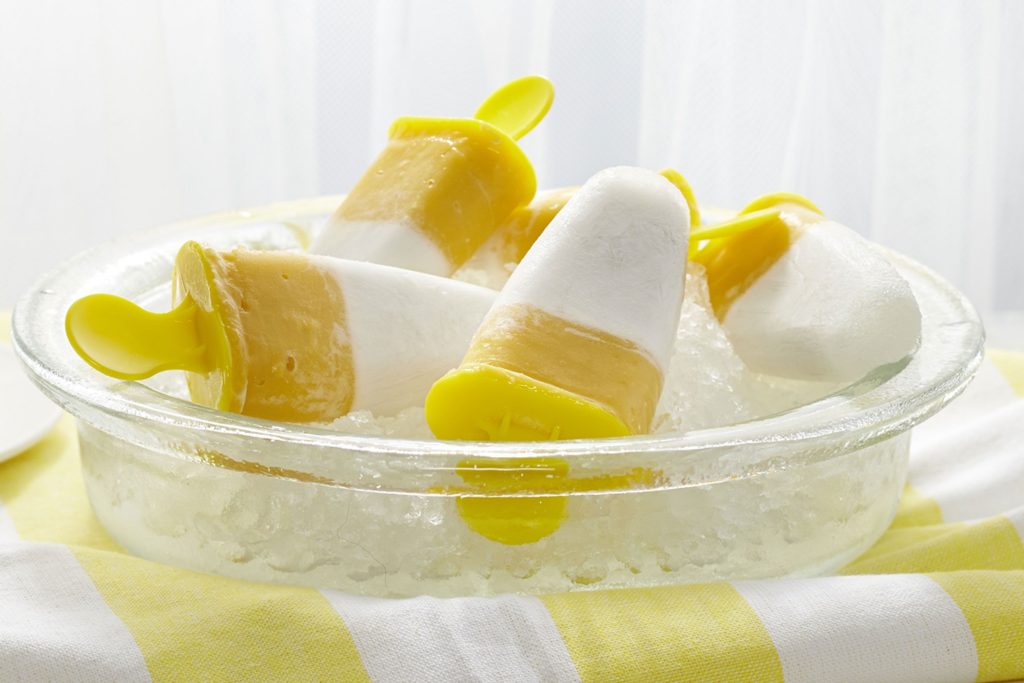
Nothing feels more refreshing than a homemade popsicle on a hot afternoon. Mango Coconut Popsicles blend ripe mangoes with creamy coconut milk to create a tropical frozen treat that’s naturally sweet, colorful, and perfect for cooling down.
These popsicles are a great choice for pool days, backyard barbecues, or an easy dessert to keep in the freezer throughout the summer. Made ahead of time, they’re ready whenever a cool, fruity snack is needed.
Each bite is smooth and creamy with the bright sweetness of mango balanced by rich coconut flavor. The frozen texture is light and refreshing, making these popsicles an easy favorite for warm-weather desserts.
View Recipe11. Grilled Peaches with Honey and Vanilla Ice Cream
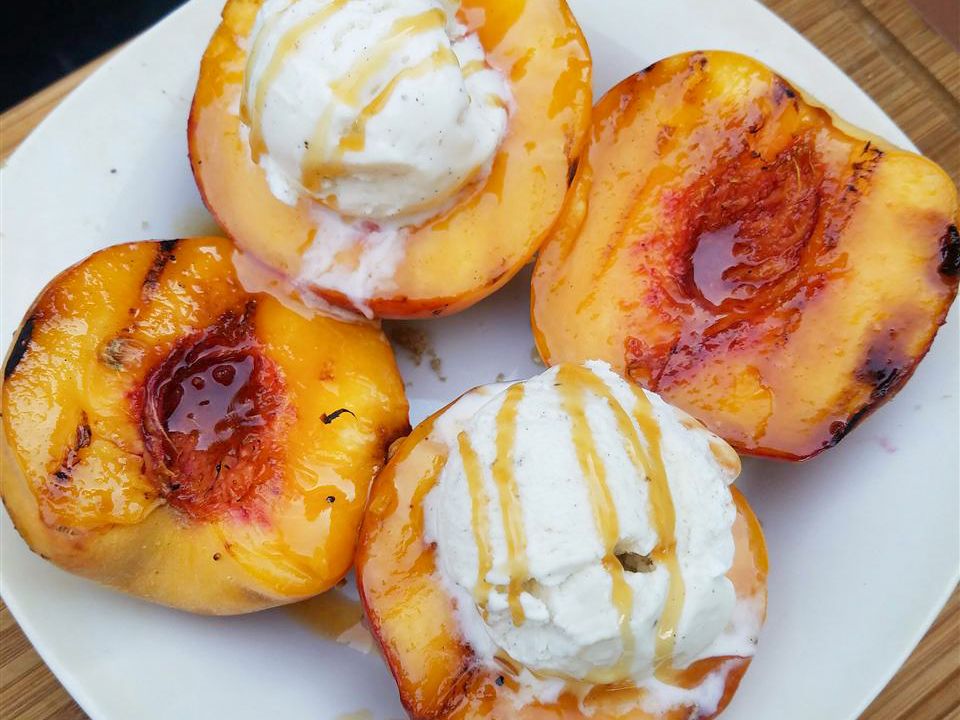
Sweet summer peaches become even more flavorful with a few minutes on the grill. Grilled Peaches with Honey and Vanilla Ice Cream pairs warm, lightly caramelized peaches with cool vanilla ice cream and a drizzle of honey for a dessert that’s simple yet full of seasonal charm.
This recipe is perfect for backyard barbecues, weekend cookouts, or relaxed evenings when fresh peaches are at their peak. It comes together quickly after the main meal, making it an easy dessert to serve without much extra effort.
The peaches turn tender with lightly charred edges that bring out their natural sweetness, while the ice cream melts into a creamy sauce over the warm fruit. A drizzle of honey ties everything together, creating a fresh, comforting dessert that captures the best of summer.
View Recipe12. Blackberry Crisp
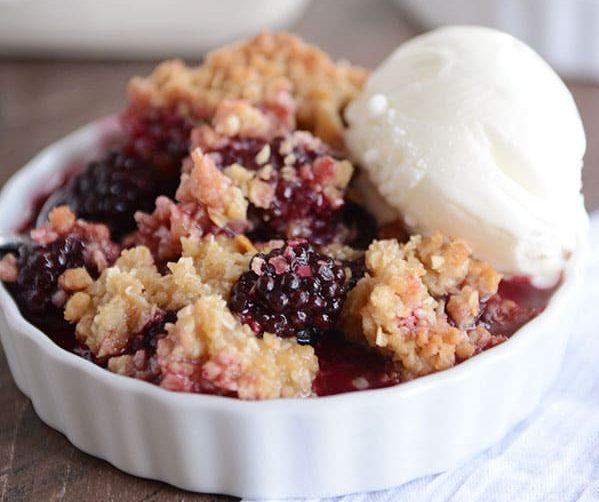
Fresh blackberries shine in this comforting baked dessert that’s perfect for summer. Blackberry Crisp pairs juicy berries with a buttery oat crumble that bakes until golden, creating a simple recipe that lets the fruit take center stage.
It’s an excellent choice for family dinners, backyard gatherings, or weekends when fresh blackberries are in season. Serve it warm from the oven with a scoop of vanilla ice cream or let it cool for an easy dessert to enjoy later.
The berries become soft and jammy as they bake, while the crisp topping adds a delicious buttery crunch to every spoonful. The balance of sweet, tart, and lightly toasted flavors makes this a timeless summer dessert that’s hard to resist.
View RecipeThe post 12 Easy Summer Desserts That Everyone Will Ask You to Make Again first appeared on Beyond the Bayou Blog.

hi there,
i’m Anne
A food blogger with a passion for creating vibrant, approachable recipes.