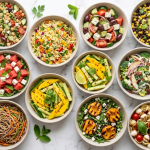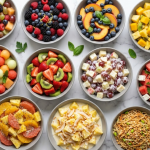
Cold pasta salads are one of those dishes that never fail at a summer potluck. They’re easy to make ahead, travel well, and taste even better after sitting for a while. Plus, they offer the perfect balance of comfort and freshness on a warm day.
After going through both sources, it’s clear that Italian-style pasta salads, creamy classics, and veggie-packed versions dominate. You’ll also see newer trends like grinder-style salads, green goddess flavors, and global-inspired dressings gaining popularity. These variations keep things interesting while still being crowd-friendly.
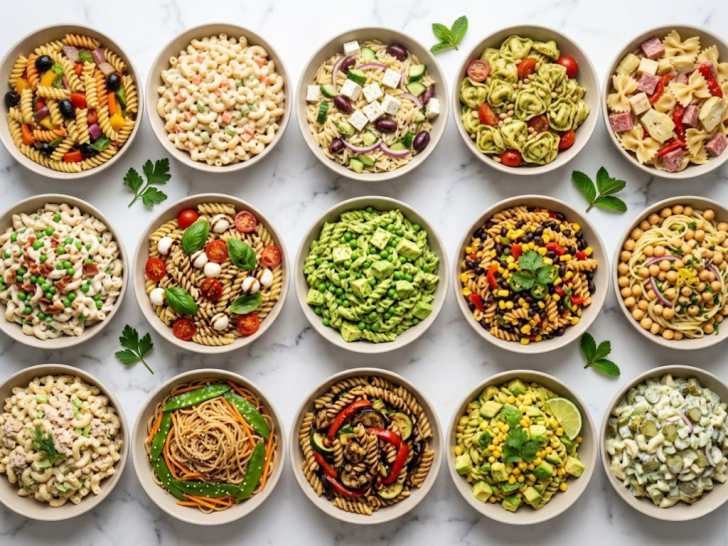
This list brings together a mix of traditional favorites and fresh, modern twists. Each recipe is simple, flavorful, and perfect for sharing exactly what you want when you’re feeding a group without overcomplicating things.
1. Classic Italian Dressing Pasta Salad
Preparing a classic Italian pasta salad is a practical way to feed a crowd with a dish that actually improves as it sits. Unlike leafy salads that wilt, this pasta-based version thrives on “marination time,” as the noodles absorb the zesty, herbaceous notes of the dressing. It is the quintessential side dish for BBQs, potlucks, and meal-prep lunches.
The process is efficient because you can chop your vegetables while the pasta boils. The key to a great pasta salad is the rinse: by rinsing the cooked pasta under cold water, you stop the cooking process immediately and wash away excess starch, ensuring the noodles stay distinct and “al dente” rather than clumping together.
The texture is a satisfying mix of chewy pasta, crunchy raw vegetables, and creamy pearls of mozzarella. The flavor profile is bold and “bright,” characterized by tangy vinegar, savory dried herbs, and the salty punch of cured meats and olives.
Servings: 6–8 servings
Ingredients
- 1 lb (16 oz) rotini or fusilli pasta (the spirals hold the dressing best)
- 1 cup bottled Italian dressing (or a homemade mix of olive oil, red wine vinegar, and Italian herbs)
- 1 cup cherry tomatoes, halved
- 1 English cucumber, diced
- 1/2 red onion, finely diced
- 1 bell pepper (any color), diced
- 4 oz salami or pepperoni, diced or sliced into ribbons
- 8 oz fresh mozzarella pearls (or cubed provolone)
- 1/2 cup black olives or kalamata olives, sliced
- 1/4 cup fresh parsley, chopped
- Optional: 1/4 cup grated Parmesan cheese and a pinch of red pepper flakes
Instructions
- Cook the Pasta: Bring a large pot of salted water to a boil. Cook the pasta for about 1 minute less than the package directions specify for “al dente.”
Pro Tip: Slightly undercooking the pasta ensures it doesn’t get mushy after it soaks up the liquid dressing. - The Cold Rinse: Drain the pasta and immediately rinse it with cold water until it is cool to the touch. Drain thoroughly.
- Prep the Mix-Ins: While the pasta cooks, chop your tomatoes, cucumber, onion, pepper, and salami.
- Combine: In a very large bowl, toss the cooled pasta with half of the Italian dressing.
- Add the Goods: Add in all the chopped vegetables, meat, cheese, and olives. Fold everything together gently.
- Final Seasoning: Add the remaining dressing, fresh parsley, and Parmesan cheese. Toss again to ensure every nook and cranny of the pasta is coated.
- The Chill Factor: For the best flavor, cover and refrigerate for at least 1 hour before serving.
Note: If the salad looks a little dry after chilling (the pasta loves to drink the dressing!), simply add a splash more dressing or a drizzle of olive oil right before serving.
2. Creamy Macaroni Salad with Veggies
Preparing a creamy macaroni salad is a practical way to deliver that classic, nostalgic “deli-style” side dish while sneaking in a colorful array of fresh vegetables. Unlike the Italian version we just looked at, this salad relies on a mayonnaise-based dressing, which creates a smooth, velvety coating that binds the ingredients together.
The process is efficient because it utilizes the “cooling” time of the pasta to allow the vegetables to slightly soften in the dressing’s acidity. The secret to a perfect creamy salad is seasoning the pasta water heavily, since the salad is served cold, the noodles need that internal salt to prevent the dish from tasting bland. It’s the ultimate partner for fried chicken, burgers, or any smoky BBQ main.
The texture is ultra-creamy with a distinct “snap” from the raw veggies. The flavor profile is a mellow, slightly sweet, and tangy blend with a hint of savory mustard and onion.
Servings: 6–8 servings
Ingredients
- 1 lb (16 oz) elbow macaroni
- 1 cup mayonnaise (standard or Japanese-style for extra richness)
- 2 tablespoons yellow mustard or Dijon
- 1 tablespoon apple cider vinegar (to cut the richness)
- 1 tablespoon sugar (traditional for that deli-style taste)
- 1 cup carrots, finely shredded or diced
- 1 cup celery, finely diced
- 1/2 cup red bell pepper, finely diced
- 1/4 cup red onion, minced
- 2 hard-boiled eggs, chopped (optional, for extra creaminess)
- Salt and black pepper to taste
- Optional: A dash of paprika or celery seed for an authentic finish
Instructions
- Boil and Prep: Cook the elbow macaroni in a large pot of salted water until tender but still holding its shape.
- The Rinse: Drain and rinse the pasta with cold water until completely cooled. Drain very well.
Texture Tip: If the pasta is still wet when you add the mayo, the dressing will slide off and become watery. Give it a few extra shakes in the colander! - Whisk the Dressing: In a large bowl, whisk together the mayonnaise, mustard, vinegar, sugar, salt, and pepper until smooth.
- The Veggie Fold: Stir the carrots, celery, bell pepper, and onion into the dressing. If using hard-boiled eggs, fold them in now.
- Combine: Add the cooled macaroni to the bowl. Toss thoroughly until every noodle is submerged in the creamy dressing.
- The Chill: Cover and refrigerate for at least 2 hours.
Note: Macaroni salad is like a sponge; it will absorb the dressing as it sits. If it seems too dry when you’re ready to serve, stir in an extra tablespoon of mayo or a splash of milk to loosen it back up. - Final Garnish: Dust the top with a little paprika or fresh parsley before placing it on the table.
3. Greek Feta Cucumber Pasta Salad
Preparing a Greek Feta Cucumber Pasta Salad is a practical way to enjoy the refreshing flavors of a traditional Horiatiki (Greek Village Salad) with the added heartiness of pasta. This version is particularly effective for summer because the high water content of the cucumbers makes it incredibly hydrating and light, even with the addition of carbohydrates.
The process is efficient because it utilizes a “fresh-chop” method, there’s no cooking involved beyond boiling the noodles. By using a lemon-oregano vinaigrette instead of a heavy sauce, you ensure the salad stays bright and doesn’t feel “weighed down.” The feta cheese provides a natural saltiness that seasons the vegetables from the outside in as it crumbles into the dressing.
The texture is a vibrant mix of “tender-chewy” pasta, “crisp-cool” cucumbers, and “creamy-salty” feta. The flavor profile is a Mediterranean dream: zesty, herbaceous, and deeply savory.
Servings: 6 servings
Ingredients
- 1 lb (16 oz) Orzo or Penne pasta
- 1 large English cucumber, quartered and sliced
- 1 pint cherry tomatoes, halved
- 1/2 cup Kalamata olives, pitted and sliced
- 1/2 red onion, thinly sliced into half-moons
- 6 oz block of Feta cheese, crumbled (high-quality sheep’s milk feta is best)
- 1/4 cup fresh parsley, chopped
For the Greek Vinaigrette:
- 1/3 cup extra virgin olive oil
- 3 tablespoons fresh lemon juice
- 1 tablespoon red wine vinegar
- 1 teaspoon dried oregano
- 1 clove garlic, minced
- Salt and black pepper to taste
Instructions
- Cook the Pasta: Boil the pasta in heavily salted water until al dente.
Pasta Choice: Orzo is fantastic here because it mimics the size of the chopped veggies, but Penne or Farfalle (bowties) are great for “catching” the feta crumbles. - Cool Down: Drain and rinse with cold water immediately. Ensure it is drained thoroughly so the dressing doesn’t get diluted.
- Whisk the Dressing: In a small jar or bowl, whisk together the olive oil, lemon juice, vinegar, oregano, garlic, salt, and pepper.
- Assemble: In a large bowl, combine the cooled pasta, cucumbers, tomatoes, olives, and red onion.
- The Feta Fold: Add the crumbled feta and parsley.
Pro Tip: If you like a “creamy” Greek salad, toss the feta in while the pasta is still slightly warm. If you prefer distinct chunks of cheese, wait until the pasta is completely cold. - Dress and Toss: Pour the vinaigrette over the salad and toss gently to coat.
- Rest: Let the salad sit for 20 minutes at room temperature or in the fridge before serving. This allows the cucumbers to release a bit of juice, which mingles with the lemon and oil to create a light “sauce.”
4. Pesto Tortellini Pasta Salad
Preparing a pesto tortellini pasta salad is a practical way to turn a side dish into a substantial, “main-character” meal. Unlike standard pasta salads that use dry noodles, this version utilizes cheese-filled tortellini, adding an extra layer of richness and protein. It is particularly effective because the ridges of the tortellini are designed to grab and hold onto the pesto, ensuring every bite is saturated with flavor.
The process is efficient because tortellini, especially the refrigerated kind cooks in just 3–5 minutes. By using a high-quality store-bought pesto or a quick homemade batch, you can have a gourmet-level salad ready in less time than it takes to preheat a grill. It’s a sophisticated choice for wine nights, garden parties, or a luxurious desk lunch.
The texture is pillowy and soft, punctuated by the “snap” of fresh tomatoes and the creamy finish of mozzarella. The flavor profile is a punchy, herbaceous explosion of basil, garlic, and aged Parmesan.
Servings: 4–6 servings
Ingredients
- 20 oz refrigerated cheese tortellini
- 1/2 cup basil pesto (store-bought or fresh)
- 1/4 cup pine nuts, toasted
- 1 pint cherry tomatoes, halved
- 8 oz fresh mozzarella pearls (Ciliegine)
- 2 cups fresh baby spinach or arugula
- 1 tablespoon balsamic glaze (optional, for drizzling)
- Salt and black pepper to taste
- Optional: Sliced sun-dried tomatoes for an extra savory kick
Instructions
- Cook the Tortellini: Bring a large pot of salted water to a boil. Cook the tortellini according to package instructions (usually until they float).
Caution: Tortellini is delicate! Drain them gently to avoid breaking the pasta “skins” and losing the cheese filling. - The “Cold Shock”: Rinse with cold water to stop the cooking process and prevent the cheese inside from becoming too runny.
- The Pesto Toss: While the pasta is still slightly damp (but cool), place it in a large bowl and toss with the pesto.
Pro Tip: The small amount of water remaining on the pasta helps the thick pesto emulsify and coat the tortellini evenly without needing extra oil. - Mix-ins: Add the cherry tomatoes, mozzarella pearls, toasted pine nuts, and baby spinach.
- Season: Taste and add salt or pepper. Since pesto is already salty, you may only need a tiny pinch.
- Chill or Serve: This salad can be served immediately at room temperature, or chilled for an hour.
Note: If serving later, the spinach may wilt slightly; if you prefer it crisp, fold the greens in just before serving. - Final Touch: Drizzle with a balsamic glaze right before it hits the table to add a sweet acidity that cuts through the rich pesto.
5. Loaded Antipasto Pasta Salad
Preparing a loaded antipasto pasta salad is a practical way to serve an entire “charcuterie board” in a single bowl. This dish is the ultimate “power salad” because it doesn’t just feature pasta; it’s packed with high-protein cured meats, zesty marinated vegetables, and sharp cheeses. It’s incredibly effective for entertaining because it’s sturdy enough to sit out at a tailgate or picnic without losing its integrity.
The process is efficient because it relies heavily on “pantry gems”, ingredients like marinated artichokes, olives, and roasted peppers that come pre-seasoned in jars. By using the oil from these marinated vegetables as part of your dressing, you add layers of “aged” flavor that you simply can’t get from fresh ingredients alone.
The texture is a complex playground: chewy pasta, velvety artichokes, “snappy” salami, and firm cubes of provolone. The flavor profile is bold, salty, and vinegary, with a deep savory finish from the cured meats.
Servings: 8–10 servings
Ingredients
- 1 lb (16 oz) Rotini or Cavatappi pasta
- 4 oz Genoa salami, cubed or sliced into quarters
- 4 oz pepperoni, sliced or chopped
- 6 oz sharp provolone cheese, cubed
- 1 jar (12 oz) marinated artichoke hearts, drained and chopped
- 1/2 cup roasted red peppers, sliced
- 1/2 cup pepperoncini peppers, sliced (for a mild kick)
- 1/2 cup Kalamata or green olives, pitted
- 1/2 cup grape tomatoes, halved
- 1/4 cup red onion, finely diced
For the Dressing:
- 3/4 cup high-quality Italian vinaigrette
- 1 tablespoon of the oil from the artichoke jar
- 1 teaspoon dried oregano
- 1/2 teaspoon garlic powder
- Optional: A handful of fresh basil or parsley for a pop of color
Instructions
- Boil and Cool: Cook the pasta in salted water until just al dente. Drain and rinse with cold water until chilled.
Pasta Tip: Rotini is the champion here because its “screwy” shape traps the small bits of herbs and the oily dressing. - Prep the “Antipasto”: While the pasta cools, prep your “meats and treats.” Cube the provolone and salami so they are roughly the same size, this makes the salad easier to eat with a fork.
- The Big Mix: In a large bowl, combine the cooled pasta, salami, pepperoni, cheese, artichokes, peppers, olives, tomatoes, and onion.
- The Dressing Boost: Whisk the Italian vinaigrette with the reserved artichoke oil, oregano, and garlic powder.
Pro Tip: Using a bit of the oil from the marinated artichoke jar is the “secret ingredient.” It’s infused with garlic and herbs that perfectly tie the whole salad together. - Toss: Pour the dressing over the salad and toss well.
- The Marination: Let the salad sit in the fridge for at least 2 hours. As the salad chills, the pasta will absorb the vinegar and oil, seasoning the center of each noodle.
- Serve: Give it one final toss before serving. If it looks “thirsty,” add an extra splash of dressing.
6. Ranch Bacon Pasta Salad
Preparing a Ranch Bacon Pasta Salad is a practical way to bring the smoky, savory flavors of a “loaded potato” to a cold side dish. This salad is exceptionally effective because it uses a creamy ranch base that acts as a glue, binding the crispy bacon bits and sharp cheddar cheese to every spiral of pasta.
The process is efficient because it relies on high-impact ingredients. Using a dry ranch seasoning packet allows you to control the creaminess by mixing it with sour cream or mayo, while the bacon provides a salty crunch that contrasts with the tender noodles. It’s a staple for BBQs and potlucks because it’s universally loved by both kids and adults.
The texture is a playful mix of “pillowy” pasta, “crispy” bacon, and “creamy” dressing. The flavor profile is a bold, zesty blend of garlic, herbs, and smoky pork.
Servings: 8–10 servings
Ingredients
- 1 lb (16 oz) Rotini or Shell pasta
- 10–12 slices bacon, cooked crisp and crumbled
- 1 ½ cups sharp cheddar cheese, cubed or shredded
- 1 cup frozen peas, thawed (adds a sweet pop of color)
- 1 pint cherry tomatoes, halved
- 1/2 red onion, finely diced (optional)
For the Creamy Ranch Dressing:
- 1 cup mayonnaise
- 1/2 cup sour cream (or Greek yogurt for tang)
- 1 packet (1 oz) dry Ranch seasoning mix
- 2–3 tablespoons milk (to thin to desired consistency)
- 1/2 teaspoon garlic powder (for extra punch)
- Cracked black pepper to taste
Instructions
- Cook the Pasta: Boil the pasta in salted water until al dente.
Crucial Step: Rinse with cold water immediately and drain well. If the pasta is warm, it will melt the cheese and turn the mayo-based dressing oily. - The Dressing: In a medium bowl, whisk together the mayonnaise, sour cream, ranch seasoning, milk, and garlic powder until smooth.
- The Assembly: In a large bowl, combine the cooled pasta, crumbled bacon, cheddar cheese, peas, tomatoes, and onion.
- Toss: Pour the dressing over the top and fold everything together until the pasta is fully coated.
- The Chill: Refrigerate for at least 1 hour.
Note: Pasta tends to “drink” ranch dressing. If you find the salad is too dry after chilling, stir in an extra tablespoon of milk or a splash of bottled ranch dressing to bring back the creaminess. - Serve: Garnish with extra bacon bits or a sprinkle of fresh chives.
7. Caprese Mozzarella Tomato Pasta Salad
Preparing a Caprese pasta salad is a practical way to enjoy the iconic flavors of a refined Italian appetizer in a more substantial, shareable format. This dish is highly effective because it relies on “high-quality simplicity” when you combine sun-ripened tomatoes, fresh basil, and creamy mozzarella, you don’t need a heavy sauce to create a memorable meal.
The process is remarkably efficient. Since the “sauce” is essentially a high-quality balsamic vinaigrette that you toss with the ingredients, there is no simmering or complex prep involved. It’s the perfect “balcony lunch” or a light dinner that feels elegant but takes less than 20 minutes to assemble.
The texture is a refreshing balance of “chewy” pasta, “juicy” tomatoes, and “soft-creamy” mozzarella pearls. The flavor profile is a clean, bright harmony of sweet balsamic, floral basil, and milky cheese.
Servings: 6 servings
Ingredients
- 1 lb (16 oz) Farfalle (bowtie) or Rotini pasta
- 1 pint cherry or grape tomatoes, halved
- 8 oz fresh mozzarella pearls (Ciliegine)
- 1 cup fresh basil leaves, torn or chiffonade (sliced into thin ribbons)
- 1/4 cup extra virgin olive oil
- 2 tablespoons high-quality balsamic vinegar (or balsamic glaze)
- 1 clove garlic, minced
- Salt and freshly cracked black pepper
- Optional: A handful of toasted pine nuts for a nutty crunch
Instructions
- The Pasta Base: Cook the pasta in a large pot of salted water until al dente.
Pro Tip: Rinsing the pasta under cold water is non-negotiable here. It keeps the noodles firm and prevents them from melting the delicate fresh mozzarella pearls. - Whisk the Dressing: In a small bowl, whisk together the olive oil, balsamic vinegar, minced garlic, salt, and pepper.
- Combine: In a large serving bowl, toss the cooled pasta with the tomatoes and mozzarella pearls.
- The Herbs: Add the fresh basil ribbons.
Note: Always add the basil last. If you add it to hot pasta or toss it too vigorously, it will bruise and turn black. You want those vibrant green flecks! - Dress the Salad: Pour the balsamic mixture over the salad and toss gently to coat every bowtie.
- The Finish: For a more intense flavor, drizzle a little extra balsamic glaze over the top just before serving. This adds a “restaurant-style” sweetness and a beautiful dark contrast to the white cheese.
- Serve: This salad is best served at room temperature or slightly chilled.
8. Green Goddess Herb Pasta Salad
Preparing a Green Goddess herb pasta salad is a practical way to satisfy a craving for something creamy while still feeling like you’re eating your greens. The “effectiveness” of this salad lies in the dressing a vibrant, emerald-green sauce that packs an entire garden’s worth of herbs into a single bowl. It’s a sophisticated alternative to a standard mayo-based macaroni salad, offering a much brighter and more aromatic profile.
The process is highly efficient because the dressing is made entirely in a blender or food processor. While the pasta boils, you simply toss in a handful of herbs and a base of Greek yogurt or avocado to create a nutrient-dense sauce. This is the ultimate “spa-day” lunch or a stunning side dish for a spring brunch.
The texture is silky and lush, punctuated by the crunch of fresh cucumber and the pop of green peas. The flavor profile is an herb-forward explosion of basil, chives, and tarragon, balanced by a zesty citrus finish.
Servings: 6 servings
Ingredients
- 1 lb (16 oz) Fusilli or Campanelle pasta (the “bell” shape holds the green sauce beautifully)
- 1 cup frozen peas, thawed
- 1 English cucumber, diced
- 1/2 cup scallions (green parts only), thinly sliced
- 1/2 cup pumpkin seeds or slivered almonds (for crunch)
The Green Goddess Dressing:
- 1 ripe avocado (or 1/2 cup Greek yogurt for a tangier version)
- 1 cup fresh basil leaves
- 1/2 cup fresh parsley
- 1/4 cup fresh chives
- 2 tablespoons fresh lemon juice
- 1 clove garlic
- 2 tablespoons extra virgin olive oil
- Salt and black pepper to taste
- Optional: 1 tablespoon capers or a splash of rice vinegar for extra “zing”
Instructions
- The Pasta: Cook your pasta in salted water until al dente. Drain and rinse with cold water until completely chilled.
- Blitz the Sauce: While the pasta cooks, place all the dressing ingredients in a blender. Pulse until the mixture is a smooth, bright green cream.
Pro Tip: If the dressing is too thick to move in the blender, add a tablespoon of water or lemon juice at a time until it reaches a “pourable” consistency. - The Base Mix: In a large bowl, combine the cooled pasta, peas, cucumber, and scallions.
- The Coating: Pour the Green Goddess dressing over the pasta. Use a large rubber spatula to fold the sauce in gently so you don’t break the pasta shapes.
- Add Crunch: Just before serving, sprinkle with the pumpkin seeds or almonds.
Note: Seeds and nuts can lose their crunch if they sit in the creamy dressing for too long, so always add them at the last second! - Chill: This salad is best served slightly chilled. If making it ahead of time, keep the dressing separate and toss right before serving to maintain that vibrant green color.
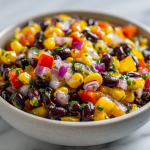
9. Spicy Southwest Black Bean Pasta Salad
Preparing a Spicy Southwest Black Bean Pasta Salad is a practical way to bring bold, smoky flavors to your table while providing a dish that is naturally filling. This salad is exceptionally effective because it functions as a “bridge” between a classic pasta dish and a hearty bean salad. The star here is the interplay between the earthy black beans, sweet corn, and a zesty lime-cumin dressing.
The process is highly efficient because it relies on staples like canned beans and frozen corn, which require zero cooking. By using a “one-bowl” mixing method, you can have a protein-packed side or a light vegetarian main ready in the time it takes to boil your noodles. It’s the perfect companion for a summer taco night or a backyard fajita party.
The texture is a satisfying combination of “tender” pasta, “creamy” beans, and “crisp” peppers. The flavor profile is a sun-drenched mix of smoky chipotle, bright lime, and a subtle heat that builds with every bite.
Servings: 6–8 servings
Ingredients
- 1 lb (16 oz) Farfalle (bowtie) or Rotini pasta
- 1 can (15 oz) black beans, rinsed and drained
- 1 ½ cups corn kernels (roasted or canned)
- 1 red bell pepper, diced
- 1/2 small red onion, finely diced
- 1 cup cherry tomatoes, halved
- 1 large jalapeño, seeded and minced (leave seeds for extra spice)
- 1/2 cup fresh cilantro, chopped
- Optional: 1 avocado, diced (add just before serving)
For the Spicy Southwest Dressing:
- 1/3 cup extra virgin olive oil
- 3 tablespoons fresh lime juice
- 1 teaspoon ground cumin
- 1 teaspoon chili powder (or chipotle powder for a smokier taste)
- 1/2 teaspoon garlic powder
- 1/2 teaspoon salt
- A dash of hot sauce or honey (to balance the acidity)
Instructions
- Cook the Pasta: Boil the pasta in salted water until al dente.
Rinse Rule: Rinse immediately with cold water. For a Southwest salad, you want the pasta completely cold so it doesn’t “cook” the fresh cilantro or soften the peppers. - Whisk the Dressing: In a jar or small bowl, combine the olive oil, lime juice, cumin, chili powder, garlic powder, salt, and honey/hot sauce. Shake or whisk vigorously until emulsified.
- The Big Mix: In a large bowl, combine the chilled pasta, black beans, corn, bell pepper, red onion, tomatoes, and jalapeño.
- Dress and Toss: Pour the dressing over the salad and toss thoroughly.
- The Herb Infusion: Fold in the fresh cilantro.
Pro Tip: If you’re an avocado lover, wait until the very last second to fold in the diced avocado pieces so they don’t get mashed during the mixing process. - Marinate: Let the salad sit in the fridge for at least 30 minutes. The lime juice will slightly “tame” the heat of the jalapeño and the bite of the red onion.
- Serve: Garnish with an extra lime wedge and a sprinkle of cotija cheese or extra cilantro.
10. Lemon Garlic Chickpea Pasta Salad
Preparing a lemon garlic chickpea pasta salad is a practical way to create a high-protein, plant-forward meal that feels incredibly light and “clean.” This salad is particularly effective because chickpeas (garbanzo beans) share a similar texture to al dente pasta, creating a cohesive bite. The raw garlic and lemon juice work together to “brighten” the dish, making it a perfect palate cleanser for a heavy summer meal.
The process is efficient because it relies on the heat of the freshly cooked pasta to “bloom” the garlic and herbs. Unlike other salads that require a long chill, this one is exceptional when served lukewarm or at room temperature, though it holds up beautifully in the fridge for several days. It’s a fantastic option for meal-prep enthusiasts or anyone looking for a Mediterranean-style lunch.
The texture is a mix of “tender-chewy” pasta, “earthy-creamy” chickpeas, and the “crisp” bite of fresh vegetables. The flavor profile is a sharp, zesty explosion of citrus and garlic, rounded out by the nutty richness of extra virgin olive oil.
Servings: 6 servings
Ingredients
- 1 lb (16 oz) Fusilli, Penne, or Chickpea-based pasta (for extra protein)
- 1 can (15 oz) chickpeas, rinsed and drained
- 1 large English cucumber, diced
- 1 cup cherry tomatoes, halved
- 1/4 cup red onion, minced
- 1/2 cup fresh parsley or dill, finely chopped
For the Lemon Garlic Dressing:
- 1/3 cup extra virgin olive oil
- 1/4 cup fresh lemon juice (about 2 lemons)
- 2 cloves garlic, finely grated or minced
- 1 teaspoon dried oregano
- 1/2 teaspoon red pepper flakes (optional, for a tiny hint of heat)
- Salt and cracked black pepper to taste
- Optional: 1/2 cup crumbled feta or shaved Parmesan
Instructions
- The Pasta: Cook your pasta in heavily salted water until al dente.
The “Warm Toss” Secret: For this specific recipe, do not rinse the pasta with ice-cold water. Drain it, then give it a very quick 5-second rinse with lukewarm water. You want the pasta to stay slightly warm so it absorbs the garlic and lemon oils. - Whisk the Dressing: While the pasta boils, whisk together the olive oil, lemon juice, grated garlic, oregano, and pepper flakes.Note: Grating the garlic with a microplane makes it “melt” into the dressing, ensuring you don’t get a harsh bite of raw garlic.
- The Infusion: Place the warm pasta and the drained chickpeas in a large bowl. Pour the dressing over them immediately and toss. The warmth will take the “raw edge” off the garlic and infuse the chickpeas.
- The Veggie Add-ins: Once the pasta has cooled slightly (after about 5 minutes), add the cucumber, tomatoes, red onion, and fresh herbs.
- The Finish: Fold in the cheese if using. The residual warmth might soften the cheese just enough to make it slightly creamy.
- Serve: This salad is best served at room temperature or chilled. If serving the next day, add a fresh squeeze of lemon to “re-awaken” the flavors.
11. Tuna Dill Cold Pasta Salad
Preparing a Tuna Dill Cold Pasta Salad is a practical way to turn a pantry staple into a refreshing, protein-rich meal. This salad is particularly effective because it bridges the gap between a classic tuna salad and a hearty pasta dish. The use of fresh dill is the “secret weapon” here, it cuts through the richness of the tuna and mayonnaise, providing a bright, floral aroma that makes the entire dish feel light and summery.
The process is efficient because it uses ingredients you likely already have on hand. It’s a “one-bowl” wonder that stores exceptionally well, making it a premier choice for meal prepping or as a reliable side for a casual outdoor lunch.
The texture is a satisfying combination of “pillowy” pasta, “flaky” tuna, and the “crunch” of fresh celery and onions. The flavor profile is savory and creamy with a distinct, refreshing herbaceous finish.
Servings: 4–6 servings
Ingredients
- 1 lb (16 oz) Shell or Elbow pasta
- 2 cans (5–6 oz each) tuna in water, drained and flaked
- 3/4 cup mayonnaise
- 1/4 cup Greek yogurt or sour cream (for extra tang)
- 2 tablespoons fresh dill, finely chopped (plus more for garnish)
- 1 tablespoon Dijon mustard
- 1 tablespoon fresh lemon juice
- 1 cup celery, finely diced
- 1/2 small red onion, minced
- 1/2 cup frozen peas, thawed
- Salt and black pepper to taste
Instructions
- The Pasta: Cook the shells in salted water until al dente.
Pasta Tip: Shells are the best choice for tuna salad because the small “pockets” trap the flaked tuna and peas, ensuring you get every ingredient in every bite. - The Cold Rinse: Drain and rinse with cold water until the pasta is completely chilled. Drain thoroughly to prevent a watery dressing.
- The Creamy Base: In a large bowl, whisk together the mayonnaise, Greek yogurt, Dijon mustard, lemon juice, and fresh dill.
- The Flake: Add the drained tuna to the dressing. Use a fork to flake it into small pieces, but avoid over-mixing if you prefer larger “chunks” of tuna.
- The Mix-ins: Add the chilled pasta, celery, red onion, and peas.
- The Fold: Gently fold everything together until the pasta is evenly coated. Taste and add salt and pepper as needed.
- The Chill: Refrigerate for at least 30 minutes before serving. This allows the pasta to absorb the lemon and dill flavors.
- Final Touch: Garnish with an extra sprig of fresh dill and a lemon wedge.
12. Asian Sesame Ginger Noodle Salad
Preparing an Asian sesame ginger noodle salad is a practical way to bring the “zing” of a professional cold noodle bar into your home kitchen. This dish is highly effective because it leans on the principle of balanced aromatics freshly grated ginger and toasted sesame oil provide a deep, savory foundation that is instantly lifted by the acidity of rice vinegar and lime.
The process is efficient because it’s a “boil, whisk, and toss” recipe. While your noodles cook (which takes only minutes for varieties like udon or thin spaghetti), you can prepare the dressing and julienne your veggies. It is arguably the best “traveling” salad; unlike mayo-based dishes, this vinaigrette-style salad remains vibrant and food-safe at room temperature for much longer, making it the king of summer picnics.
The texture is a fantastic contrast of “slurppable” noodles and the “crispy-crunch” of raw cabbage and peppers. The flavor profile is a sophisticated blend of nutty, salty, and sweet, with a gentle heat from the fresh ginger and a touch of Sriracha.
Servings: 4–6 servings
Ingredients
- 8–10 oz noodles (Udon, Soba, or even thin spaghetti/linguine)
- 1 cup shredded red cabbage
- 1 cup carrots, julienned or shredded
- 1 red bell pepper, thinly sliced
- 1 cup shelled edamame (thawed if frozen)
- 3 green onions, thinly sliced
- 1/4 cup fresh cilantro, chopped
- 1/4 cup roasted peanuts or cashews, chopped (for crunch)
- 1 tablespoon toasted sesame seeds
For the Sesame Ginger Dressing:
- 3 tablespoons soy sauce (or Tamari for gluten-free)
- 2 tablespoons toasted sesame oil
- 2 tablespoons rice vinegar
- 1 tablespoon fresh lime juice
- 1 tablespoon honey or maple syrup
- 1 tablespoon fresh ginger, finely grated
- 1 clove garlic, minced
- 1 teaspoon Sriracha (optional, for heat)
Instructions
- The Noodles: Cook your noodles according to the package directions until al dente.
The “Non-Stick” Trick: Immediately drain and rinse the noodles under cold running water. Once cooled, toss them with a tiny drizzle of sesame oil; this prevents them from clumping together while you finish the rest of the salad. - Blitz the Dressing: In a small jar or bowl, whisk together the soy sauce, sesame oil, rice vinegar, lime juice, honey, grated ginger, garlic, and Sriracha.
Pro Tip: If you have a microplane, use it for both the ginger and the garlic to create a paste-like consistency that emulsifies perfectly into the oil. - The Veggie Base: In a large bowl, combine the shredded cabbage, carrots, bell pepper, edamame, and green onions.
- The Toss: Add the chilled noodles to the bowl of vegetables. Pour the dressing over the top and use tongs to toss everything together until the noodles are glossy and the veggies are evenly distributed.
- Add the Garnish: Just before serving, fold in the fresh cilantro and sprinkle with the chopped nuts and sesame seeds.
- Resting Time: While you can eat this immediately, letting it sit in the fridge for 20–30 minutes allows the noodles to absorb the ginger and soy, deepening the flavor.
13. Roasted Veggie Balsamic Pasta Salad
Preparing a roasted veggie balsamic pasta salad is a practical way to bring “depth of flavor” to a category of food that is often just raw and crunchy. While most pasta salads rely on fresh vegetables, this version uses the oven to caramelize the natural sugars in bell peppers, zucchini, and red onions. This is highly effective because the roasted vegetables become soft and “jammy,” creating a built-in sauce that clings to the pasta.
The process is efficient because you can roast the entire tray of vegetables in the same amount of time it takes to boil the water and cook the noodles. By tossing the hot vegetables and their roasting juices directly into the pasta, you ensure that no flavor is wasted. It’s an ideal “transitional” dish, sophisticated enough for a dinner party, yet sturdy enough for a weekday lunch.
The texture is a luxurious mix of “tender” roasted vegetables, “chewy” pasta, and “creamy” pockets of goat cheese or feta. The flavor profile is rich, smoky, and sweet, finished with the sharp, acidic punch of a balsamic glaze.
Servings: 6 servings
Ingredients
- 1 lb (16 oz) Penne or Rigatoni pasta
- 1 medium zucchini, sliced into half-moons
- 1 red bell pepper, chopped into bite-sized pieces
- 1 yellow bell pepper, chopped into bite-sized pieces
- 1 red onion, cut into wedges
- 1 cup cherry tomatoes
- 3 tablespoons extra virgin olive oil (for roasting)
- 1/2 cup balsamic vinaigrette
- 1/4 cup balsamic glaze (for drizzling)
- 4 oz goat cheese or feta, crumbled
- 1/4 cup fresh basil, torn
- Salt and black pepper to taste
Instructions
- Roast the Veggies: Preheat your oven to 400°F (200°C). Toss the zucchini, peppers, onion, and cherry tomatoes on a large sheet pan with olive oil, salt, and pepper. Roast for 20–25 minutes until the edges are charred and the tomatoes have burst.
- The Pasta: While the veggies roast, cook your pasta in salted water until al dente.
Drain Tip: Do not rinse the pasta with cold water this time! For this recipe, you want the pasta warm so it “marries” with the roasted vegetables and melts the cheese slightly. - The Big Combine: In a large bowl, combine the warm pasta with the roasted vegetables (including all the flavorful oil and juices from the sheet pan).
- Dress it Up: Add the balsamic vinaigrette and toss well. The warmth of the pasta will help the vinaigrette penetrate the noodles.
- Add the Creamy Element: Gently fold in the goat cheese or feta and the fresh basil.
Texture Note: The goat cheese will create a creamy, slightly “saucy” coating as it interacts with the warm balsamic and oil. - The Final Glaze: Just before serving, drizzle the thick balsamic glaze over the top in a decorative pattern and add a final crack of black pepper.
14. Avocado Corn Lime Pasta Salad
Preparing an Avocado Corn Lime Pasta Salad is a practical way to capture the essence of summer in a single bowl. This recipe is highly effective because it treats the avocado not just as a topping, but as a structural component, when tossed with lime juice and warm pasta, some of the avocado breaks down to create a “natural cream sauce” that is entirely dairy-free.
The process is efficient because it centers around fresh, high-impact ingredients that require minimal prep. By using charred corn (either from a grill or a hot skillet), you introduce a smoky sweetness that acts as a perfect foil to the sharp, zesty lime. It’s the ultimate “California-style” side dish that feels indulgent while remaining light and nutrient-dense.
The texture is a beautiful contrast: “velvety” avocado, “snappy” corn kernels, and “smooth” pasta. The flavor profile is bright, citrusy, and buttery, with a clean finish.
Servings: 6 servings
Ingredients
- 1 lb (16 oz) Fusilli or Gemelli pasta
- 2 ripe avocados, diced
- 2 cups corn kernels (fresh off the cob, frozen/thawed, or canned)
- 1 pint cherry tomatoes, halved
- 1/4 cup red onion, finely minced
- 1/2 cup fresh cilantro, chopped
- Optional: 1/2 cup Cotija cheese or Feta for a salty kick
For the Honey-Lime Dressing:
- 1/4 cup extra virgin olive oil
- 1/4 cup fresh lime juice (about 2–3 juicy limes)
- 1 tablespoon honey or agave nectar
- 1 clove garlic, minced
- 1/2 teaspoon cumin
- Salt and black pepper to taste
Instructions
- The Pasta: Cook your pasta in salted water until al dente.
The “Lukewarm” Secret: For this salad, drain the pasta and let it air-dry for a minute without rinsing under freezing water. You want it slightly warm (not hot) when you add the avocado so the fruit softens and creates that signature creamy texture. - Char the Corn: If using fresh or frozen corn, toss it in a dry skillet over high heat for 3–5 minutes until you get some dark brown charred spots. This adds a “smoky” depth that takes the salad from basic to gourmet.
- Whisk the Dressing: In a small bowl, whisk together the olive oil, lime juice, honey, garlic, cumin, and salt/pepper.
- The Big Mix: In a large bowl, combine the slightly warm pasta, charred corn, tomatoes, red onion, and cilantro.
- The Avocado Fold: Add the diced avocado and the dressing. Toss gently.
Pro Tip: Use a large spoon and fold from the bottom. You want some avocado pieces to stay whole for texture, while others should “melt” into the pasta to form a light sauce. - Final Touch: Sprinkle with Cotija cheese if you’re using it.
- Serve: Serve immediately. Because of the lime juice, the avocado will stay green for a few hours, but this salad is best enjoyed fresh!
15. Dill Pickle Creamy Pasta Salad
Preparing a dill pickle creamy pasta salad is a practical way to satisfy those “salty-crunchy” cravings in a format that feels like a full meal. This recipe is highly effective because it treats the pickle brine as a primary seasoning—using the juice directly in the dressing ensures the vinegary, dilly flavor permeates the core of every pasta noodle.
The process is efficient because it uses standard pantry items but rearranges them into something surprisingly bold. It’s the ultimate “conversation starter” at a BBQ; people are often skeptical until they take that first tangy, creamy bite. If you’re a fan of a solid deli pickle, this is essentially that experience transformed into a cold, comforting side dish.
The texture is a playful mix of “velvety” dressing, “soft” pasta, and the “aggressive crunch” of diced pickles. The flavor profile is bright, zesty, and unapologetically “briny.”
Servings: 6–8 servings
Ingredients
- 1 lb (16 oz) Shell or Radiatori pasta (shapes with “ridges” to hold the sauce)
- 1 ½ cups dill pickles, finely diced (standard or “bread and butter” for a sweeter kick)
- 1/2 cup sharp cheddar cheese, finely cubed
- 1/4 cup red onion, minced
- 1/4 cup fresh dill, chopped
For the Tangy Pickle Dressing:
- 1 cup mayonnaise
- 1/4 cup sour cream
- 3 tablespoons dill pickle brine (straight from the jar)
- 1 teaspoon dried dill
- 1/2 teaspoon garlic powder
- 1/2 teaspoon black pepper
- Optional: A dash of cayenne pepper for a “spicy pickle” vibe
Instructions
- The Pasta: Cook the pasta in salted water until al dente.
The “Shell” Advantage: Small shells are perfect here because they act like little scoops for the diced pickles and bits of cheese. - The Rinse: Drain and rinse thoroughly with cold water. Ensure it is completely cooled so the mayonnaise dressing doesn’t “break” or become oily.
- The Brine Dressing: In a medium bowl, whisk together the mayonnaise, sour cream, pickle brine, dried dill, garlic powder, and pepper.
Pro Tip: Taste the dressing before adding salt! Between the pickles, the brine, and the cheese, you likely won’t need any extra. - The Mix: In a large bowl, combine the chilled pasta, diced pickles, cheddar cheese, and red onion.
- The Coating: Pour the dressing over the top and fold gently.
- The Herb Pop: Stir in the fresh dill. Fresh dill is more aromatic than dried, so using both layers provides a professional-level depth of flavor.
- The Chill: Refrigerate for at least 1 hour. This allows the vinegar in the brine to “pickle” the pasta noodles slightly.
- Serve: Garnish with a few whole pickle chips on top for a fun visual.

hi there,
i’m James
The home cook and food blogger behind Beyond the Bayou Blog. Cooking has always been my happy place.
know more