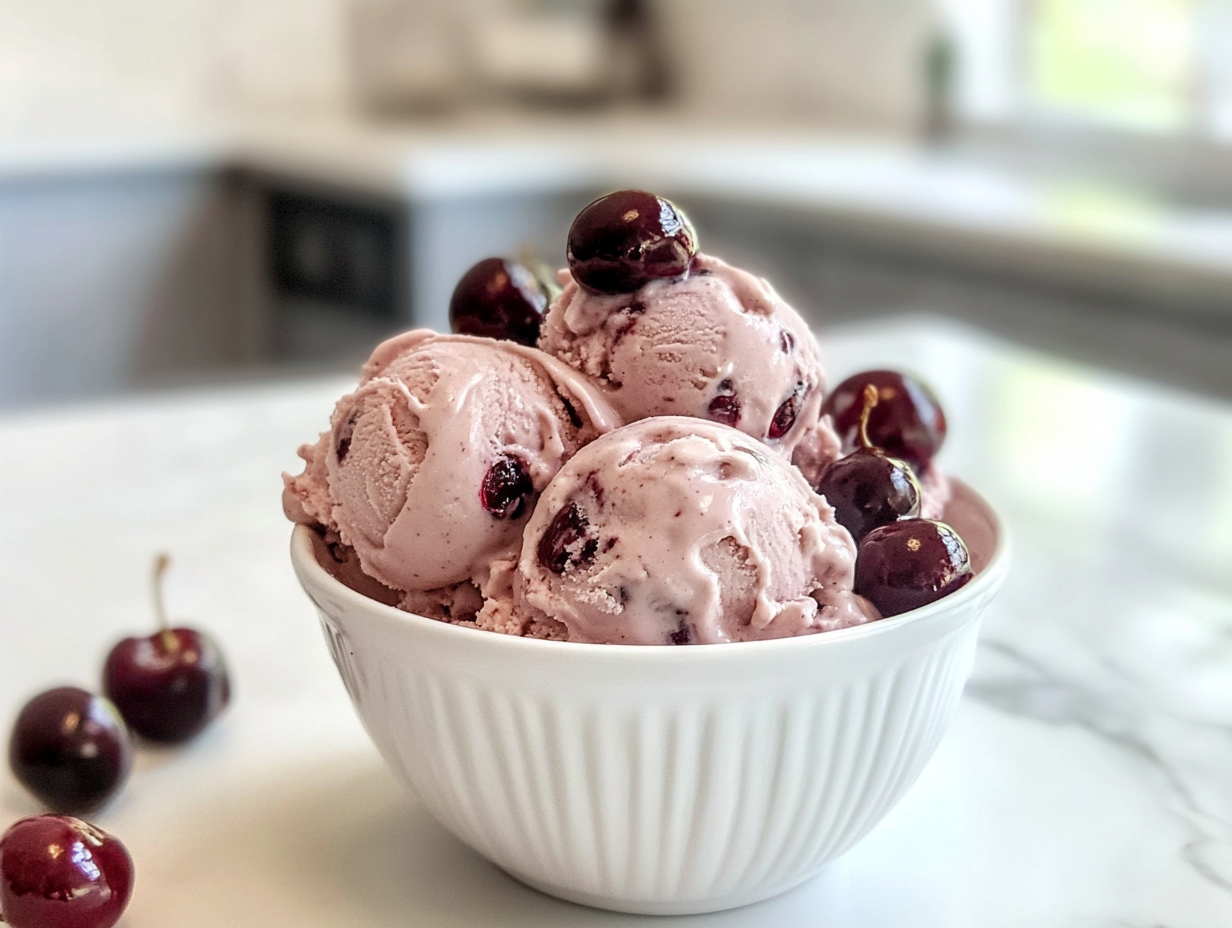
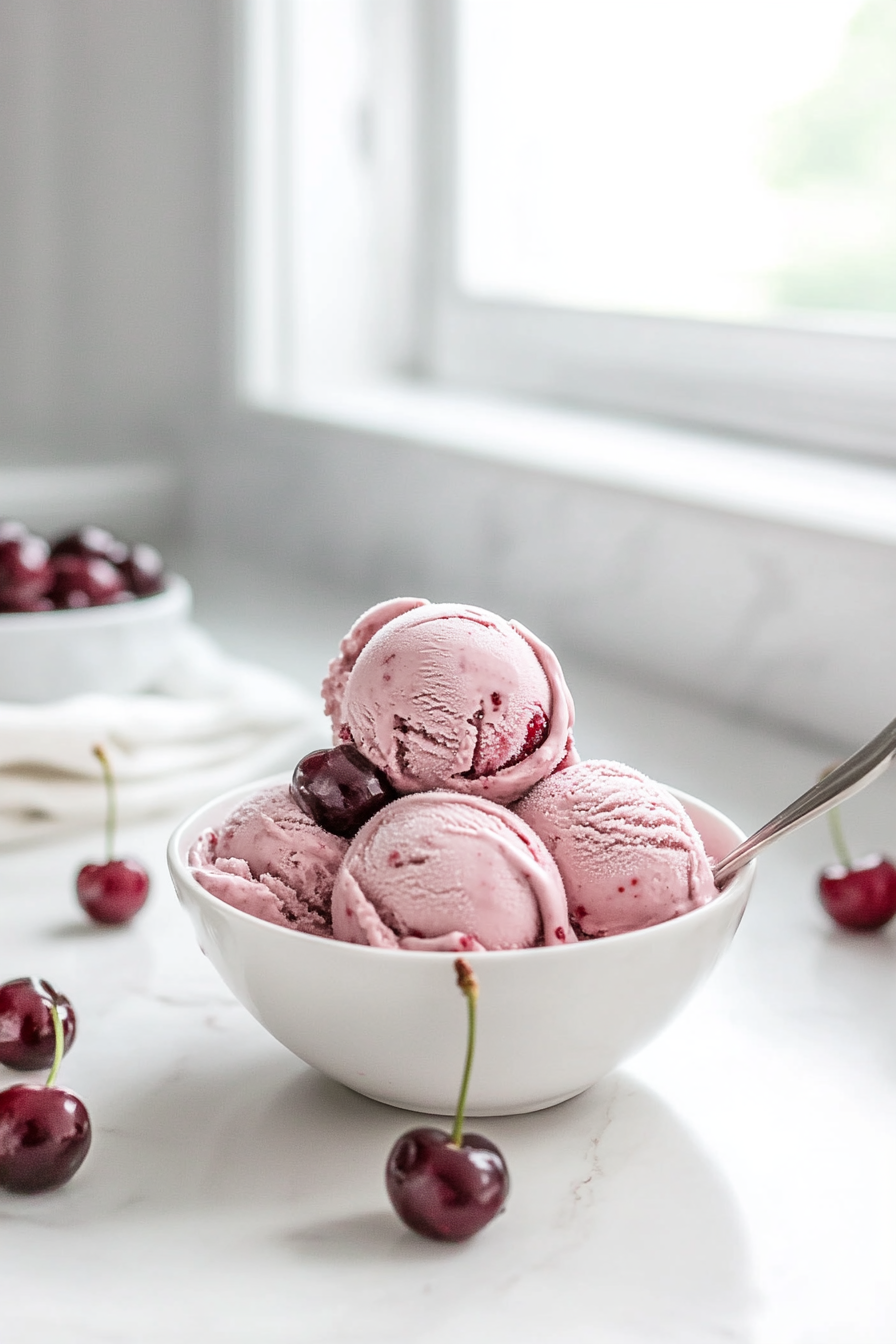
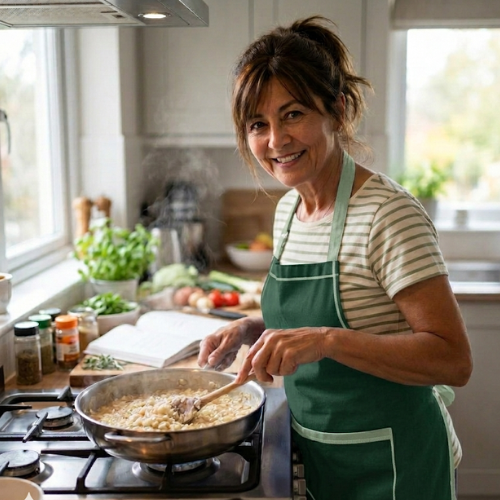
This homemade Cherry Garcia is my go-to when I want a dessert that feels unhurried and indulgent.
Unlike store-bought versions, this recipe focuses on a smooth, custard-style texture that balances the boldness of the fruit with a velvety finish.
What Makes This Cherry Garcia Ice Cream So Amazing?

-
Heavy Cream (2 cups) — Creates the ultra-rich, smooth base that makes the ice cream creamy and scoopable.
-
Whole Milk (1 cup) — Adds softness and helps balance the richness of the cream for a perfect 2:1 ratio.
-
Sugar (3/4 cup) — Sweetens the base perfectly while ensuring the ice cream freezes to a firm, scoopable consistency.
-
Egg Yolks (2 large) — Replaces whole eggs to provide a professional, velvety custard texture without any “eggy” flavor.
-
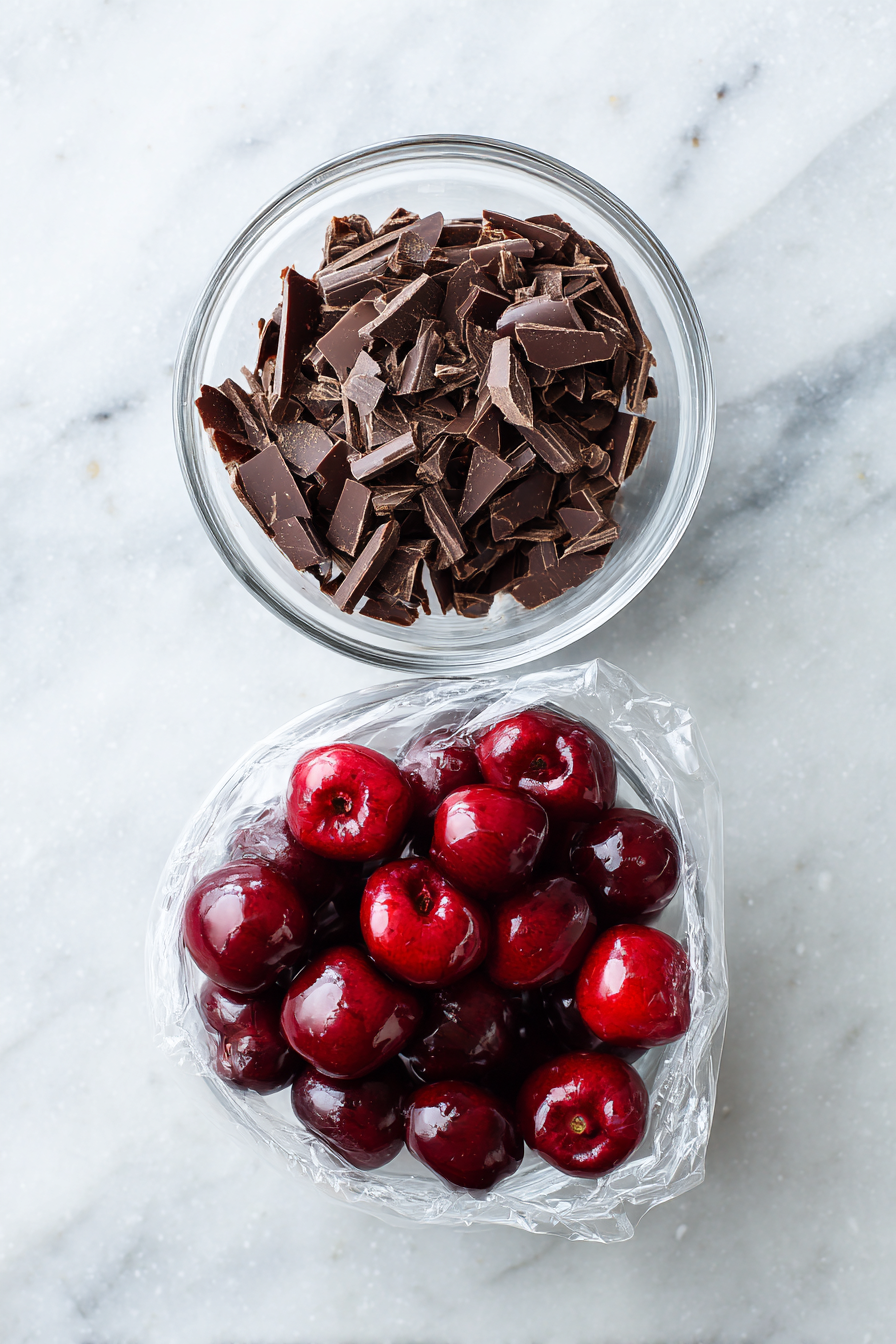
Fresh Bing Cherries (1 cup, halved) — Brings bright, juicy bursts of sweetness; toss in a teaspoon of lemon juice to enhance their natural tartness.
-
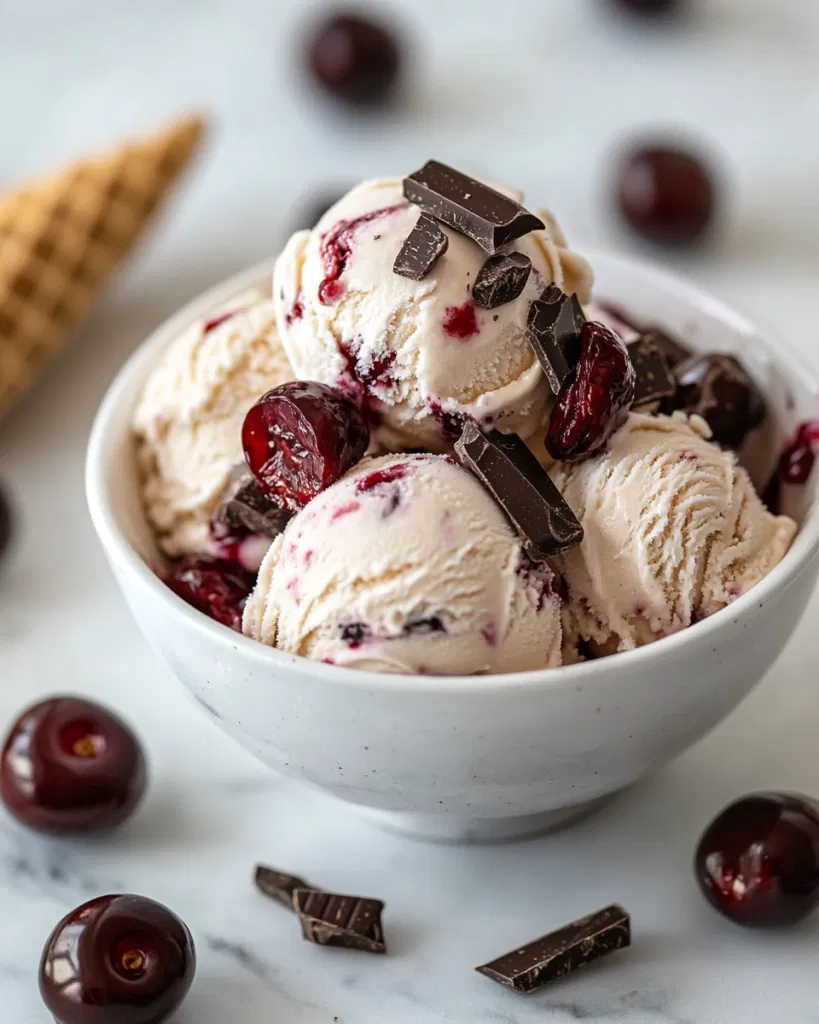
Shaved Dark Chocolate (1/2 cup) — Use a shaved bar instead of chunks for a signature “melt-in-your-mouth” texture that isn’t waxy when frozen.
-
Salt (pinch) — Balances the sweetness and rounds out the flavor of the dark chocolate.
Cherry Garcia Ice Cream Recipe
Equipment
- Ice Cream Maker A 1.5-quart or 2-quart electric churn is required for this specific recipe to achieve a smooth, aerated texture.
- Insulated Freezer Bowl: If using a canister-style machine, ensure the bowl is frozen for at least 24 hours before starting.
- Medium Heavy-Bottomed Saucepan: Essential for tempering the egg yolks and heating the dairy without scorching the bottom.
- Fine-mesh strainer Used to strain the custard base after cooking. This removes any accidental bits of cooked egg, ensuring an ultra-smooth finish.
- Instant-Read Thermometer Crucial for food safety and consistency; the custard must reach 170°F (77°C) to thicken properly without curdling.
- Large Mixing Bowl & Whisk: For "tempering" (slowly combining) the hot milk into the cold egg yolks.
- Shallow Airtight Container: A pre-chilled loaf pan or insulated ice cream tub helps the finished product freeze faster, which prevents large ice crystals from forming.
- Vegetable Peeler or Sharp Knife: Used to shave the dark chocolate bar into thin flakes that melt easily in the mouth.
Ingredients
- 1/2 cup Shaved Dark Chocolate: Hershey’s Special Dark. Shave thin with a knife or vegetable peeler so the chocolate melts easily on the tongue.
- 1/2 cup Fresh Bing Cherries: Halved and pitted. If using canned, drain and pat dry thoroughly to prevent ice crystals.
- 2 Large Egg Yolks: Provides a rich creamy texture without the “eggy” flavor or foaminess of whole eggs.
- 3/4 cup Granulated White Sugar: The perfect amount to sweeten without preventing the ice cream from freezing properly.
- 2 cups Heavy Cream: Essential for a premium velvety mouthfeel.
- 1 cup Whole Milk: Balances the richness for a smooth finish.
- 1 tsp Fresh Lemon Juice: Toss with the cherries before adding to brighten the fruit flavor.
- 1 pinch Fine Salt: To balance the sweetness and enhance the dark chocolate notes.
Instructions
- Place the shaved dark chocolate and halved cherries in separate bowls and refrigerate. Keeping these cold is essential so they don't melt the ice cream base when added later.
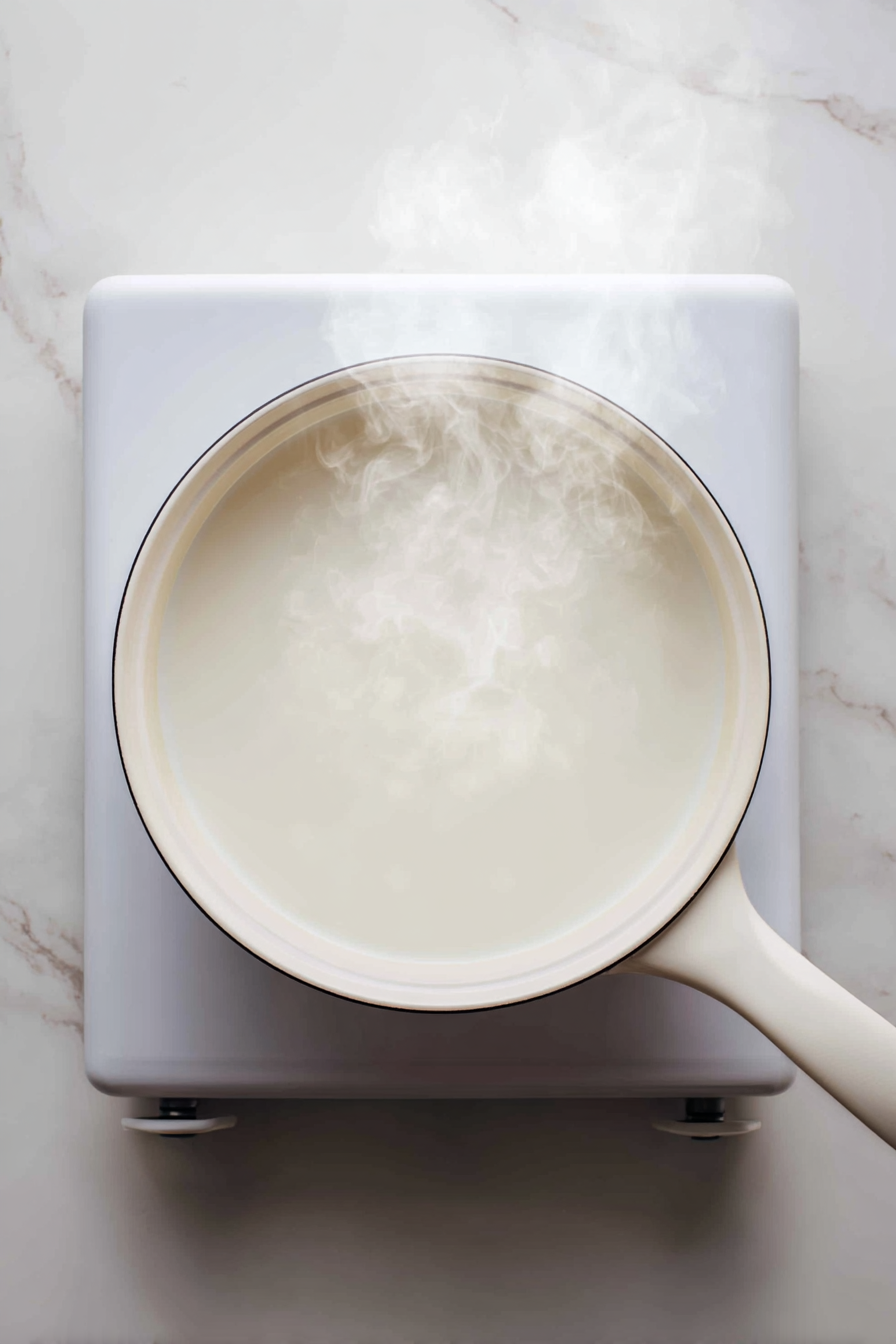
- In a medium heavy-bottomed saucepan, combine the heavy cream and whole milk. Heat over medium-low, stirring occasionally, until the mixture reaches a gentle simmer (around 160°F). Do not let it reach a rolling boil.
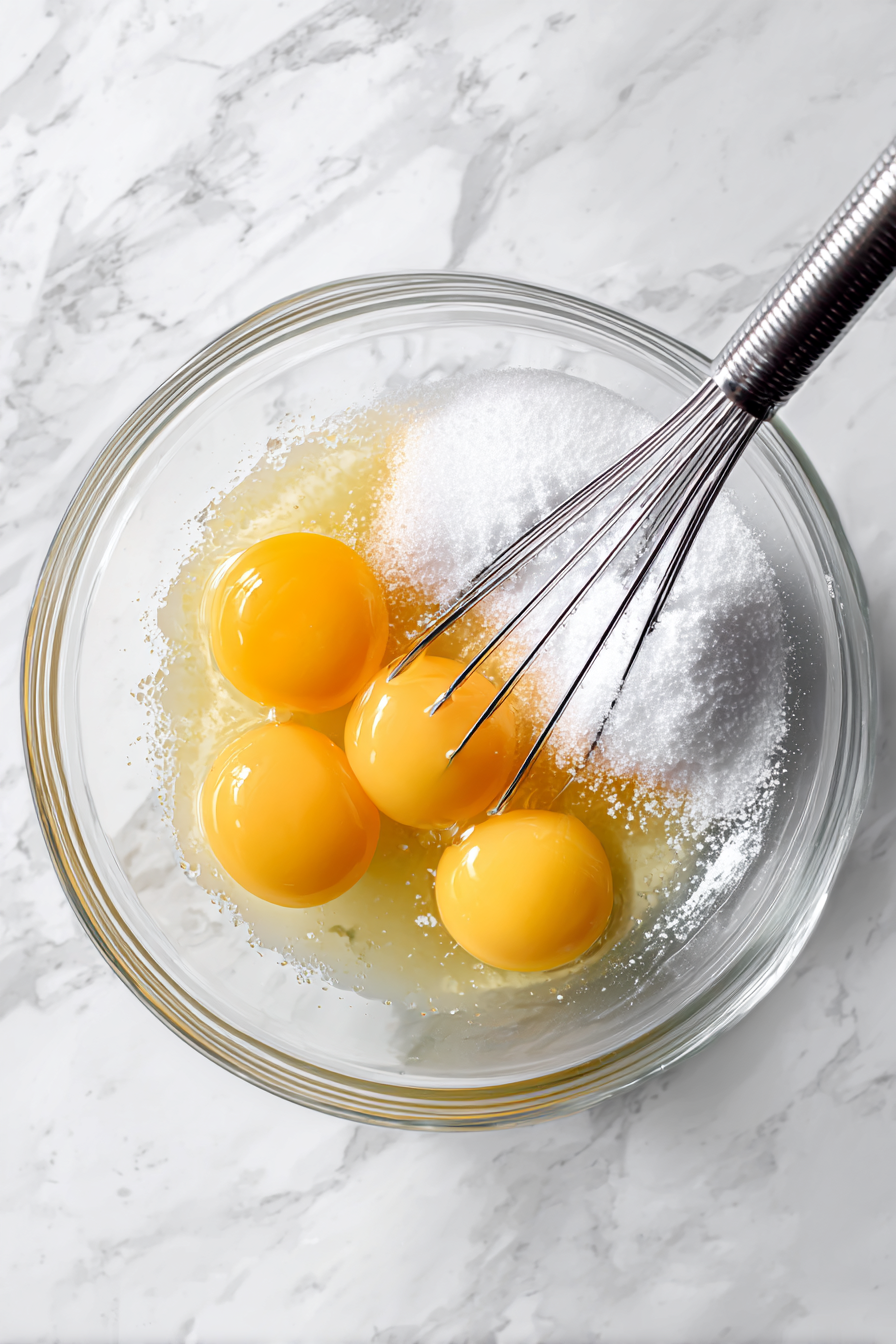
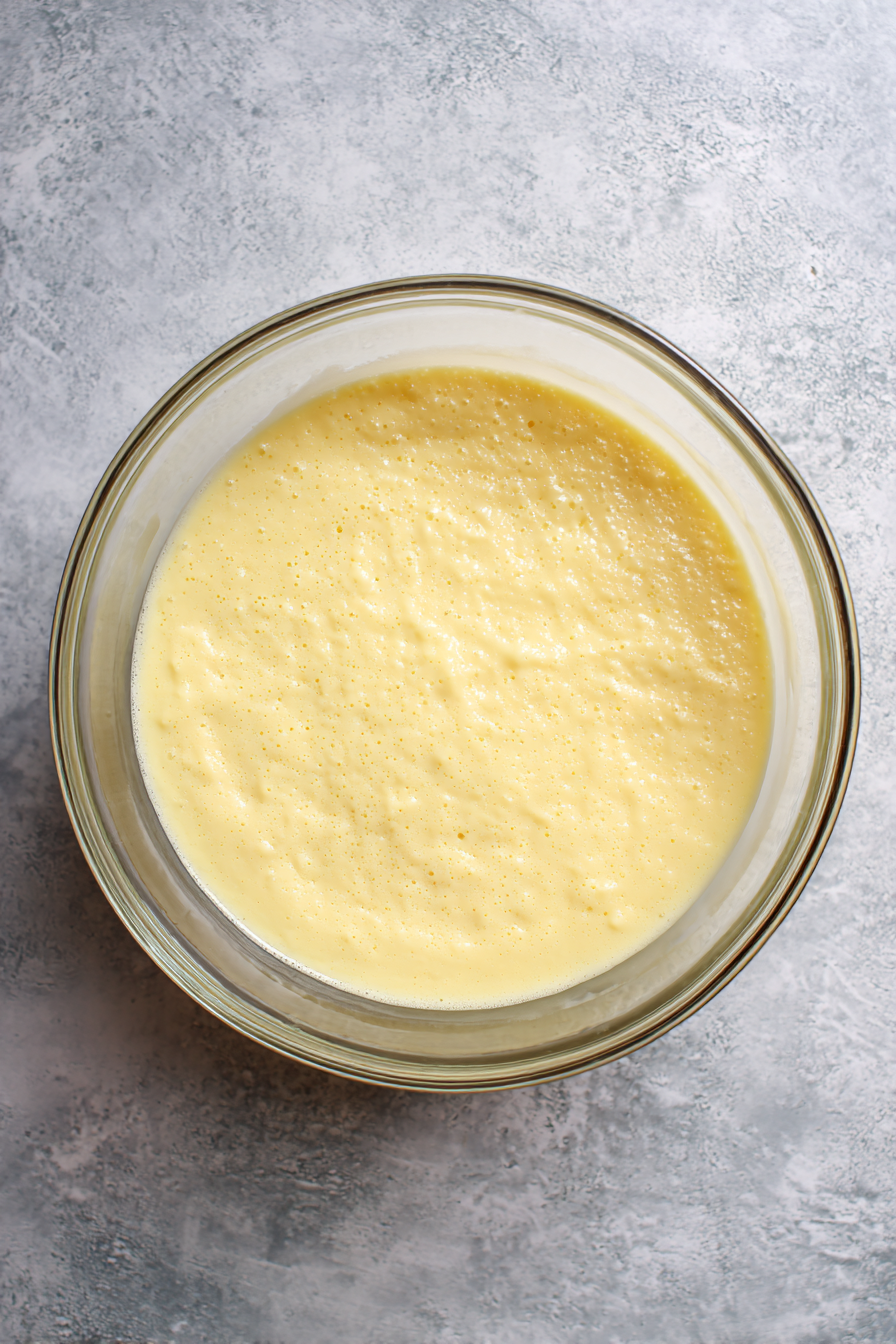
- While the dairy heats, whisk the egg yolks and sugar in a medium bowl for about 2 minutes until the mixture is thick, pale yellow, and smooth.
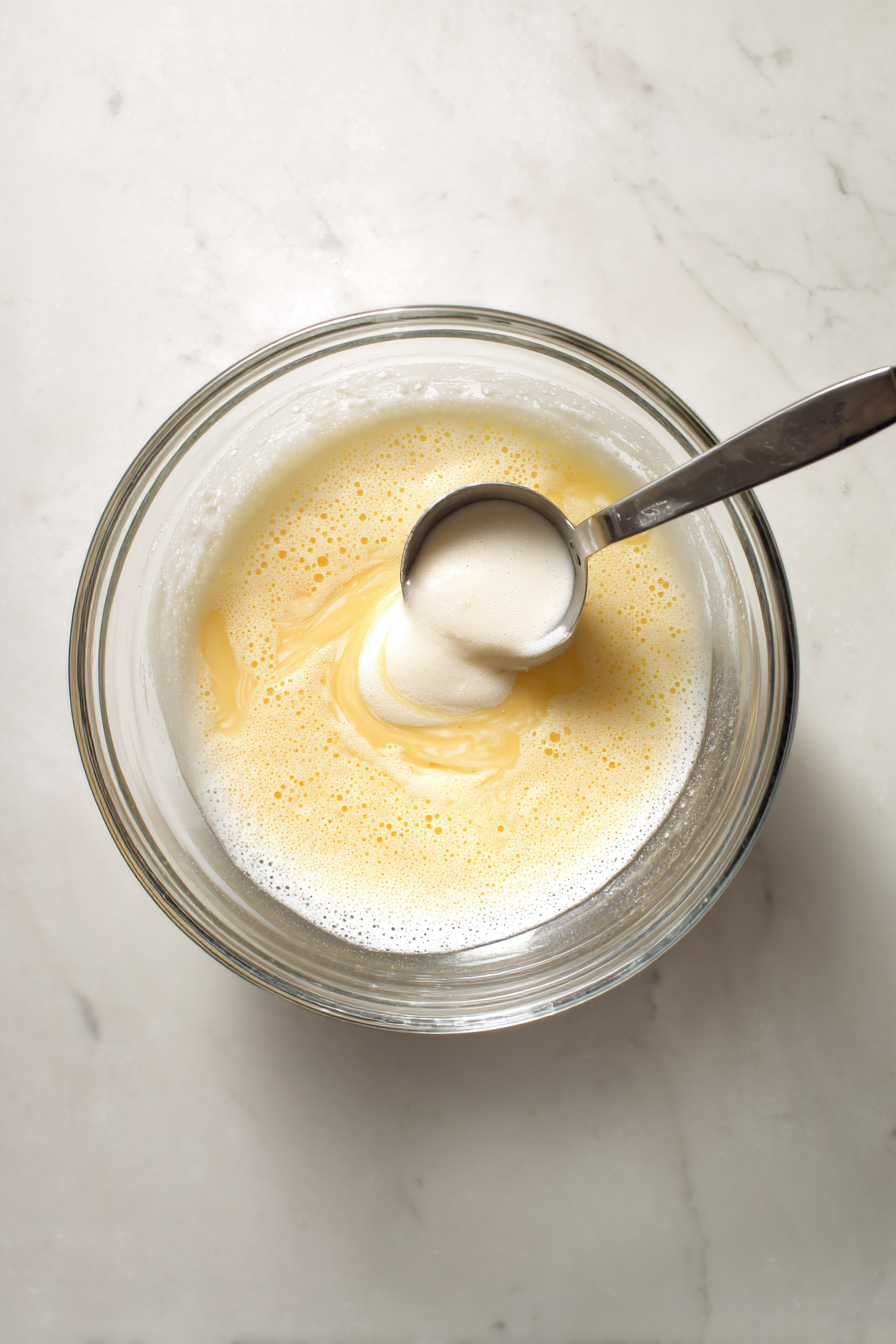
- To prevent scrambling, slowly drizzle one ladle (about 1/2 cup) of the hot cream mixture into the egg yolks while whisking constantly. Repeat with one more ladle to gradually raise the temperature of the yolks.
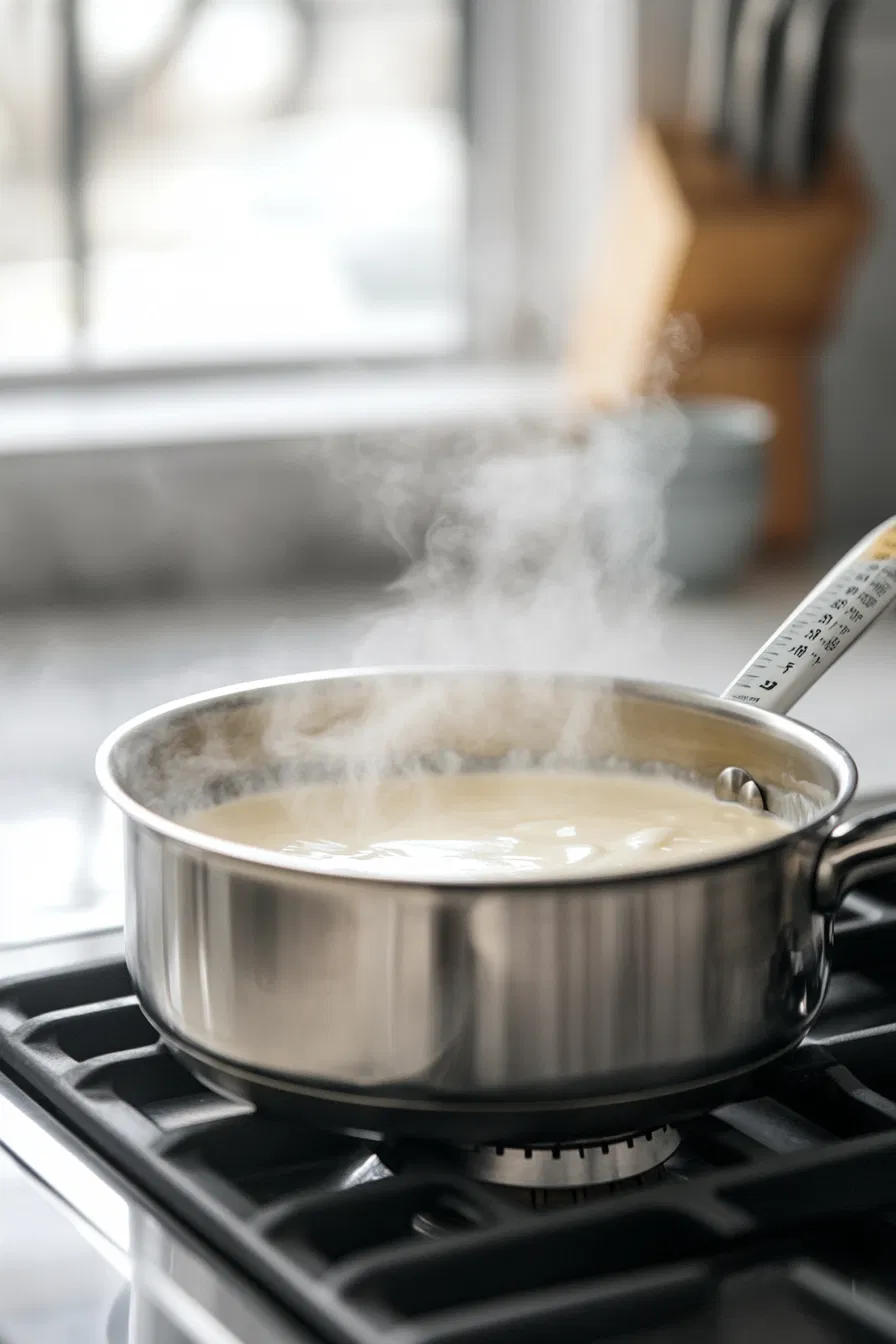
- Pour the tempered egg mixture back into the saucepan with the remaining cream. Cook over medium-low heat, stirring constantly with a heat-resistant spatula, until the custard thickens and reaches 170°F–175°F. It should be thick enough to coat the back of a spoon.
- Immediately pour the custard through a fine-mesh strainer into a clean bowl to remove any potential bits of cooked egg. Cover the surface directly with plastic wrap to prevent a "skin" from forming and refrigerate until the base reaches 40°F (at least 6 hours or overnight).
- In the final 2 minutes of the churning cycle, add the chilled shaved chocolate and cherries. This ensures the inclusions are evenly suspended without sinking or stalling the machine.
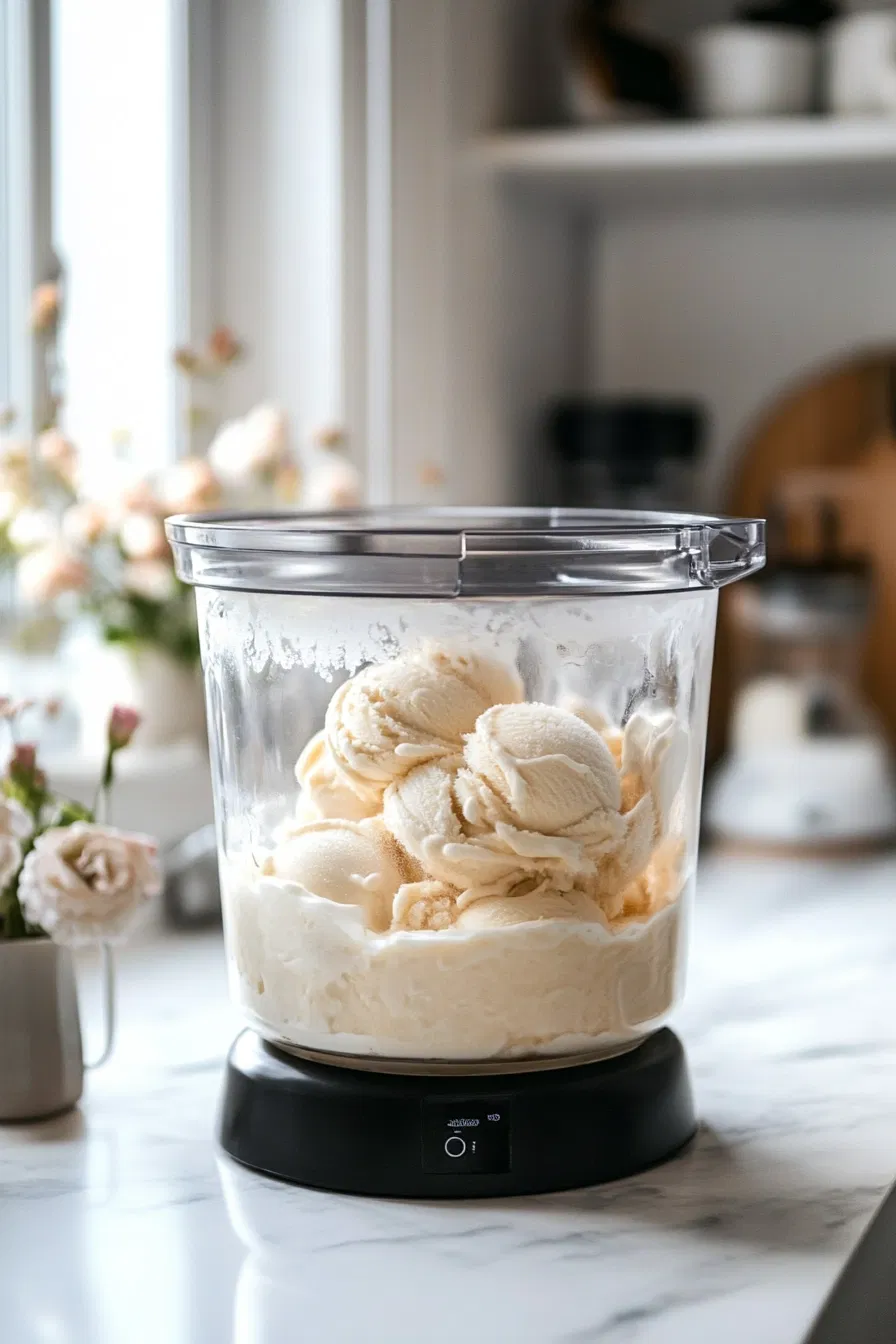
- Transfer the soft-serve consistency ice cream into a pre-chilled, airtight container. Press parchment paper against the surface to prevent ice crystals and freeze for 4–6 hours until firm and scoopable.
Nutrition
Fun Fact: When Jerry Garcia first tasted his namesake ice cream, he famously said, ‘As long as they don’t name a motor oil after me, it’s fine with me.’ High praise from the legend himself!
How This Recipe Fits Into My Day?
On slow days, preparing ice cream feels peaceful. Mixing the base and folding in the cherries becomes a small ritual.
On busy days, it becomes a treat waiting in the freezer something cool and soothing to come back to.
It asks nothing from me yet gives so much comfort.
When I want something refreshing but cozy, this recipe always meets me halfway. It’s bright from the fruit, rich from the chocolate, and smooth all the way through.
And on days when I want to share something joyful, this is a flavor everyone seems to love. It never disappoints.
Tips I Will Recommend You To Follow!
- Metal Magic: For a faster freeze, use a metal container. Metal conducts cold better than plastic or glass, helping your ice cream firm up more quickly. It’s especially handy when you’re craving Cherry Garcia ASAP!
- Freezer Placement: Store your ice cream in the back of the freezer, away from the door. The back is colder and more stable than the door, which fluctuates in temperature. For homemade ice cream, this placement is key to achieving a quicker and more even freeze.
- Serving Size Insight: This recipe yields about 1/2 gallon of ice cream, translating to roughly 4 pints or 12 generous scoops. Ideal for sharing or indulging!
- Storage Tips: To maintain quality, keep your ice cream in an airtight container. Glass containers are excellent for this purpose and help prevent freezer burn. This recipe fits perfectly into two standard glass containers.
- Gluten-Free Assurance: This Cherry Garcia ice cream is naturally gluten-free, but always double-check that your chocolate is gluten-free. Many chocolates are, but labels provide the final word.
- No Substitutions: Stick to heavy cream and sweetened condensed milk as specified. Substituting ingredients can affect both taste and texture, so keep the recipe as is for the best results.
- Scooping Secrets: Use a wet ice cream scoop for smoother serving. Wetting the scoop slightly before use ensures the ice cream releases effortlessly, avoiding the frustration of it sticking or breaking apart. This tip comes from my time at a frozen custard shop and makes a noticeable difference.
Mouthwatering Treats To Enjoy With Cherry Garcia Ice Cream!

Frequently Asked Questions
- Why is my ice cream icy instead of creamy?
This happens if the base isn’t cold enough before churning. Ensure your custard is chilled to 40°F (overnight is best) to prevent large ice crystals from forming. - Why is the chocolate hard and waxy?
Standard chocolate chips are too thick for freezing. Using shaved chocolate or flakes ensures the bits melt instantly on your tongue instead of feeling like pebbles. - Can I use frozen cherries?
Yes, but they must be thawed and patted dry. Excess moisture from the fruit will turn into hard ice chunks in your finished scoop. - Why do I have to temper the eggs?
Tempering prevents the eggs from scrambling. Slowly whisking hot cream into the yolks ensures a smooth, safe custard rather than a lumpy texture. - How do I prevent freezer burn?
Press parchment paper directly onto the surface of the ice cream before sealing the lid. This blocks air contact, which is the primary cause of icy surface buildup. - How long will this stay fresh?
Without commercial stabilizers, homemade ice cream is best eaten within 2 weeks. Store it in the back of the freezer, not the door, to maintain a consistent temperature.
hi there,
i’m Anne
A food blogger with a passion for creating vibrant, approachable recipes.