Peanut Butter Cups Recipe
There’s something about making peanut butter cups that feels like reclaiming a childhood treat, but with a grown-up spin. I love the way the chocolate melts just enough to coat your fingertips, and the salty peanut butter contrast that makes you pause mid-bork. It’s a messy, honest process—stirring, melting, pouring, tasting—and I wouldn’t have it any other way.
This recipe isn’t about perfect uniformity or glossy finishes. It’s about the little imperfections that make each batch feel personal, almost like a secret handshake. When I make these, I’m reminded how simple ingredients—chocolate, peanut butter, a pinch of salt—can turn into something that sparks joy, chaos, and a little nostalgia.
Making peanut butter cups with a focus on homemade, small-batch, artisanal techniques, emphasizing the sensory experience and personal touch.
Why I Keep Coming Back to This Recipe
- I love how the smell of melting chocolate fills the kitchen.
- Making these is my go-to when I need a quick, satisfying treat.
- Nothing beats the feeling of popping a homemade cup out of the mold.
My Personal Journey with Peanut Butter Cups
I started making these because I wanted control over the ingredients and a more intense peanut flavor. The process of melting, pouring, and chilling feels almost meditative, a small act of self-care. Seeing the shiny chocolate and perfectly centered peanut butter makes me proud, even if they’re not perfect.
A Brief History of Peanut Butter Cups
- Peanut butter cups were invented in the 1920s by the Hershey Company.
- The original recipes used lard in the chocolate to improve texture.
- Peanut butter cups became a staple in American candy aisles during the post-war era.
Ingredient Breakdown & Tips

- Chocolate: I prefer dark for its richness, but milk makes it sweeter. Both melt smoothly, just watch the temp.
- Peanut Butter: Creamy natural peanut butter gives the best flavor, but chunky adds a little crunch if you like.
- Salt: A pinch of sea salt heightens the peanut flavor and adds contrast. Don’t skip it.
- Sweetener: I sometimes stir in a little honey or maple syrup for extra depth.
- Vanilla: A splash can add warmth and complexity, but plain is fine too.
Spotlight on Chocolate and Peanut Butter
Chocolate:
- It melts into a glossy, smooth coating that crackles when you bite. Watch the temp to avoid seizing.
- Peanut Butter: It’s the core flavor—rich, salty, and oozy when warm. Stir well to keep it smooth.
Chocolate:
- Its behavior changes when melted—becomes fluid and shiny, but can bloom if overheated.
- The temperature is crucial—too hot, and it dulls; too cool, it won’t coat smoothly.
Ingredient Substitutions for Variations
- Dairy-Free: Use coconut oil-based chocolates for a creamy, dairy-free finish.
- Sugar-Free: Look for sugar-free dark chocolates, but note they may have a different melt and snap.
- Natural Peanut Butter: No added sugar or oils—just pure peanuts, for a more intense flavor.
- Salted Butter: Swap for coconut oil in the chocolate for dairy-free setting.
- Honey or Maple Syrup: Use as a sweetener in peanut butter if you like a hint of floral sweetness.
Equipment & Tools
- Silicone molds: Easy release and shaping.
- Double boiler or microwave: Gentle melting of chocolate.
- Small spoon or piping bag: Neat filling.
- Spatula: Stirring and smoothing.
- Cooling rack or tray: Even cooling.
Step-by-Step Guide to Perfect Homemade Peanut Butter Cups
- Gather all your ingredients and tools. You’ll need chocolate, peanut butter, a mold, and some patience.
- Melt the chocolate gently over a double boiler or in short bursts in the microwave, stirring often. Aim for about 45°C (113°F).
- Pour a spoonful of melted chocolate into each mold cavity, then swirl to coat the sides. Chill for 5 minutes.
- Add a dollop of peanut butter in the center of each mold. Don’t overfill; leave room for chocolate.
- Cover the peanut butter with more melted chocolate, ensuring it’s fully sealed. Tap the mold gently to remove air bubbles.
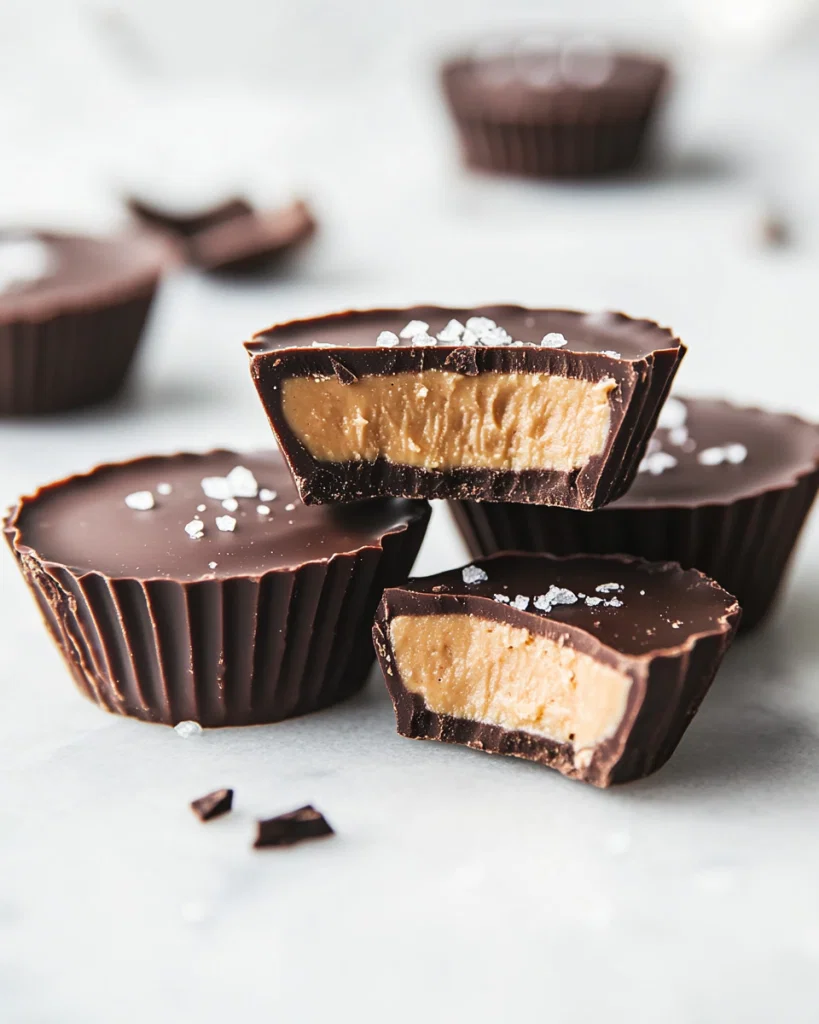
- Refrigerate the molds for at least 1 hour or until the chocolate is firm and shiny.
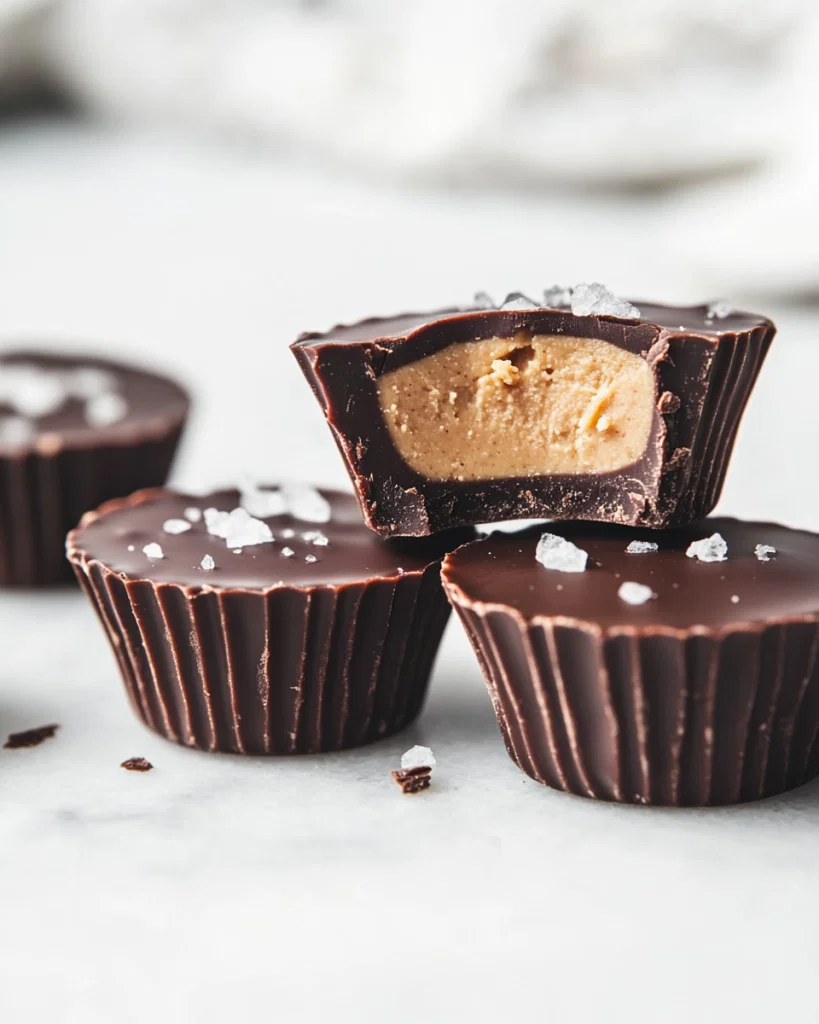
- Once set, pop the cups out of the mold carefully. Let sit at room temp for 10 minutes before serving to soften slightly.
- Sprinkle with sea salt or crushed peanuts if desired before the final chill.
- Store in an airtight container in the fridge for up to a week. Bring to room temp before eating for best texture.
Allow the peanut butter cups to rest at room temperature for about 10 minutes before eating. Store in an airtight container, layered with parchment paper, in the fridge for freshness.
How to Know It's Done
- Chocolate is smooth and shiny before pouring.
- Peanut butter stays centered without overflowing.
- Chocolate is fully set and crackly when cooled.
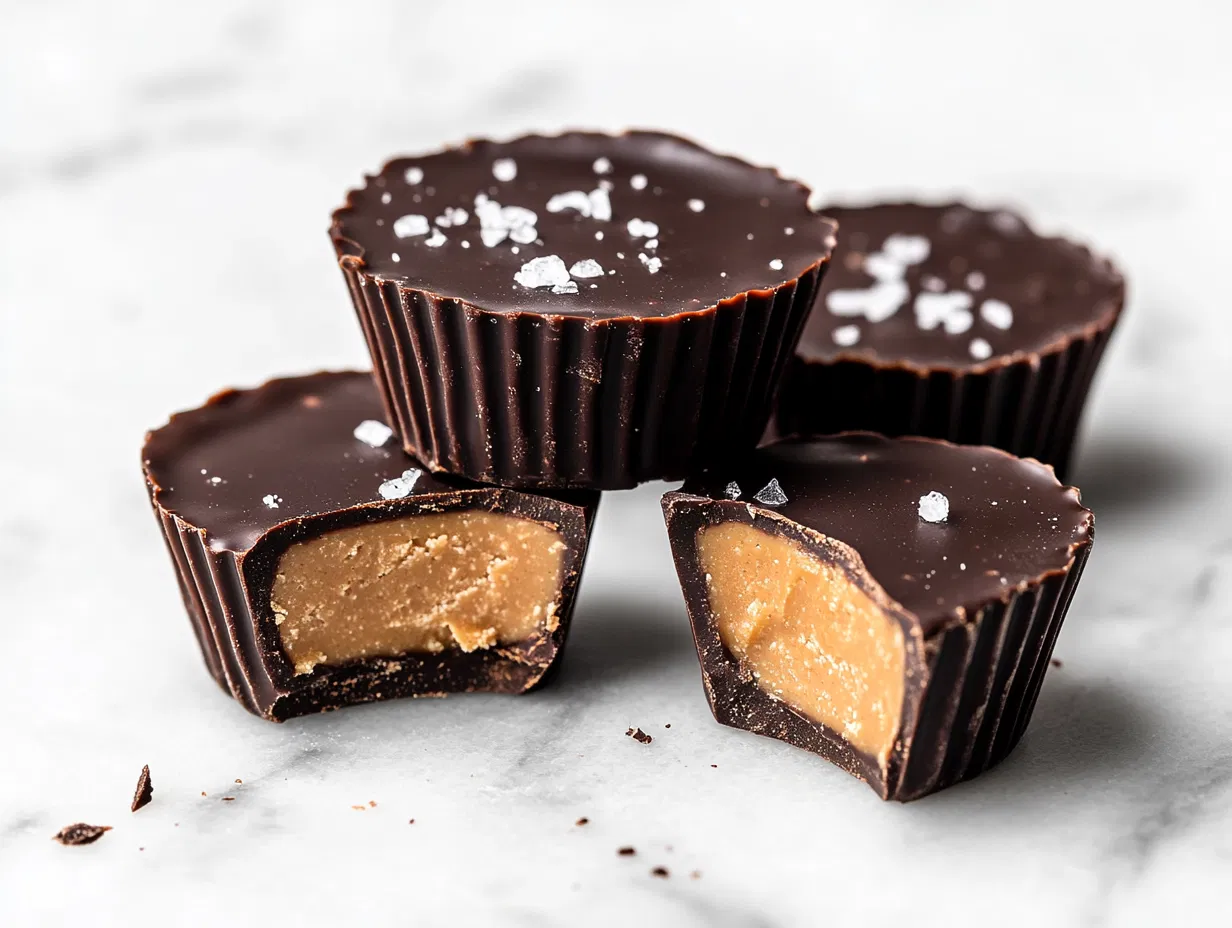
Homemade Peanut Butter Cups
Equipment
- Silicone Molds
- Double boiler or microwave
- Small spoon or piping bag
- Spatula
- Cooling rack or tray
Ingredients
- 1 cup ounce dark chocolate or chocolate chips preferably high quality
- ½ cup cup natural peanut butter creamy or chunky based on preference
- ¼ teaspoon teaspoon sea salt for sprinkling on top
- 1 teaspoon vanilla extract vanilla extract optional, for added warmth
Instructions
- Gently melt the chocolate in a double boiler or microwave, stirring often until smooth and glossy, around 45°C (113°F).
- Spoon a small amount of melted chocolate into each cavity of your silicone mold, swirling to coat the sides evenly. Chill for about 5 minutes to set slightly.
- Remove the mold from the fridge and add a dollop of peanut butter in the center of each cavity, leaving a little room at the top.
- Cover the peanut butter with more melted chocolate, ensuring it’s fully sealed and no peanut butter is exposed. Gently tap the mold on the counter to remove air bubbles.
- Sprinkle a tiny pinch of sea salt on top of each cup for added flavor contrast.
- Refrigerate the mold for at least 1 hour or until the chocolate is fully set and shiny.
- Gently pop the peanut butter cups out of the mold and let sit at room temperature for 10 minutes before serving for the best texture.
- Enjoy your homemade peanut butter cups, or store them in an airtight container in the fridge for up to a week.
Notes
Nutrition
Cooking Tips & Tricks for Great Peanut Butter Cups
- Melting chocolate → Use short bursts in the microwave or double boiler to avoid scorching.
- Filling consistency → Slightly warm peanut butter makes it easier to pipe or spoon.
- Sealing cups → Cover with a layer of chocolate quickly to prevent air gaps.
- Chilling time → Don’t rush; give at least an hour for the chocolate to fully set.
- Salt topping → A tiny pinch enhances flavor and adds texture.
Common Mistakes and How to Fix Them
- FORGOT TO temper the chocolate? Simply re-melt with a few drops of vegetable oil to restore gloss.
- DUMPED too much peanut butter? Use a spoon to remove excess or add more chocolate to cover.
- OVER-TORCHED the chocolate? Add a teaspoon of vegetable oil to bring back shine.
- SCOURED the chocolate? Strain it through a fine sieve and start over with fresh chocolate.
Quick Fixes for Common Issues
- When chocolate seizes, add a teaspoon of vegetable oil and stir until smooth.
- When peanut butter is too thick, warm it slightly to loosen.
- Splash a little hot water on the mold before filling to help release the cups.
- Patch air bubbles by tapping the mold gently on the counter.
- Shield melting chocolate from drafts to prevent blooming and dull finishes.
What to Serve With Peanut Butter Cups
Make-Ahead Tips and Storage
- You can prepare the filling and melt the chocolate a day ahead. Keep separate in airtight containers.
- Store the assembled cups in the fridge for up to a week. They taste best at room temperature.
- Reheat gently in a warm (not hot) oven or microwave if needed to soften slightly.
- For longer storage, freeze the cups wrapped in parchment, up to 3 months. Thaw at room temp.
10 Practical Q&As About Making Peanut Butter Cups at Home
1. Can I use crunchy peanut butter?
Use good quality, creamy peanut butter for a smooth, rich filling that melts in your mouth.
2. How long does it take to set?
Chill the filled molds in the fridge for at least 1 hour to set the chocolate properly.
3. Should I temper the chocolate?
Opt for dark or milk chocolate—whatever you prefer. Temper it for a shiny, crackly finish.
4. How long do they last?
Refrigerate the finished cups in an airtight container for up to a week, or freeze for longer.
5. How do I fill the cups without making a mess?
Use a small spoon or piping bag to fill the chocolate cups neatly.
6. What’s the perfect melting temp?
Avoid overheating the chocolate; keep it below 45°C (113°F) to prevent seizing.
7. Can I add toppings?
Add a pinch of sea salt on top for a flavor boost and a hint of crunch.
8. What kind of mold works best?
Use silicone molds for easy release and clean-up.
9. Should I refrigerate immediately?
Let the chocolate set at room temperature if it’s not humid; otherwise, fridge is fine.
10. Can I make these vegan?
For a vegan version, substitute dairy-free chocolate and natural peanut butter.
Once cooled, these peanut butter cups are best enjoyed at room temperature—just a little softer, more inviting. They keep well in the fridge for a week, but honestly, they rarely last that long around here. Making them is a quiet act of love, a reminder of how small moments—like spooning warm chocolate—can turn into something sweet and memorable.
In the end, it’s these tiny kitchen rituals that bring comfort. No fancy tools required, just a little patience and a taste for the imperfectly perfect. Every bite is a little piece of homemade happiness, a small rebellion against store-bought sameness.

hi there,
i'm Austin
A photographer who loves to cook. During the day, I take pictures, but at night, I dive into the world of flavors and recipes.
know more