Air Fryer Roasted Green Beans Recipe
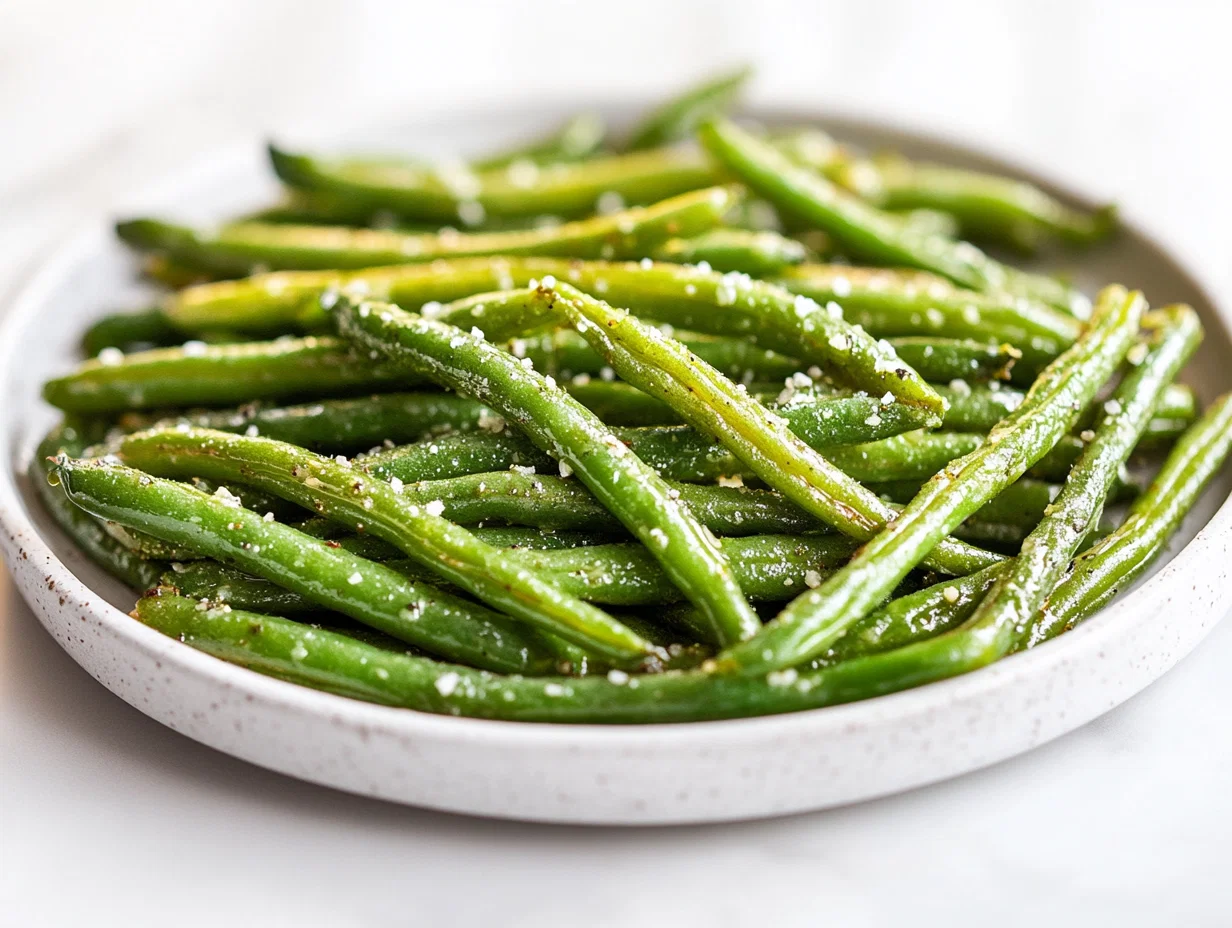
When I first got my air fryer, I wasn’t sure what to do with it besides fries and chicken wings. But then I discovered roasted green beans — simple, fast, and surprisingly addictive. It’s like getting that perfect roast without heating up the oven or turning on the stove.
There’s a certain charm in how the air fryer transforms fresh, everyday green beans into something crispy and slightly smoky. It feels like a little miracle — a healthy snack that’s ready in minutes, with almost no fuss and a lot of sensory satisfaction.
The Unusual Angle of Using the Air Fryer for a Quick, Crispy Green Bean Snack
Why I Keep Coming Back to This Simple Snack
- I love how quickly I can get crispy green beans without heating up the oven.
- There’s a satisfaction in transforming fresh beans into a snack in under 15 minutes.
- It’s my favorite way to make a healthy, crunchy side with minimal effort.
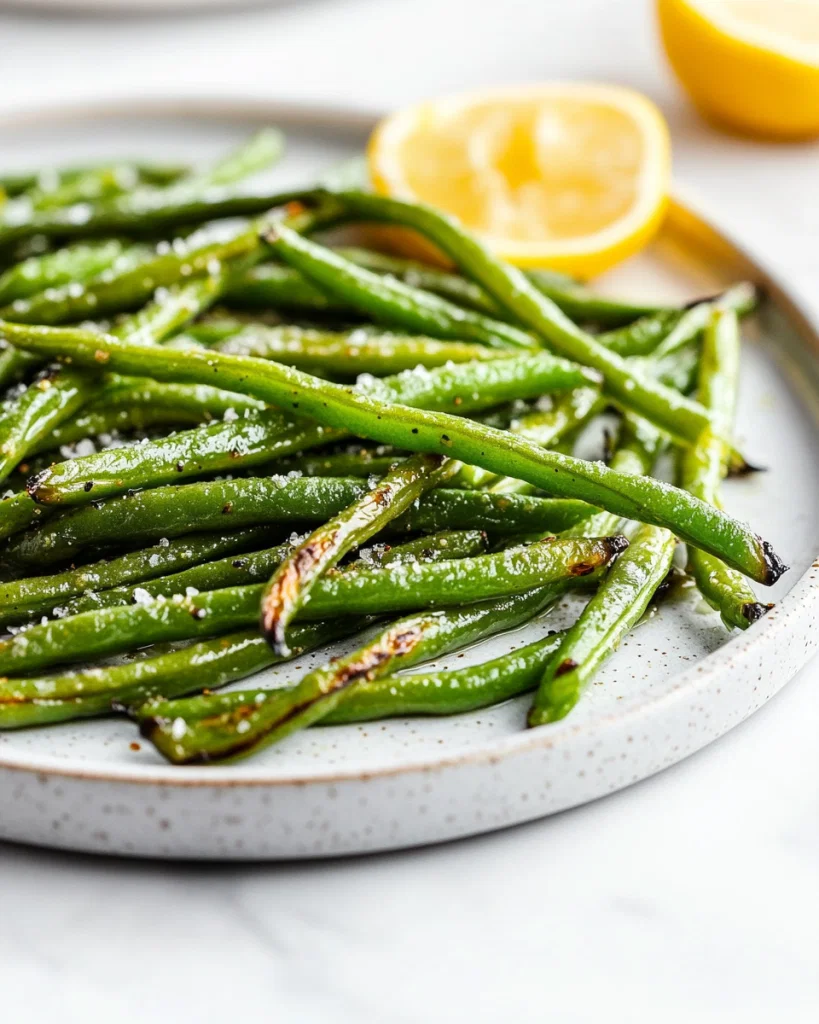
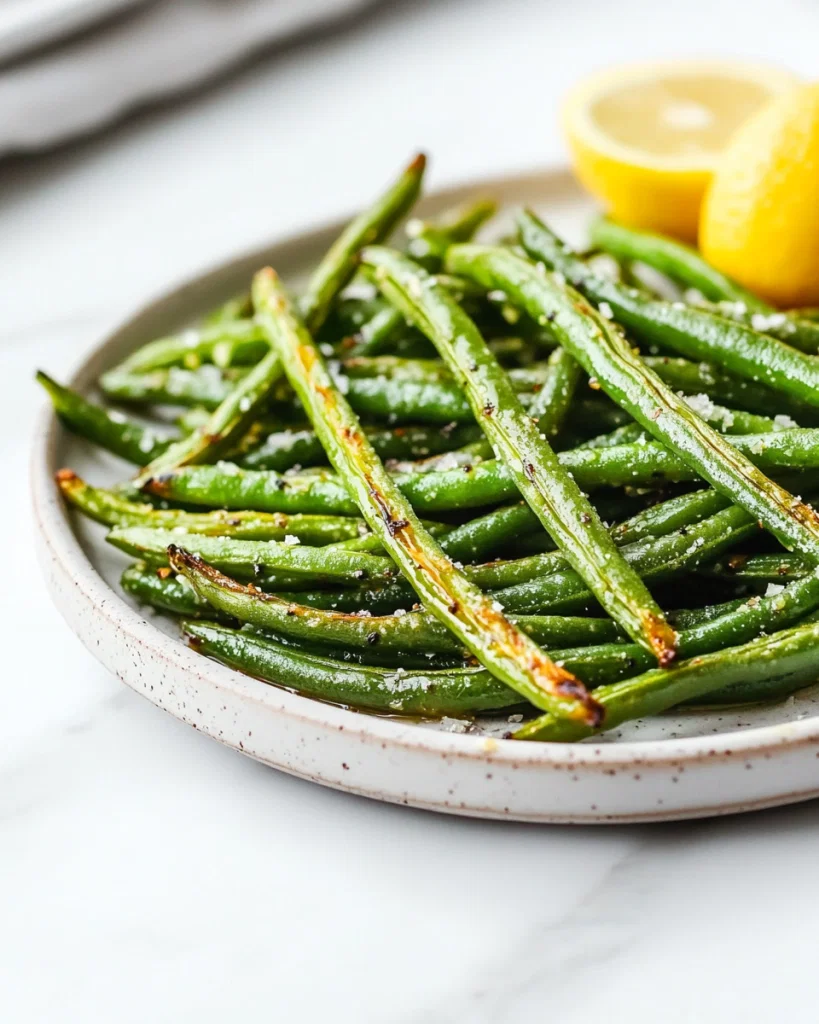
- Sometimes I sprinkle parmesan or lemon zest right before serving — instant upgrade.
- This recipe reminds me of summer dinners when green beans are at their peak.
The Inspiration Behind My Air Fryer Green Beans
I was tired of soggy, overcooked green beans from the oven. Then I remembered my air fryer’s magic touch, quick, even heat and that dry heat needed for crisping. One evening, I tossed some beans with olive oil and spices, and in minutes, they turned golden and crispy. That moment of surprise made me realize I could do this regularly. It’s become my little kitchen experiment: how to get the perfect balance between tender and crispy, without much fuss.
Origin and Trivia of Roasted Green Beans in the Air Fryer
- Green beans have been a staple in Mediterranean diets for centuries.
- Air frying as a cooking method gained popularity for its health benefits.
- Roasting green beans enhances their natural sweetness and adds smoky notes.
- In some cultures, green beans are stir-fried with garlic and chili — similar flavor profile.
- This recipe is a modern twist on traditional roasted vegetables, adapted for quick home cooking.
Ingredient Breakdown: What Makes These Green Beans Shine

- Green beans: Fresh, crisp, and bright — look for firm pods with a vibrant color. They crackle when fresh.
- Olive oil: I use a light drizzle for shine and crisp; a little goes a long way. Swap with avocado oil for higher smoke point.
- Salt & pepper: Basic but essential for flavor. Adjust to taste, especially if serving with cheese or lemon.
- Optional seasonings: Garlic powder adds aroma, chili flakes for heat, lemon zest for brightness.
- Lemon zest: Bright, fragrant, and adds a fresh zing. Use fresh zest for the most punch.
Spotlight on Green Beans and Olive Oil
Olive oil: It helps beans crisp up but can overpower if used excessively. Look for a fruity, rich flavor.:
- Green beans: Their natural sweetness intensifies with roasting, developing a smoky, nutty flavor.
- They crackle and pop slightly as they roast, giving a sensory cue that they're close to perfection.
- Choose fresh, firm pods that snap when bent, indicating good moisture content.
Lemon zest: Its bright, citrus aroma cuts through the richness, adding freshness.:
- Olive oil: It coats the beans evenly, aiding crispness and flavor. Use sparingly to prevent sogginess.
- For a more neutral flavor, switch to avocado oil which also handles high heat better.
- A good oil adds shine and helps seasonings stick.
Simple Substitutions for Different Tastes and Needs
- Oil-Free: Use a spray of water or broth for steam-roasting, but expect less crispiness.
- Garlic Powder: Swap with fresh minced garlic, but add after roasting to prevent burning.
- Salt-Free Seasoning: Use herbs or lemon juice for flavor if salt is avoided.
- Panko Breadcrumbs: Add before roasting for extra crunch, but watch for burning.
- Chili Flakes: Replace with smoked paprika for smoky heat or omit for milder flavor.
Equipment & Tools
- Air fryer: Main cooking appliance for quick roasting
- Mixing bowl: Tossing and coating beans evenly
- Tongs or a spatula: Handling hot beans safely
- Measuring spoons and cups: For oil and seasonings
- Silicone brush or spoon: Applying oil evenly
Step-by-Step Guide to Perfect Air Fryer Green Beans
- Preheat your air fryer to 200°C (400°F) for 3 minutes.
- Trim the ends off the green beans and wash thoroughly. Pat dry with a towel.
- Toss green beans with olive oil, salt, and pepper in a bowl. Use enough oil to lightly coat.
- Spread the beans in a single layer in the air fryer basket. Don’t overcrowd.
- Roast for 8–10 minutes. Shake or toss halfway through.
- Check for crispness and color. Edges should be golden and slightly charred.
- If needed, cook for an extra 1–2 minutes for more crunch.
- Remove from air fryer, sprinkle with optional seasonings like garlic powder or lemon zest.
- Let sit for 2 minutes to finish crisping. Serve immediately.
Let the beans rest for 2 minutes to set their crisp. Serve hot, straight from the fryer.
How to Know It's Done
- Edges are crispy and golden-brown.
- Green beans are tender but still hold shape.
- A nutty, roasted aroma fills the kitchen.
Air Fryer Roasted Green Beans
Equipment
- Air fryer
- Tongs or Spatula
- Silicone brush
Ingredients
- 1 pound fresh green beans trimmed and washed
- 1 tablespoon olive oil light drizzle for coating
- to taste salt adjust according to preference
- to taste black pepper freshly ground, optional
- ½ teaspoon garlic powder for extra aroma
- 1 teaspoon lemon zest lemon zest for brightness, optional
Instructions
- Preheat your air fryer to 200°C (400°F) for about 3 minutes, ensuring it's hot and ready for roasting.
- Trim the ends of the green beans and rinse them thoroughly under cold water, then pat dry with a towel until no moisture remains—this helps achieve crispiness.
- Place the green beans in a mixing bowl, then drizzle with olive oil, tossing gently with tongs or your hands to coat evenly, giving them a slight sheen.
- Sprinkle salt, pepper, garlic powder, and lemon zest over the beans, then toss again to distribute the seasonings uniformly.
- Spread the seasoned green beans in a single layer inside the air fryer basket, making sure they're not overcrowded to allow proper air circulation.
- Cook the green beans for 8–10 minutes, shaking the basket or tossing the beans halfway through to promote even crisping and prevent burning.
- Check the beans at around 8 minutes; they should be golden around the edges and crispy, with a slight char for added smoky flavor.
- If they need more crunch, cook for an additional 1–2 minutes, keeping a close eye to avoid burning.
- Use tongs or a spatula to transfer the crispy green beans to a serving dish, then sprinkle with extra seasoning or lemon zest if desired.
- Let the green beans rest for a couple of minutes to firm up their crispness, then enjoy immediately while hot and crunchy.
Notes
Nutrition
Tips & Tricks for Perfect Roasted Green Beans
- Use a light coating of oil — too much makes them greasy, too little leaves them dry.
- Shake or toss beans halfway — ensures even crisping and prevents burning.
- For extra crunch, add a sprinkle of panko or breadcrumbs before roasting.
- Keep an eye after 8 minutes — edges can go from perfect to burnt quickly.
- For smoky flavor, toss with a dash of smoked paprika after roasting.
Common Mistakes and How to Fix Them
- FORGOT TO DRY THE BEANS: Pat them thoroughly to avoid sogginess.
- DUMPED TOO MUCH OIL: Use just enough to lightly coat for crispiness, not greasiness.
- OVER-TORCHED: Reduce temperature slightly or shake more often to prevent burning.
- MISSED the shake: Toss halfway through to ensure even roasting.
Quick Fixes for Common Green Bean Roasting Issues
- When beans are soggy, pop them back in the air fryer for 2 minutes to re-crisp.
- If they’re too dry, toss with a splash of lemon juice or a drizzle of oil.
- Shield burnt edges with a quick sprinkle of fresh herbs or a squeeze of lemon.
- Splash a bit of soy sauce or hot sauce to boost flavor quickly.
- Patch over uneven cooking by removing burnt spots and tossing in fresh beans.
What to Serve With Air Fryer Roasted Green Beans
Make-Ahead Tips and Storage Advice
- Trim and wash green beans a day ahead. Keep dry and refrigerated in an airtight container.
- Store cooked beans in the fridge for up to 24 hours. Reheat in the air fryer for 3–4 minutes at 180°C (350°F).
- The flavor stays fresh, but they may lose some crispness over time.
- Reheated beans should be served immediately to regain maximum crunch.
10 Practical Q&As About Air Fryer Roasted Green Beans
1. Can I use frozen green beans?
Use fresh, vibrant green beans that snap when you bend them. Avoid limp or yellowed beans for the best crunch and flavor.
2. Do I need to preheat the air fryer?
Yes, but thaw and pat dry thoroughly. Frozen beans can release extra moisture, which might make them less crispy.
3. How long do I cook them?
Preheating helps get a quicker, more even roast. About 2–3 minutes at 200°C (400°F) should do.
4. What if they burn?
Typically, 8–10 minutes at 200°C (400°F). Shake or toss halfway to ensure even roasting.
5. Can I add other seasonings?
Keep an eye after 8 minutes. If edges turn dark or smell burnt, lower the temp slightly or shake more often.
6. How do I know they're done?
Absolutely. Garlic powder, smoked paprika, or chili flakes add nice layers. Just avoid overwhelming the green beans’ natural flavor.
7. Can I make these ahead?
They should be tender with crispy edges, and smell nutty with a hint of char. Test a bean for crunch.
8. Will they lose their crispness?
Yes, up to a day in advance. Reheat in the air fryer at 180°C (350°F) for a few minutes to crisp again.
9. Any tips for cleaning the air fryer afterward?
Yes, after a while they can soften. Reheating restores some of that initial crunch.
10. Is there a way to make them more flavorful?
Soak the basket in warm, soapy water. Use a soft brush for stubborn bits, then rinse and dry.
These roasted green beans have become my go-to snack, especially when I need something crunchy but light. They’re perfect for quick bites or a side that doesn’t demand much attention.
Plus, I love how versatile they are — sprinkle with cheese, toss with lemon zest, or just enjoy them plain. In a world where everything feels busy, this simple recipe reminds me that good, honest food can be quick and fuss-free.

hi there,
i'm Austin
A photographer who loves to cook. During the day, I take pictures, but at night, I dive into the world of flavors and recipes.
know more