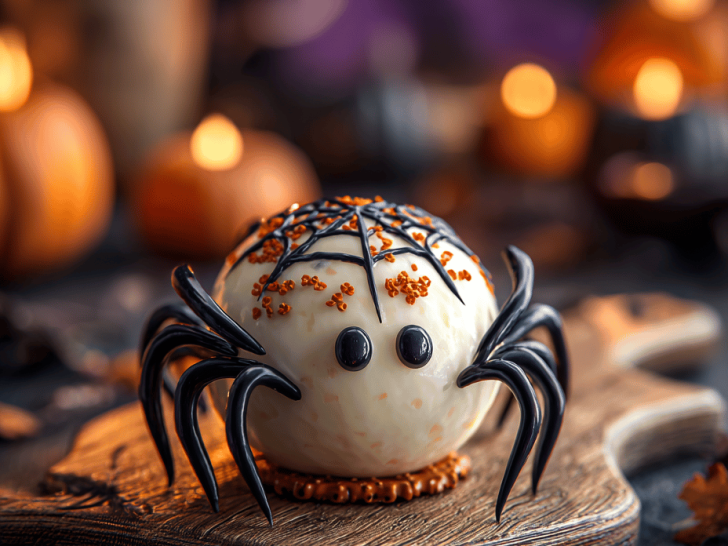
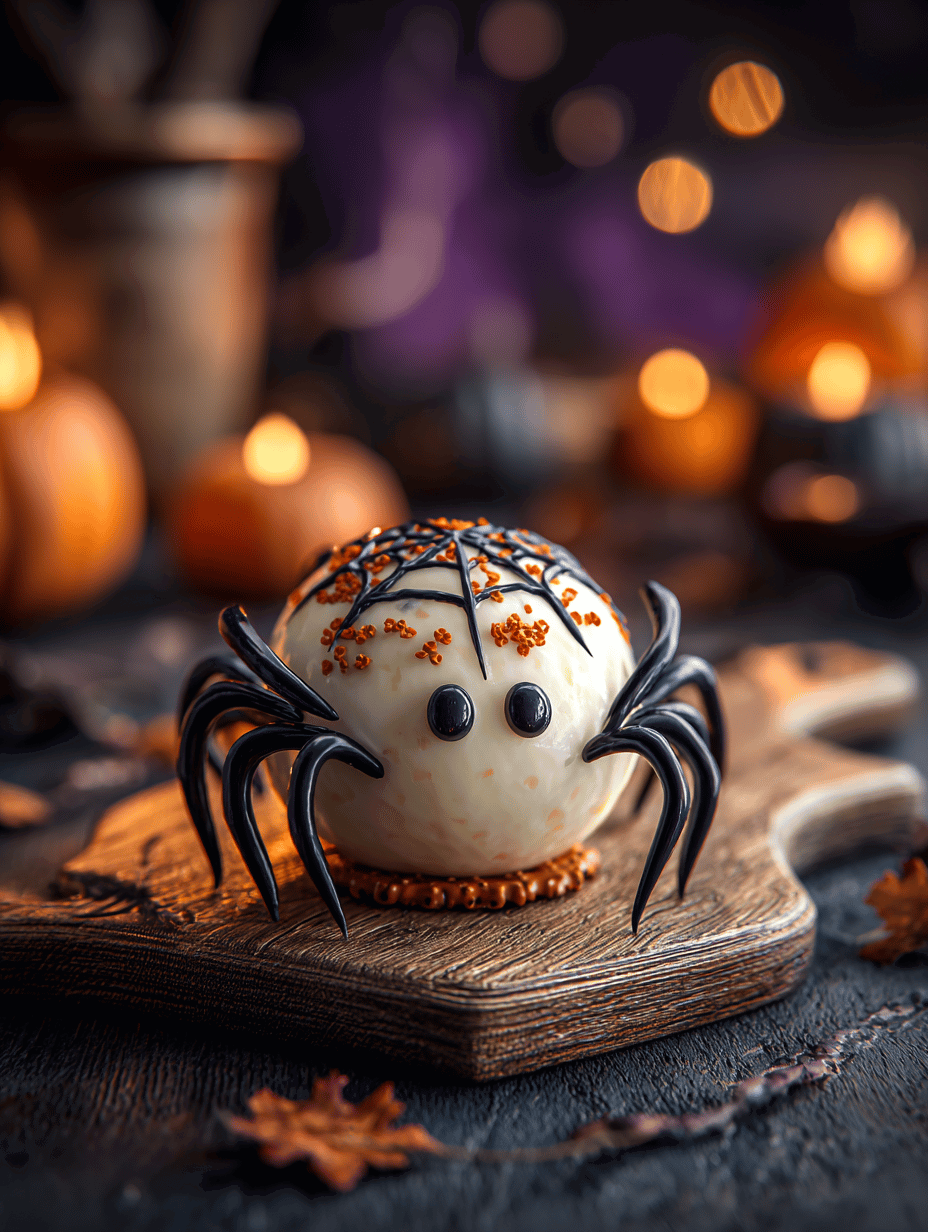
Halloween is the perfect excuse to get a little weird in the kitchen, and this spider cheese ball is no exception. I love how it combines the comfort of cheese with a touch of creepy fun, making it an instant hit at any party or family gathering. Plus, it’s surprisingly simple, even if it looks a little complicated.
Why I Keep Coming Back to This Creepy Classic
It’s quick to assemble but feels festive and fun—perfect for last-minute parties. The combo of creamy cheese and salty toppings hits just right, especially when I want a little spooky flair. Plus, it’s a hit with kids and grown-ups alike, sparking laughs and oohs every time.
Cheesy Breakdown: What Goes Into the Spider
- Cream cheese: The soft, tangy base that makes shaping easy—use full-fat for richness.
- Shredded cheddar: Adds sharpness and color—cheddar melts well and adds a smoky note.
- Garlic powder: A subtle kick of flavor—skip if you’re sensitive to garlic.
- Smoked paprika: Gives a warm, smoky hue—sub with chili powder for a different vibe.
- Olives or cherry tomatoes: For the eyes—choose based on your flavor preference and color.
- String cheese or mozzarella: Perfect for legs—oily, stretchy, and easy to shape.
Tools of the Spooky Trade
- Mixing bowl: To blend the cheese and flavorings smoothly
- Spatula or sturdy spoon: For mixing and shaping the cheese ball
- Parchment paper: To prevent sticking and make cleanup easier
- Sharp knife or toothpicks: For attaching eyes and legs
Step-by-Step to Make Your Creepy Creeper
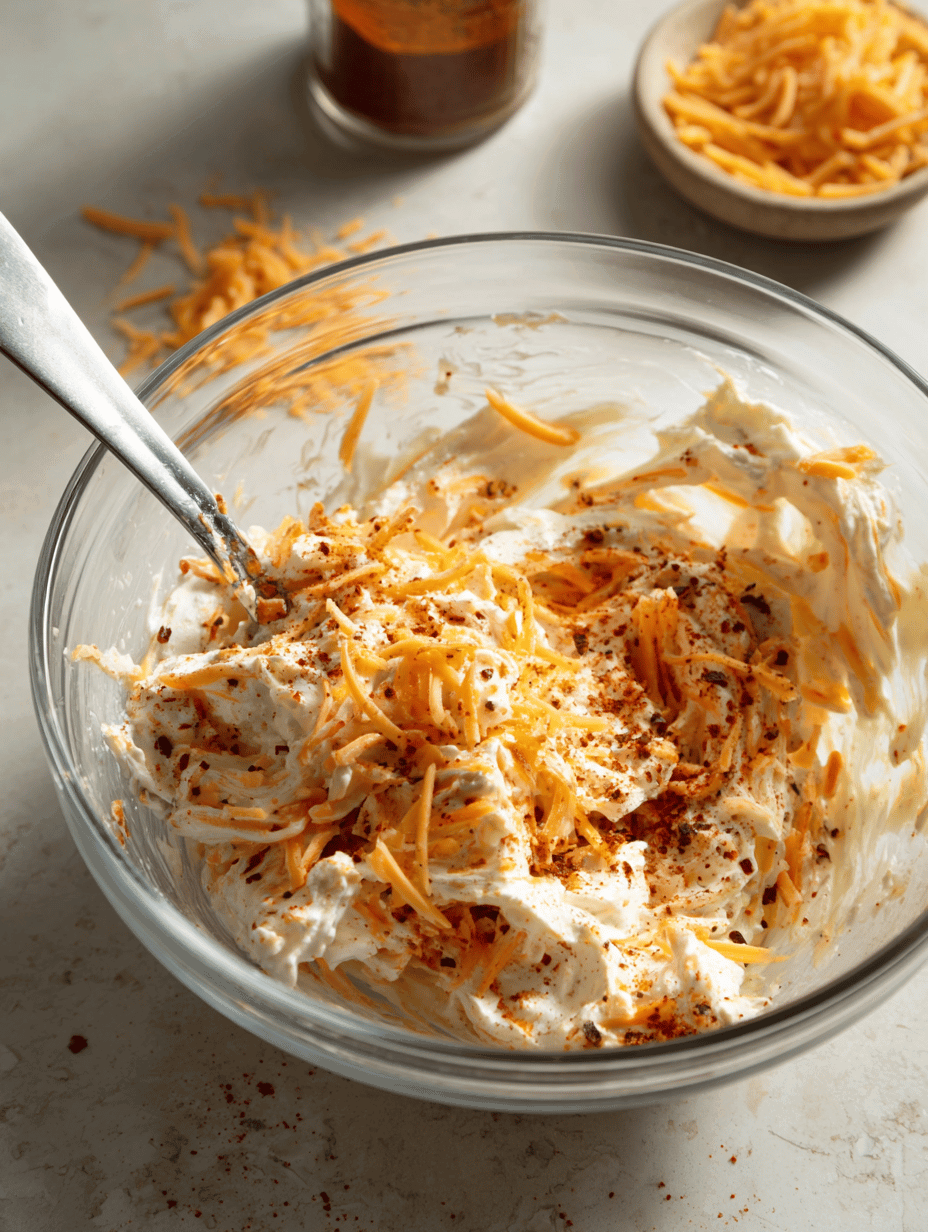
Step 1: Start with soft, room-temperature cream cheese so it’s easy to work with. Use a sturdy spoon or spatula to combine it with shredded cheddar, a pinch of garlic powder, and a dash of smoked paprika.
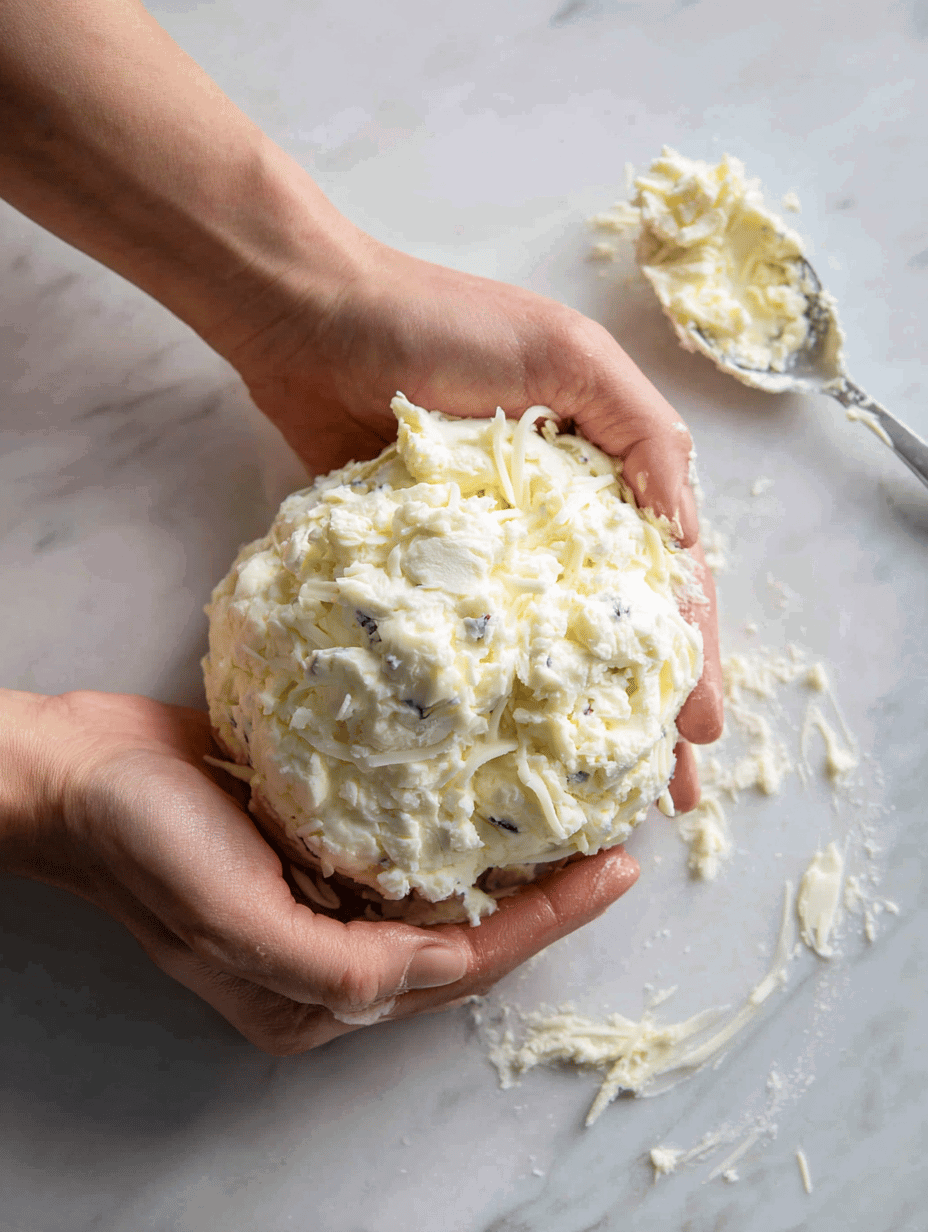
Step 2: Shape the cheese mixture into a large, flat oval on a parchment-lined tray. Use your hands or a spatula to smooth the surface, making it look like a little spider body.
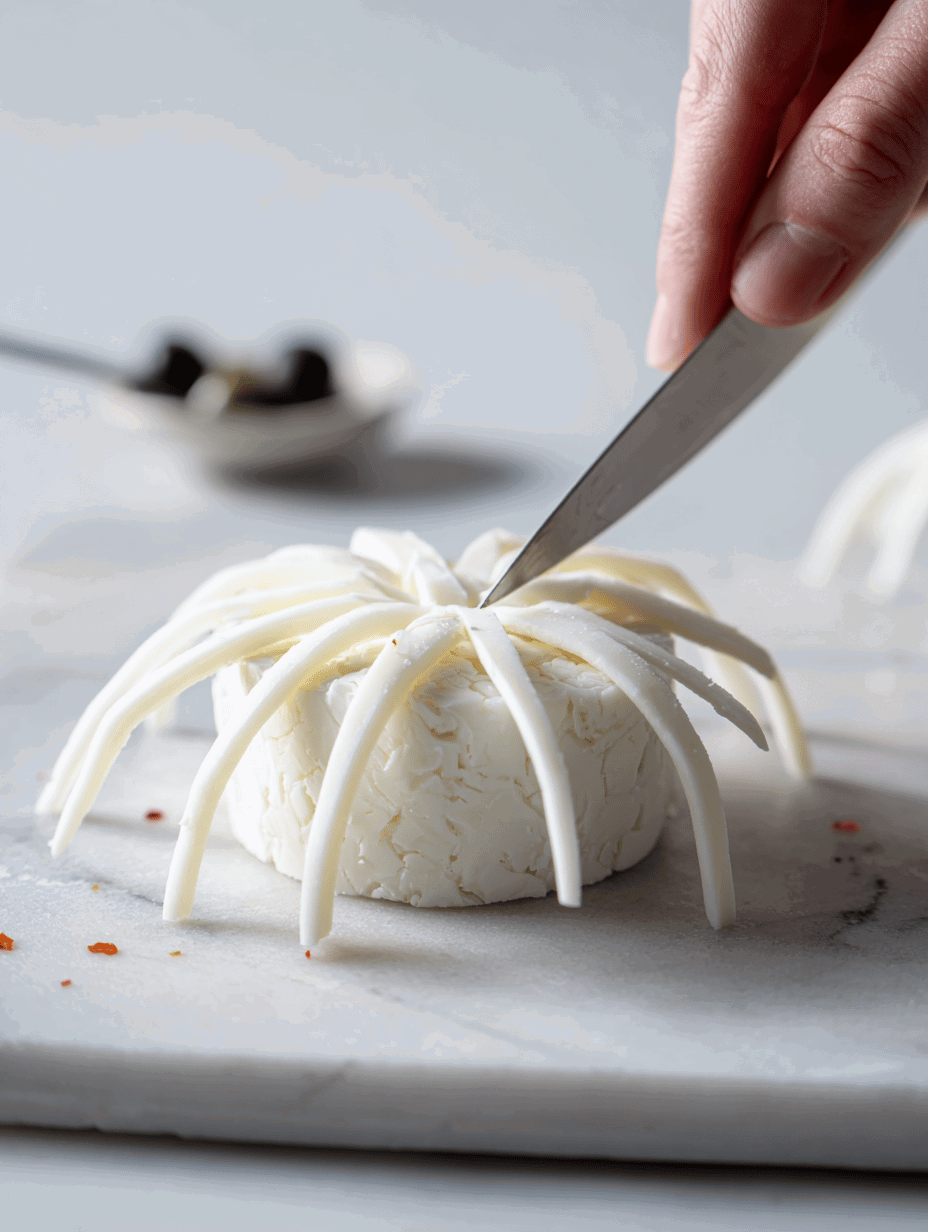
Step 3: For the legs, roll thin logs of string cheese or mozzarella. Attach them to the sides of the body with a dab of melted cheese or a toothpick, spreading out evenly to mimic spider legs.
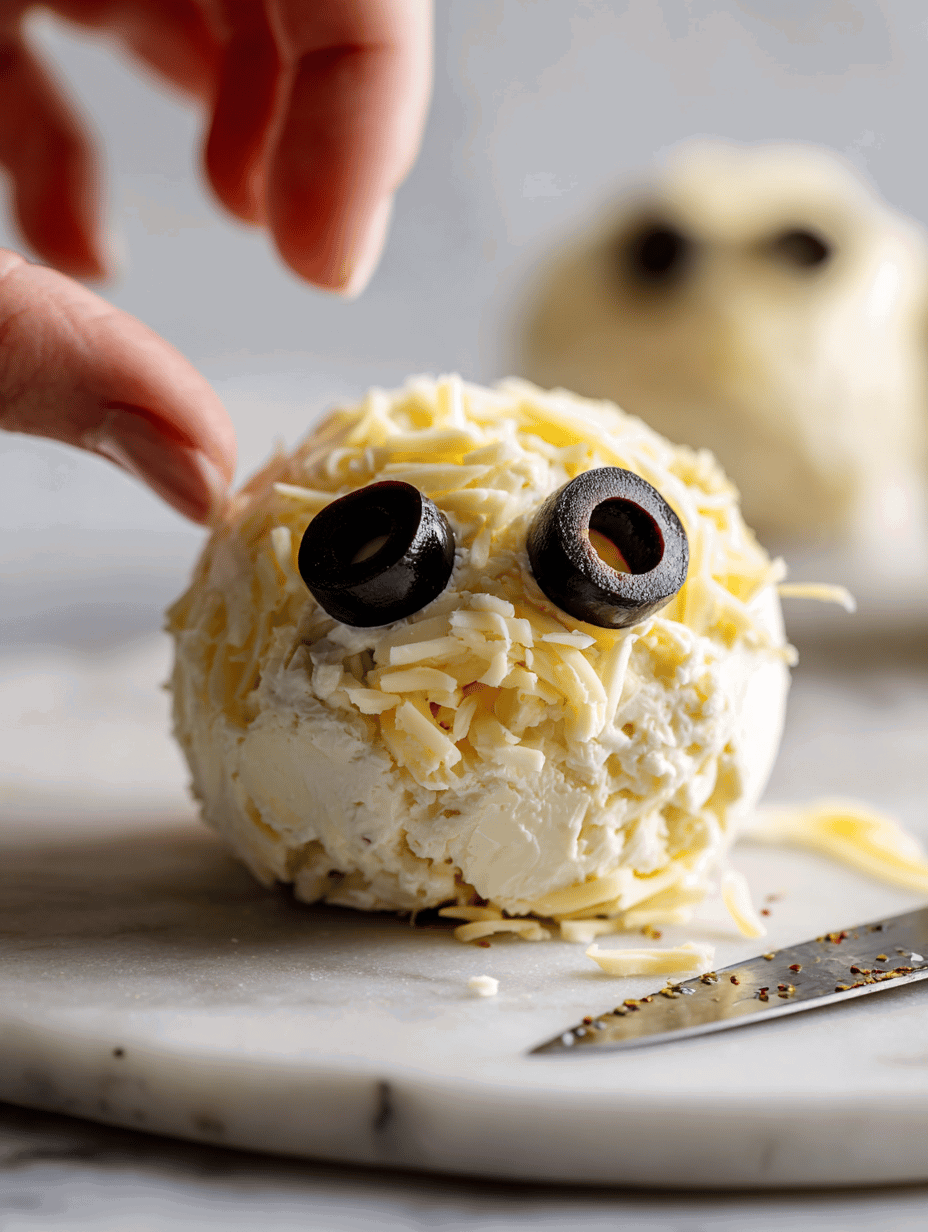
Step 4: Place black olives or cherry tomatoes for the eyes, pressing them gently into the cheese. Use mini pretzels or breadsticks as the spider’s legs if you prefer a crunchier texture.
Step 5: Chill the whole thing in the fridge for at least 30 minutes so everything sets and the flavors meld. It’s best eaten within a day for maximum freshness.
Creepy Checkpoints and Tips to Nail It
- The cheese mixture should be firm enough to mold without cracking. If it’s too sticky, chill it longer.
- Legs should be secure but not too heavy—use a little extra melted cheese to attach if needed.
- Eyes should sit flush; if they wobble, press them in more firmly before chilling.
Spooky Slip-Ups and How to Fix Them
- The cheese is too soft and won’t hold shape.? Use a chilled cheese mixture if it’s too sticky to shape.
- Legs fall off or slide down.? Attach legs while the cheese is still warm for better adhesion.
- Eyes aren’t secure.? Press eyes in firmly and chill again if they wobble.
- Eyes fall out or get squished.? Use a gentle hand when attaching olives or cherry tomatoes.
Spider Cheese Ball
Equipment
- Spatula or sturdy spoon
- Sharp knife or toothpicks
Ingredients
- 8 oz full-fat cream cheese softened to room temperature
- 1 1/2 cups shredded cheddar cheese
- 1/4 teaspoon garlic powder
- 1/2 teaspoon smoked paprika or chili powder for variation
- 10 black olives for eyes, pitted
- 4 string string cheese or mozzarella sticks for legs
Instructions
- Place the softened cream cheese in a large mixing bowl and use a spatula to blend it until smooth and creamy, with no lumps.

- Add the shredded cheddar, garlic powder, and smoked paprika to the bowl. Mix everything together until well combined and the mixture is uniform in color.
- Shape the cheese mixture into a large, oval-shaped ball on a parchment-lined tray. Use your hands or a spatula to smooth the surface, creating a compact spider body.
- Cut the string cheese or mozzarella sticks into thin logs, about 2 inches long, to form the spider’s legs.
- Press the cheese logs onto the sides of the main cheese ball, spreading them out evenly to resemble spider legs. Use a small amount of melted cheese or a toothpick to secure each leg if needed.
- Place black olives or cherry tomatoes on the cheese ball to create the spider’s eyes, pressing them gently into the surface for a flush fit.
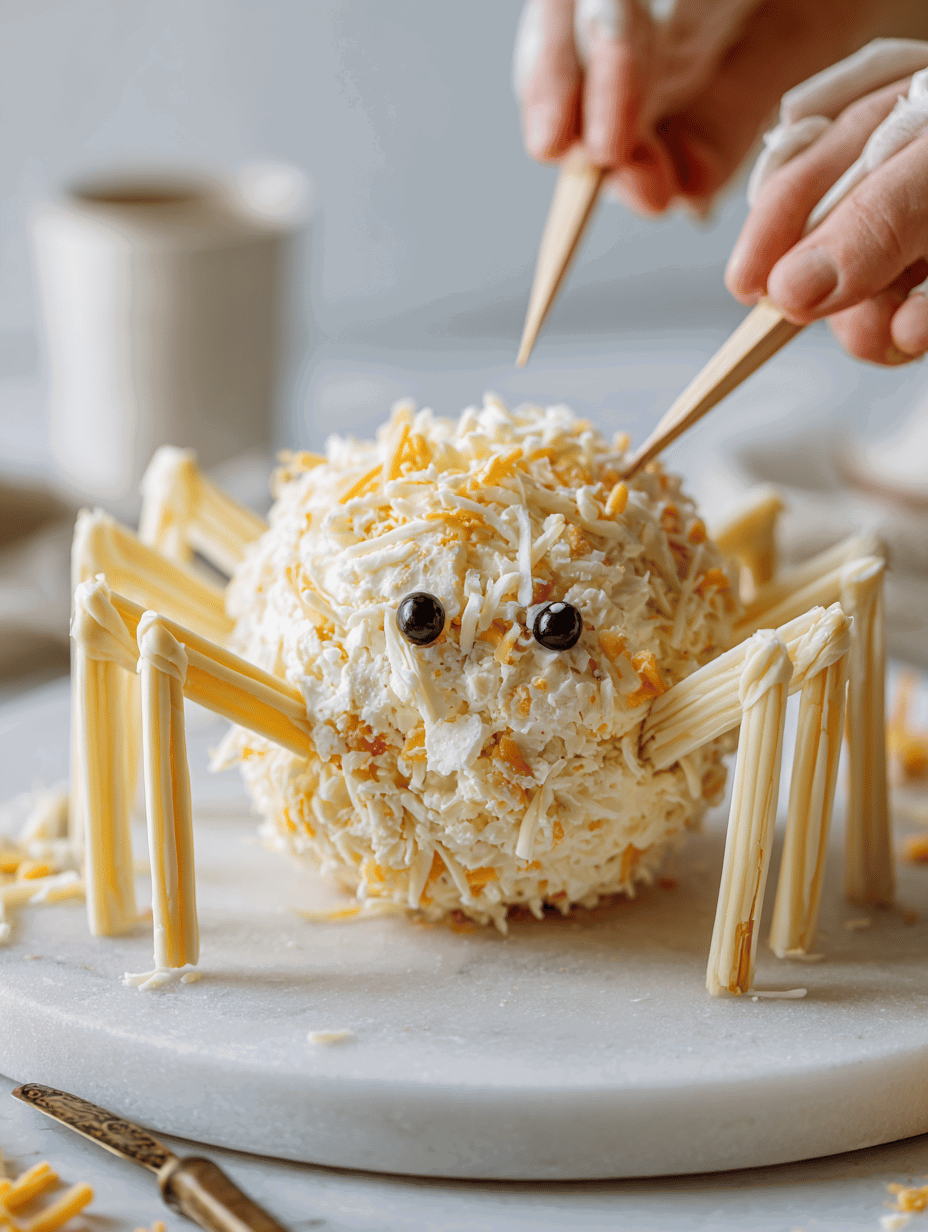
- If desired, insert mini pretzels or breadsticks as additional legs or creepy accents, securing with a small dab of melted cheese if necessary.
- Chill the assembled spider in the refrigerator for at least 30 minutes to help it set and meld the flavors together.

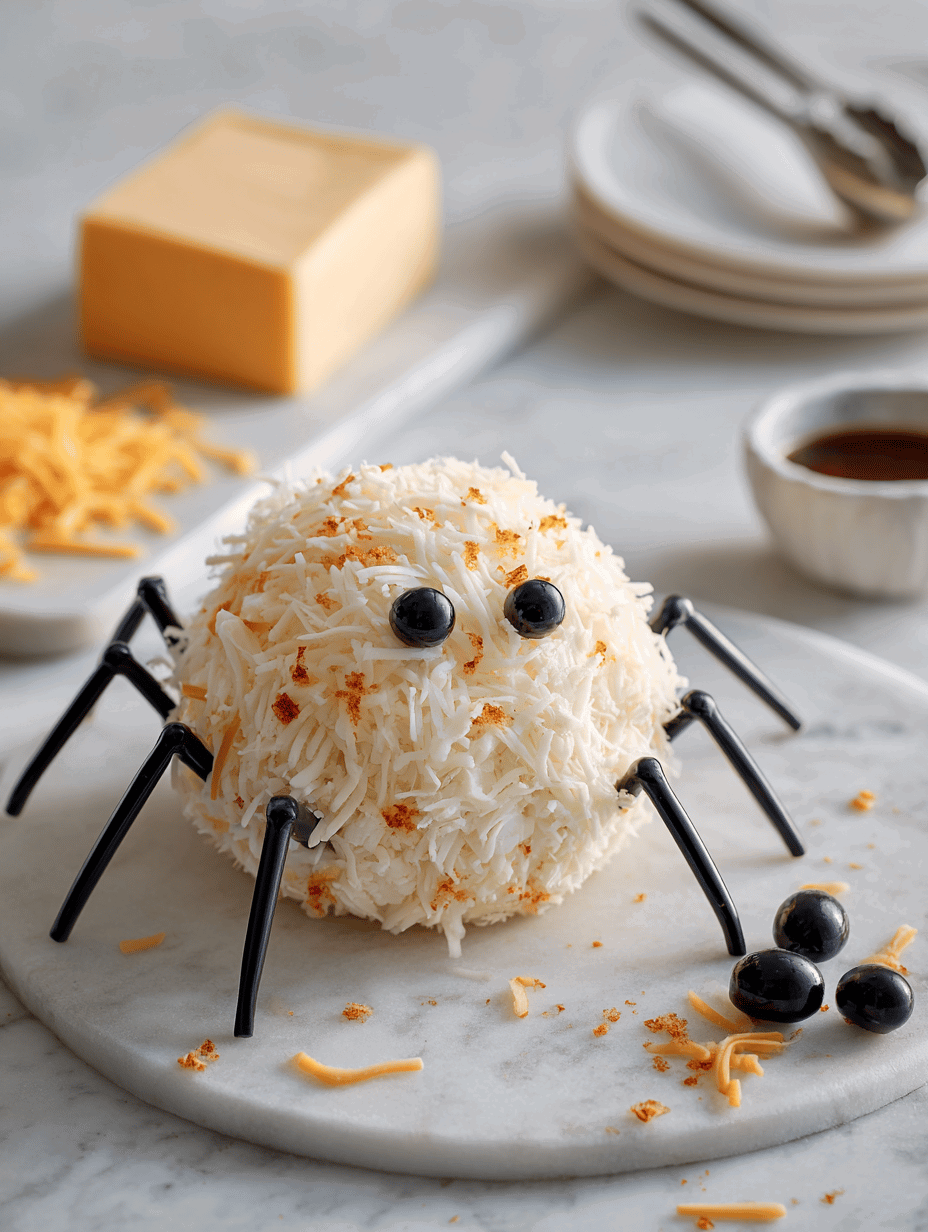
- Before serving, gently press the eyes into place if they have shifted, and make any final adjustments to the legs for a balanced, creepy appearance.

- Slice and serve your spooky cheese spider with crackers or baguette slices for a fun Halloween treat!