
Making a Kool-Aid slushie isn’t just about cooling down on a hot day. It’s about reclaiming that childhood thrill, but with a grown-up twist that makes it feel like you’ve unlocked a little secret. I love how simple ingredients can turn into something so satisfying—no fancy machines, just a little patience and a spoon. Plus, it’s the kind of treat that feels like a small rebellion against the busy, hurried world outside.
Sometimes, this is my go-to when the afternoon drags or I need a quick burst of color and flavor. It’s honest, unpretentious, and surprisingly nostalgic. No matter how many fancy drinks I try to whip up, there’s a messy, bright charm in a homemade Kool-Aid slushie that no boutique ice blend can quite match. It’s imperfect, it’s fun, and it’s honestly one of those rare recipes where I ignore the rules.
Why I Keep Coming Back to This Simple Summer Classic
- Nothing beats that instant burst of sweet, tangy flavor that floods your mouth—so bright it almost tingles.
- I love how it instantly transports me back to childhood summer afternoons—no fuss, just joy.
- It’s a chaos of colors and flavors, and I revel in the messy, unpolished beauty of it.
- Having a cold treat on hand makes the heat more bearable, and I don’t feel guilty about it.
- It’s a reminder that sometimes, simple ingredients can create the most satisfying moments.
Understanding the Ingredients—More Than Just Kool-Aid
- Kool-Aid powder: This is the heart—bright, punchy, and quick to freeze. Use any flavor you love, or mix for a custom punch. If you want less sugar, cut back or try a sugar-free version.
- Cold water: It’s the backbone, helping dissolve the powder and start the chilling process. Use ice water if you want it extra cold, but avoid overly hot water that might dilute flavor.
- Ice cubes: They’re the secret to that slushy texture. Toss in a bit more ice if your mixture isn’t getting thick enough. For a smoother blend, crushed ice works wonders.
- Sweetener (optional): I sometimes add a splash of honey or agave for depth, especially if the Kool-Aid is too tart. Skip if you prefer a straightforward tang.
- Lemon juice (optional): Brightens the flavor and cuts through excess sweetness. A splash—about a teaspoon—can make a big difference in freshness.
How to Make a Kool-Aid Slushie—Step by Step
Equipment & Tools
- Measuring cups and spoons—accuracy helps, especially with flavor balance.
- Blender or food processor—preferably with a crush-ice setting.
- Large mixing bowl—if you’re pre-mixing the Kool-Aid.
- Spatula—scraping down the sides and mixing thoroughly.
Steps
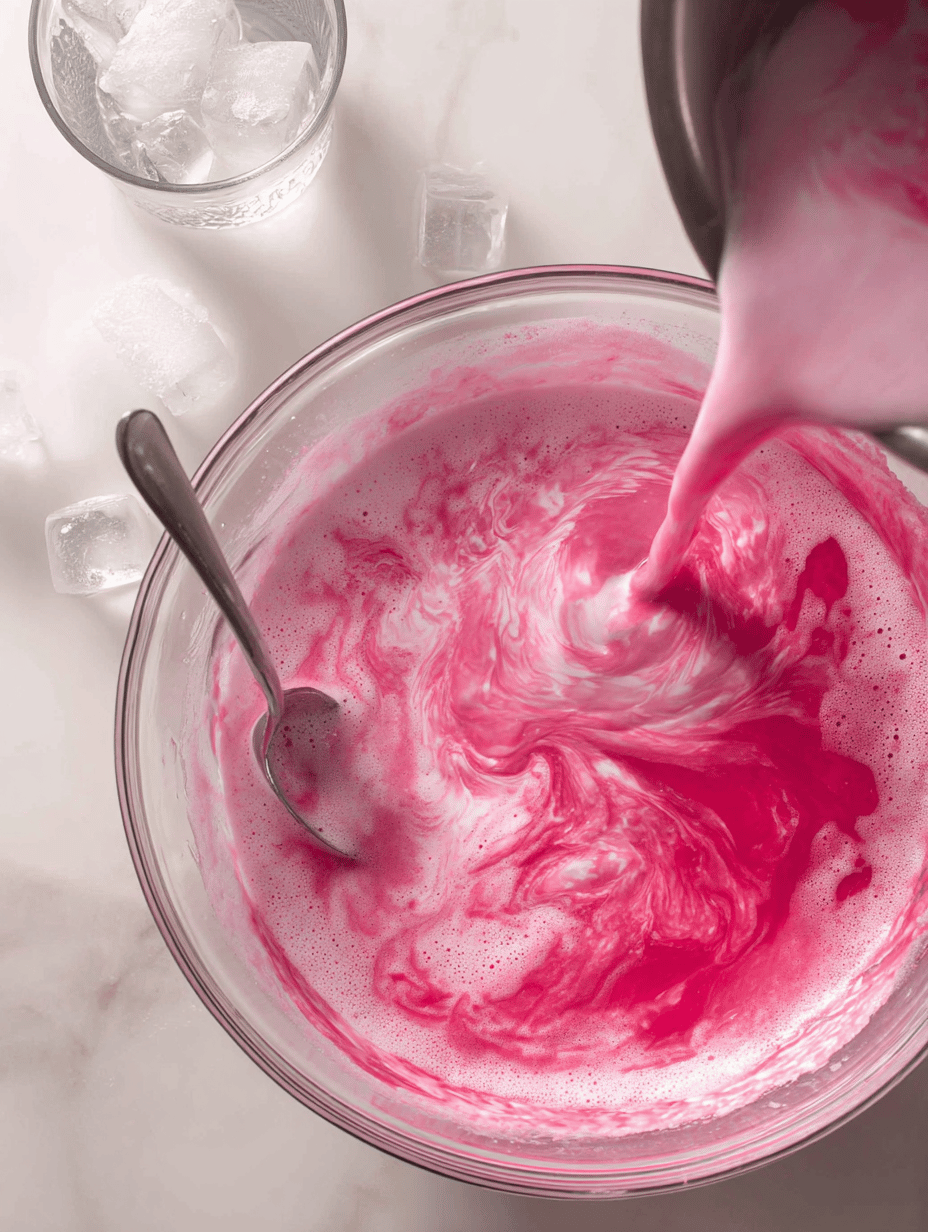
- Mix the Kool-Aid powder with 1 cup cold water in a bowl. Stir until completely dissolved—smell that sharp, tangy aroma. If it’s grainy or powdery, give it a few more seconds.
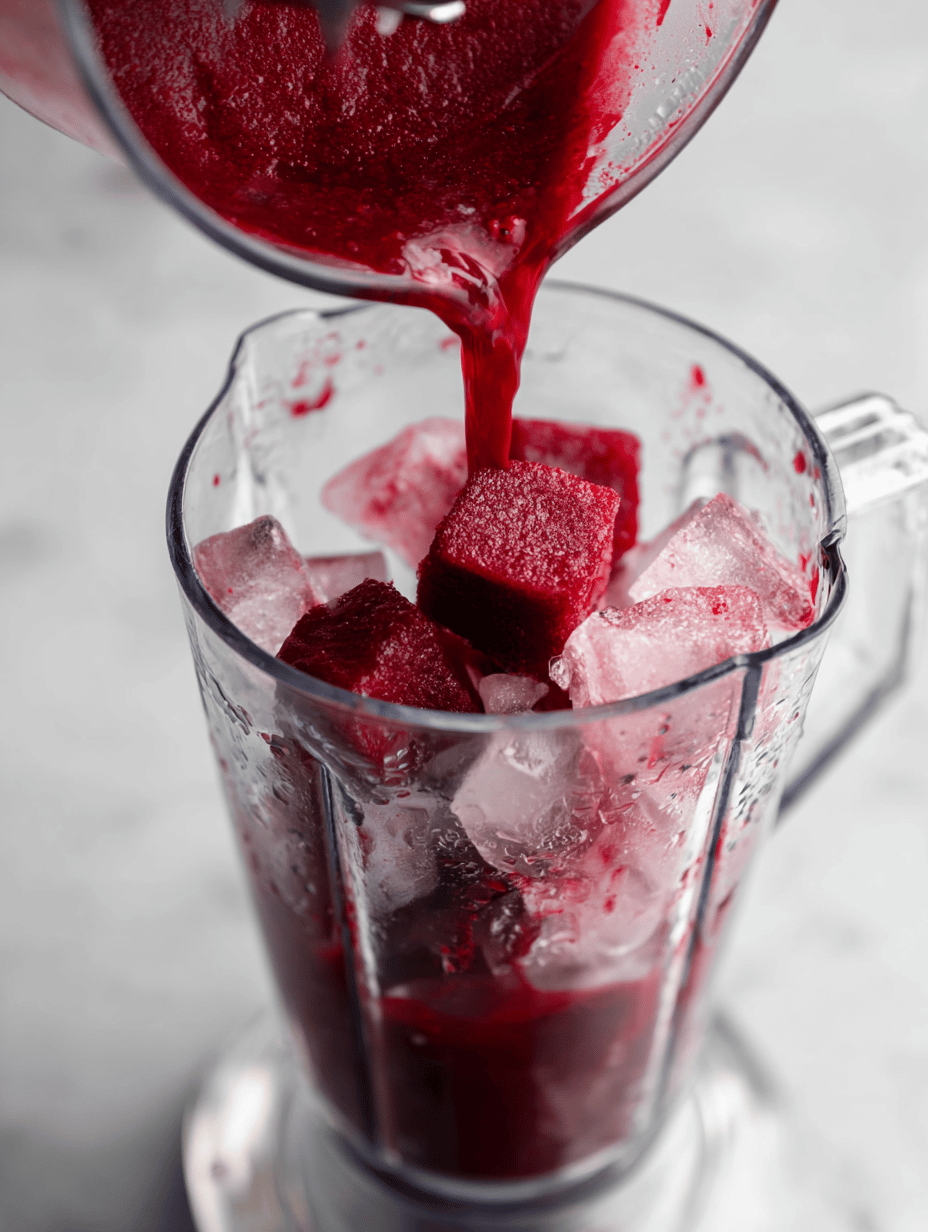
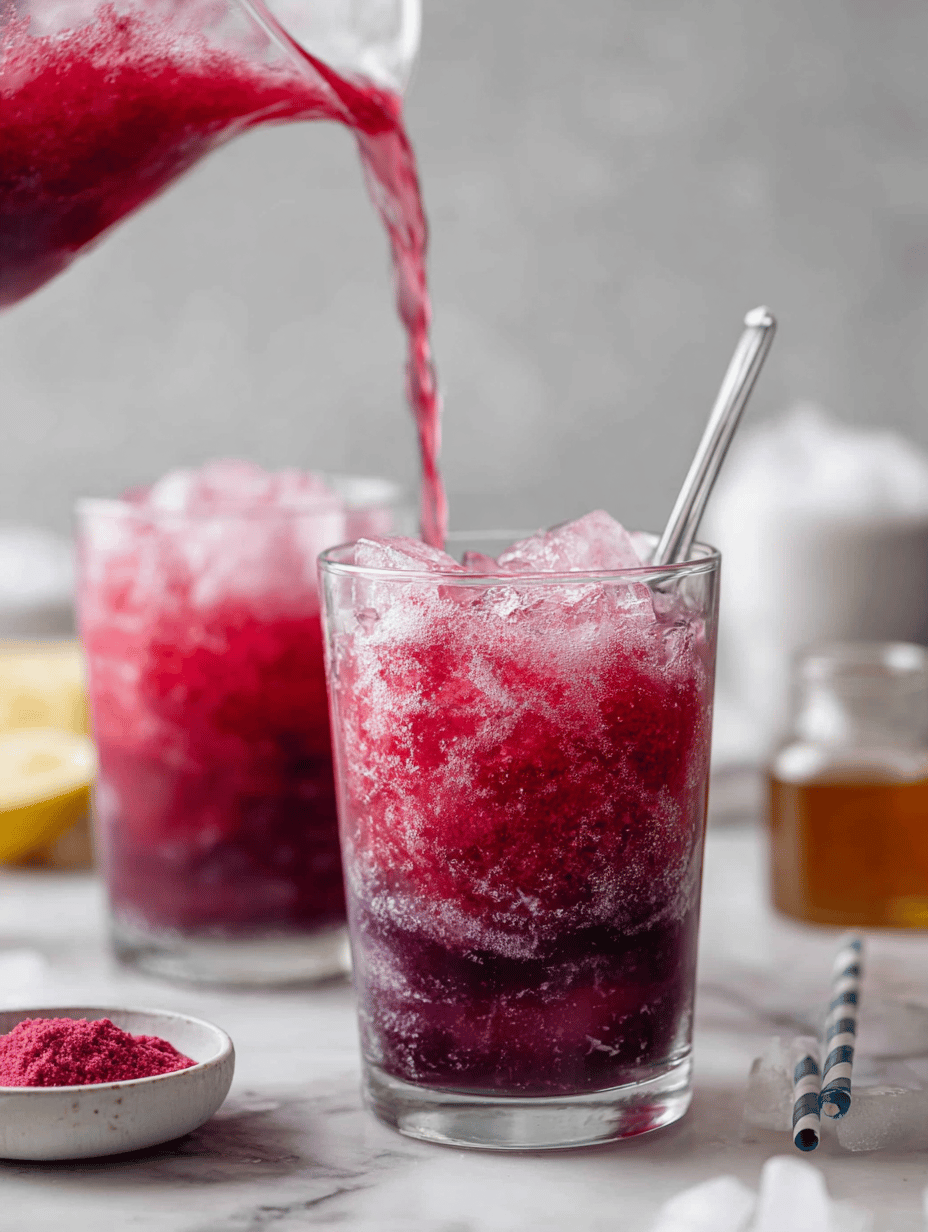
- Pour the mixture into your blender. Add 1 cup of ice cubes or crushed ice. If you want it thicker, add more ice gradually. Blend on high until the mixture is slushy—should look like a vibrant, semi-frozen rainbow.
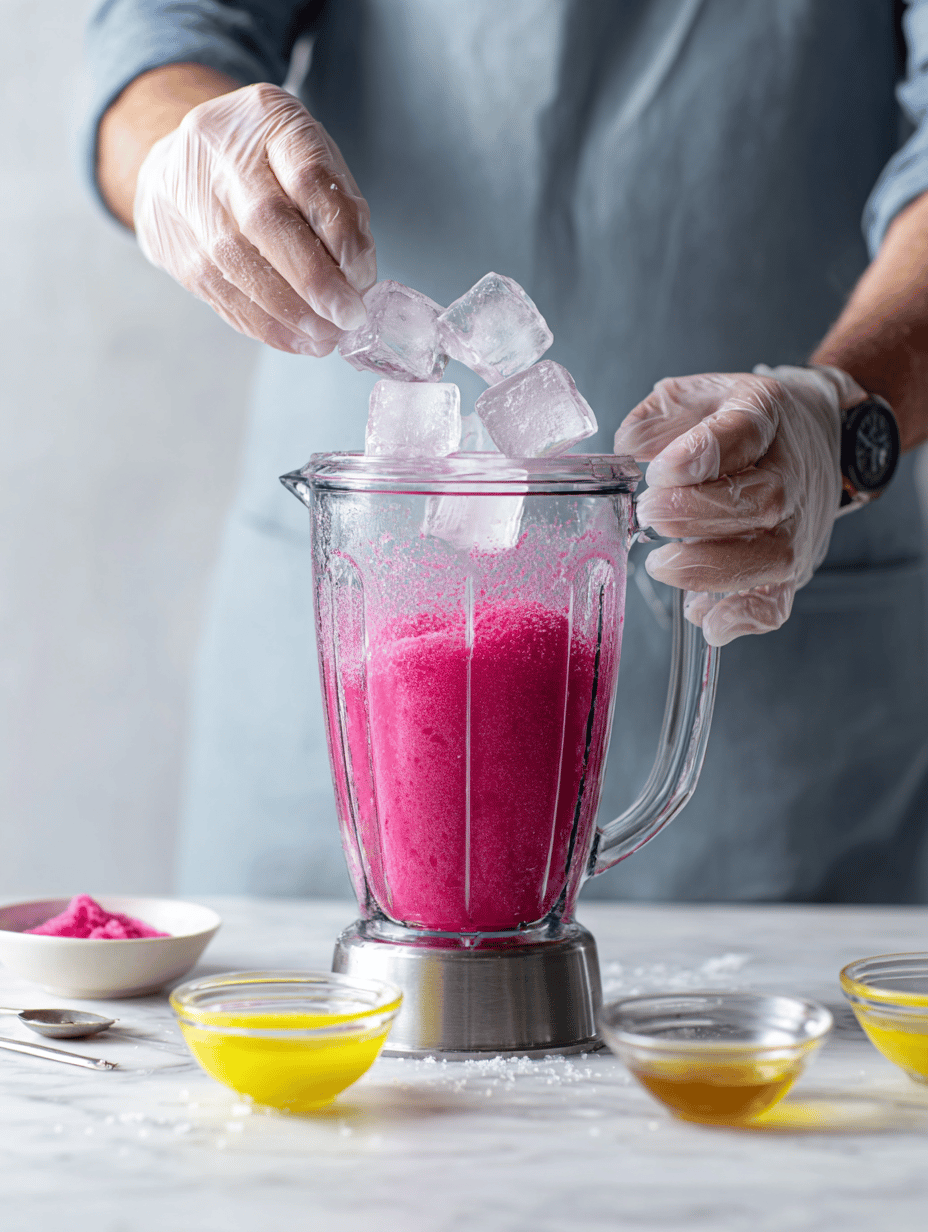
- Check the texture—if it’s too watery, add more ice and blend again. If it’s too thick, splash in a little cold water or a splash of lemon juice for brightness.
- Taste and adjust—add a pinch more sugar or a squeeze of lemon if needed. Blend briefly to combine.
- Pour into glasses immediately. Serve with a straw or spoon—enjoy that icy crackle with each sip.
Resting & Finishing
- Serve immediately for the best slushie texture. If you need to hold it, freeze for 15-20 minutes, but stir occasionally to prevent it from freezing solid.
- Garnish with a slice of lemon or a sprig of mint if you’re feeling fancy.
Checkpoints & How to Know It’s Done
- The texture should be thick and scoopable, with a crystalline shimmer.
- It should crackle when you stir it, like breaking frozen glass.
- The flavor should be bright, balanced between sweet and tart, with no overly icy lumps.
Mistakes and Fixes—Don’t Sweat the Small Stuff
- FORGOT to chill the mixture? Stir in more ice and blend again—quick cooling fixes the melt.
- DUMPED too much sugar? Add a splash of lemon juice or more ice to balance sweetness without diluting flavor.
- OVER-TORCHED the mixture? If it looks frosty and dull, re-blend with fresh ice for a more vibrant slush.
- SEASONAL change needed? Swap out Kool-Aid flavors or add a splash of fruit juice for a fresh twist.
Quick Kitchen Fixes—Because Sometimes You Need a Rescue
- When the mixture isn’t cold enough, splash with cold water and re-blend for an instant chill.
- When the flavor’s off, stir in a little extra lemon or a pinch of salt—enhances brightness and balance.
- Splash a tiny bit of grenadine if you want a darker, richer hue and flavor.
- Patch icy lumps by blending briefly and adding more ice—shimmering and crackling is the goal.
- When the mixture starts to melt too fast, serve immediately or freeze for 10 minutes to reset the texture.

Homemade Kool-Aid Slushie
Equipment
- Blender or Food Processor
- Large mixing bowl
- Spatula
Ingredients
- 1 packet Kool-Aid powder any flavor
- 1 cup cold water preferably ice-cold
- 1 cup ice cubes more if needed for thickness
- 1 teaspoon lemon juice optional, brightens flavor
- 1 teaspoon honey or agave syrup optional, for added sweetness
Instructions
- Pour the Kool-Aid powder into a large mixing bowl and add 1 cup of cold water. Stir vigorously until the powder is completely dissolved and the mixture smells tangy and vibrant.
- Transfer the Kool-Aid mixture into your blender, then add about half of the ice cubes. Blend on high until the mixture becomes slushy, with a bright, semi-frozen appearance and a crackling sound as ice breaks down.
- Check the texture—if it’s too watery, add more ice and blend again until thick and icy. If it’s too thick, splash in a little more cold water or a squeeze of lemon juice for freshness, then blend briefly.
- Taste the slushie and, if desired, stir in a teaspoon of honey or agave syrup for extra sweetness. Briefly blend again to fully incorporate the sweetener.
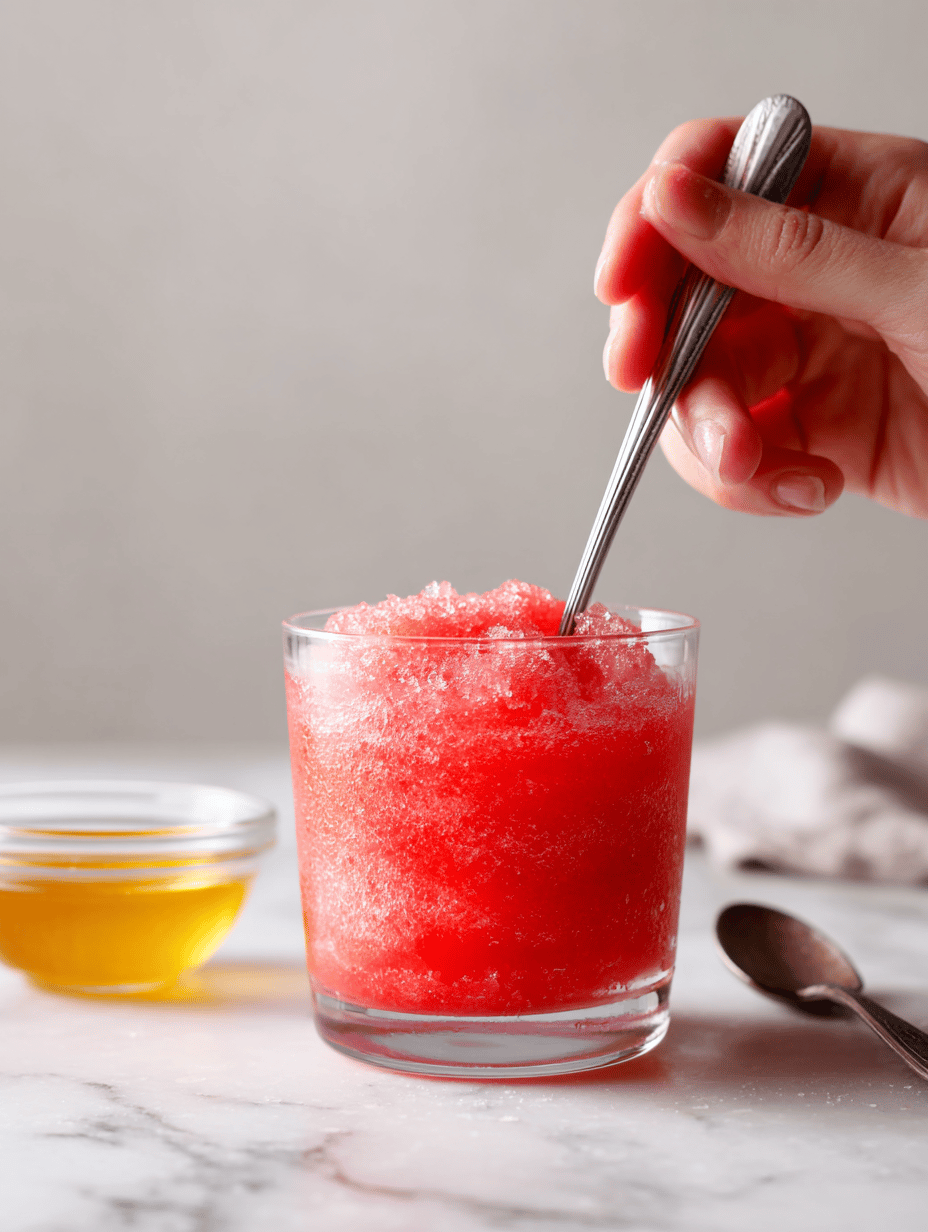
- Pour the vibrant, icy slush into glasses immediately. Serve with a straw or spoon, enjoying the crackling, colorful texture that’s perfect for summer.
Notes
Nutrition

hi there,
i’m James
The home cook and food blogger behind Beyond the Bayou Blog. Cooking has always been my happy place.
know more