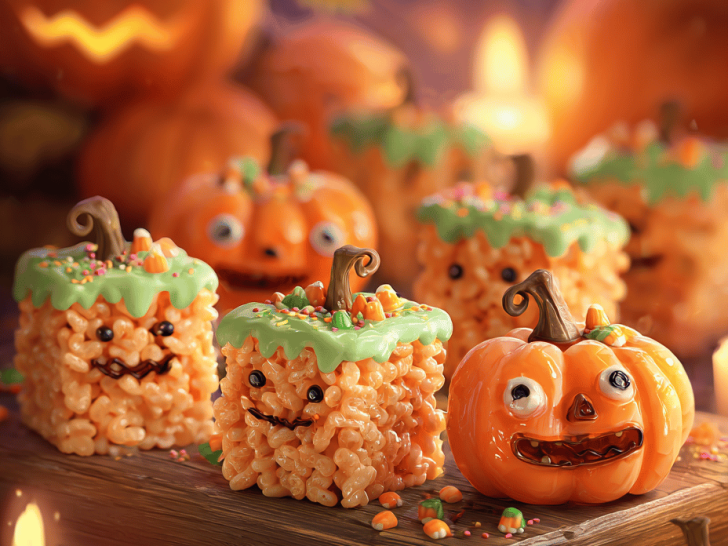
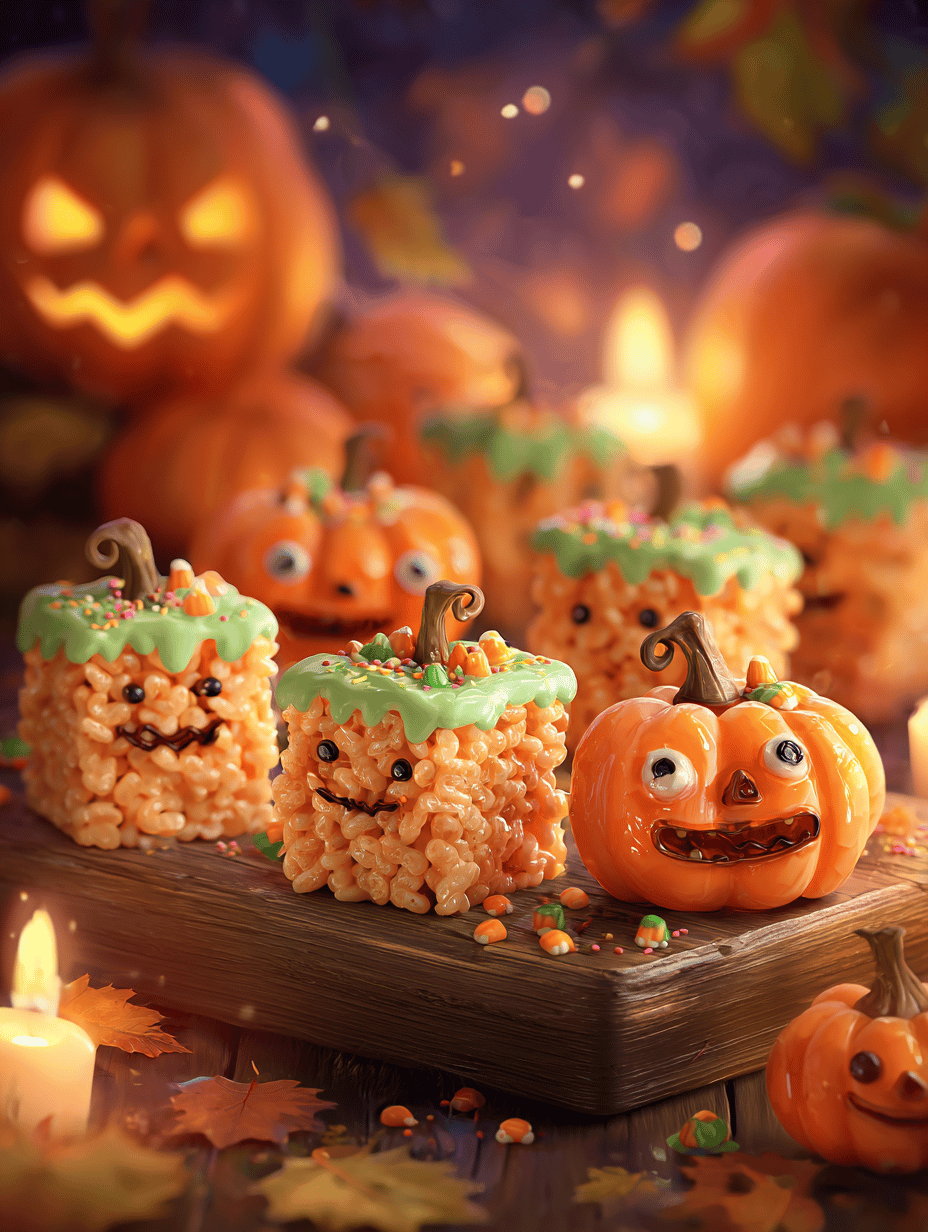
Ever find yourself craving that sweet, marshmallowy crunch but want to do more than just follow the usual recipe? I love how these pumpkin treats turn a simple childhood favorite into something festive and a little bit messy—because who doesn’t want to get their hands sticky on Halloween? Plus, the pumpkin flavor is subtle but unmistakably seasonal, making it a perfect party snack or a fun way to use up that extra can of pumpkin you’ve got lying around.
What really draws me in is how forgiving this recipe is—no fancy techniques, just a little patience and a lot of love for melting marshmallows. The best part? You can customize the color, add some spooky sprinkles, or even hide tiny candies inside. It’s chaos in the best way, a sweet project that feels like a little celebration every time you make it. And honestly, it’s the kind of treat everyone ends up fighting over.
Why I Love This Recipe: The Charm of Making a Classic with a Pumpkin Spin
- I remember making these with my grandma—messy fingers, giggles, and that warm marshmallow smell filling the kitchen.
- Watching kids’ eyes light up when they see the pumpkin hue and Halloween sprinkles—simple joy that sticks around.
- This recipe is a relief on busy weeks—a quick bake that turns out festive every single time.
- There’s pride in customizing the color and add-ins—makes it feel uniquely yours, even if it’s just for one night.
Ingredient Breakdown: What Makes These Pumpkin Rice Krispie Treats Special
- Marshmallows: I prefer the big, fluffy bags—melt smooth and give that gooey, irresistible texture. Swap with vegan marshmallows if needed.
- Butter: Adds richness, helps everything blend. Use salted butter for a slightly savory note, or swap with coconut oil for a dairy-free version.
- Pumpkin Puree: Canned pumpkin is easiest—brings moisture and a hint of earthiness. Fresh pumpkin puree works, but it’s more work and less vibrant in color.
- Rice Krispies: The classic crunch, but feel free to mix in some Cocoa Krispies for a chocolate twist or gluten-free options if necessary.
- Spices (cinnamon, nutmeg): Just a pinch transforms the flavor—if you’re feeling adventurous, add a dash of ginger or clove for extra warmth.
- Food coloring: Bright orange is the goal, but gel colors give a more vibrant hue without thinning the mixture.
Step-by-Step: Crafting Your Halloween Pumpkin Rice Krispie Treats
Equipment & Tools
- Large saucepan: For melting marshmallows and butter. Keep it on low heat to avoid scorching.
- Greased 9×13 inch pan: To pour and set the mixture. Line with parchment for easy lifting.
- Spatula: Silicone preferably, for stirring and spreading evenly.
- Mixing bowls: For prepping spices and decorations.
- Measuring cups and spoons: Precise, but eyeballing works when you get familiar.
Steps
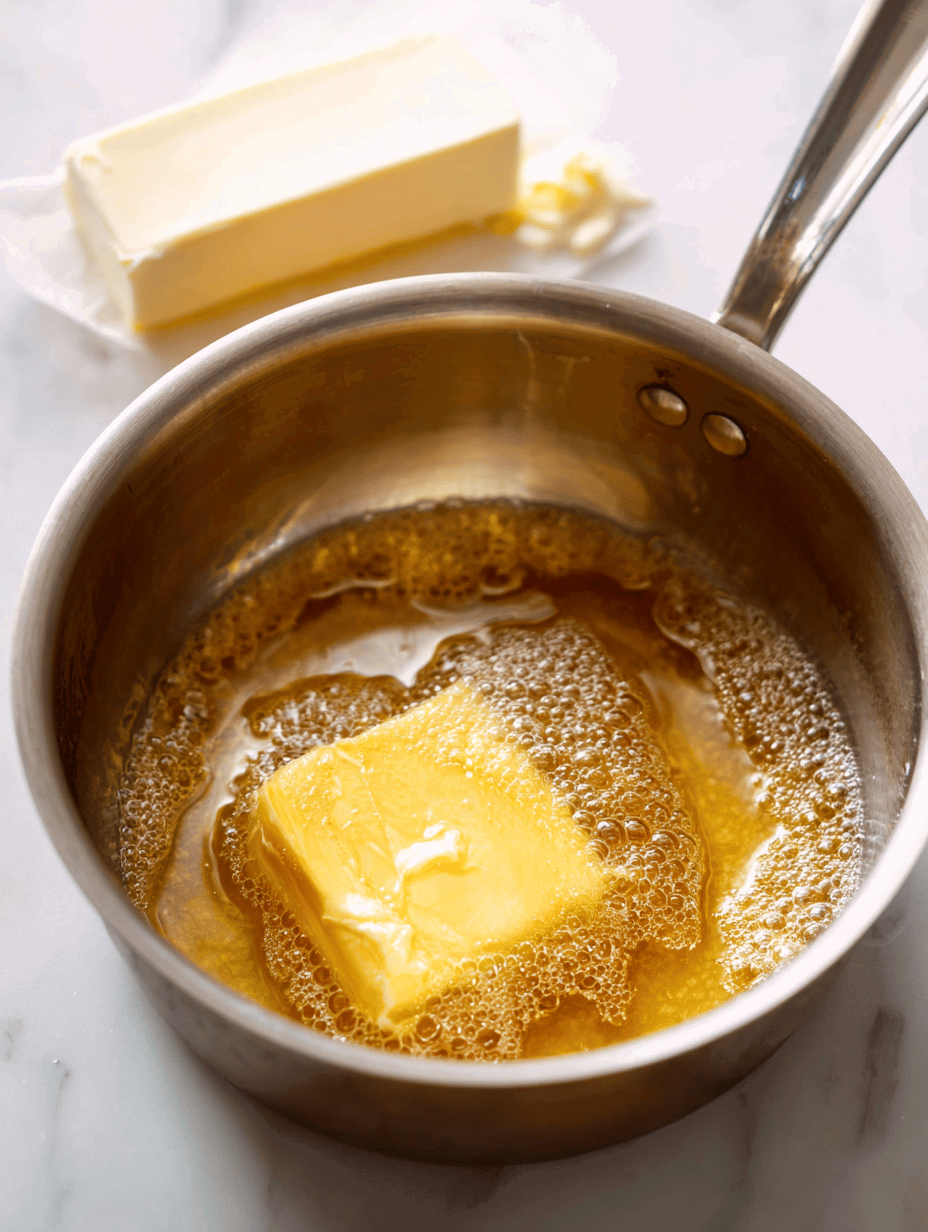
- Grease your pan and set aside. Melt 3 tablespoons butter over low heat in the saucepan. As it melts, smell that buttery aroma filling your kitchen.
- Add 10 oz of marshmallows gradually, stirring constantly. Watch for the marshmallows to become glossy and oozy—if they start to brown, lower the heat immediately.
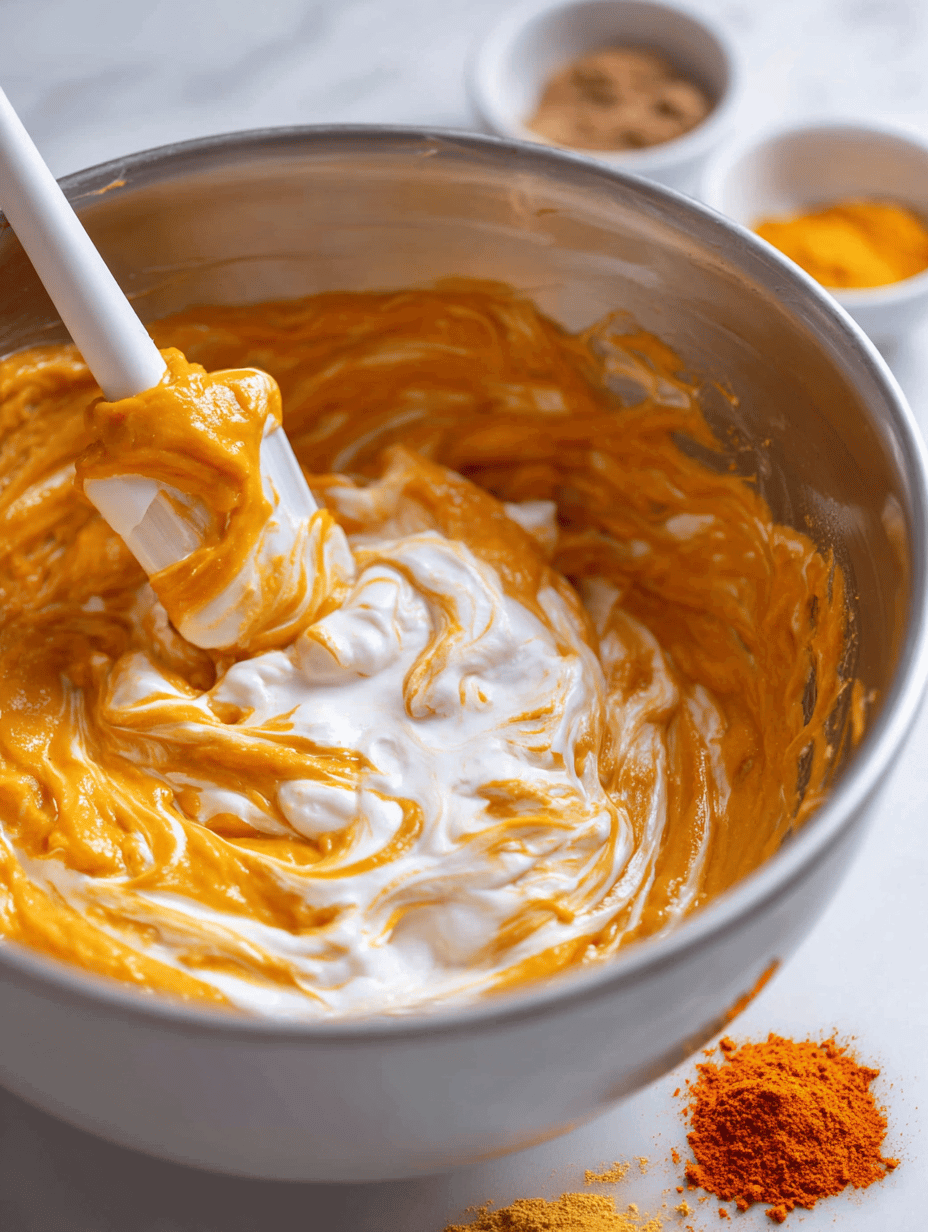
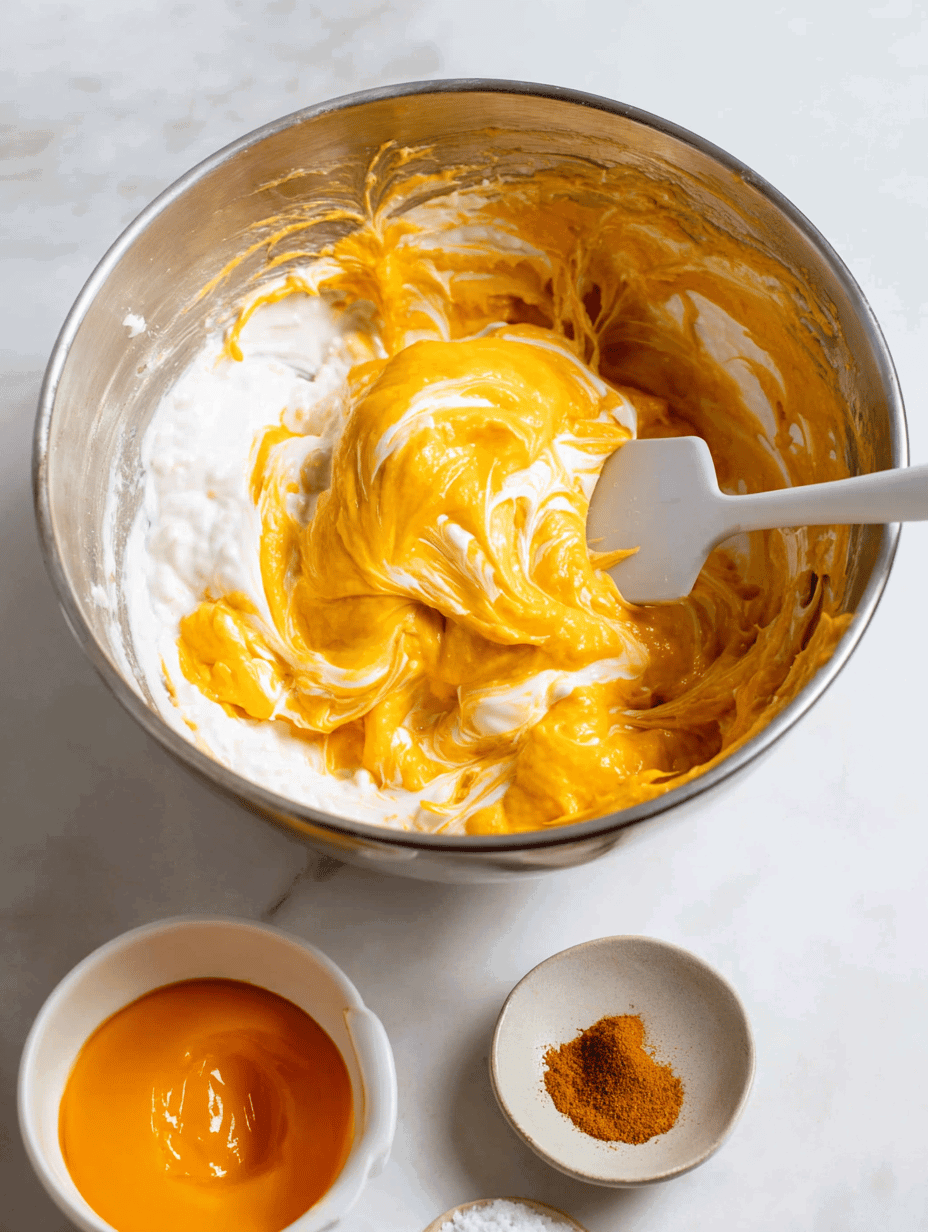
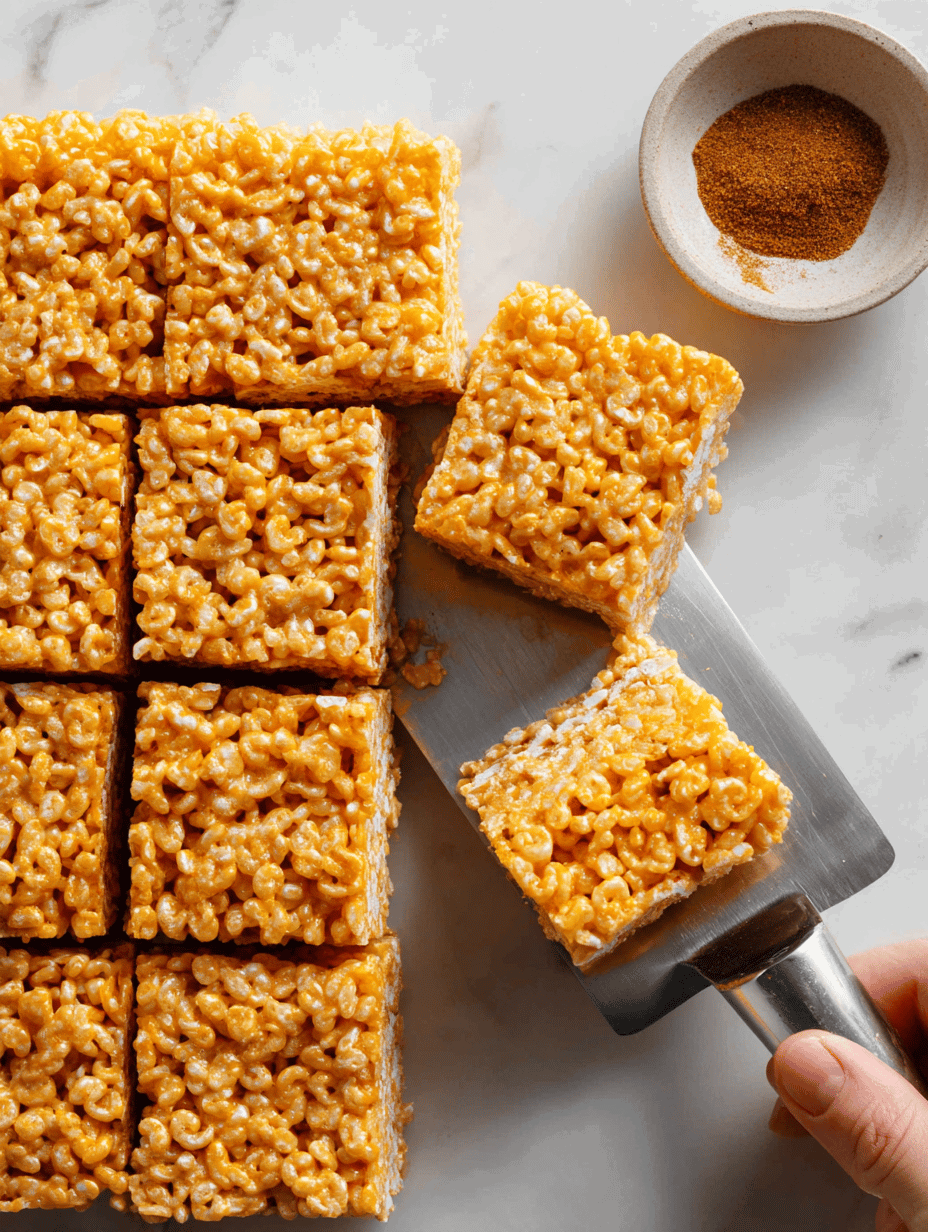
- Once melted, stir in ½ cup pumpkin puree and a teaspoon of cinnamon. The mixture will turn a warm, pumpkin hue. Cook for another 30 seconds until combined.
- Remove from heat. Quickly add 4 cups of Rice Krispies and stir until evenly coated. The mixture should crackle softly as you fold—if it’s too stiff, a splash of melted marshmallow helps loosen it up.
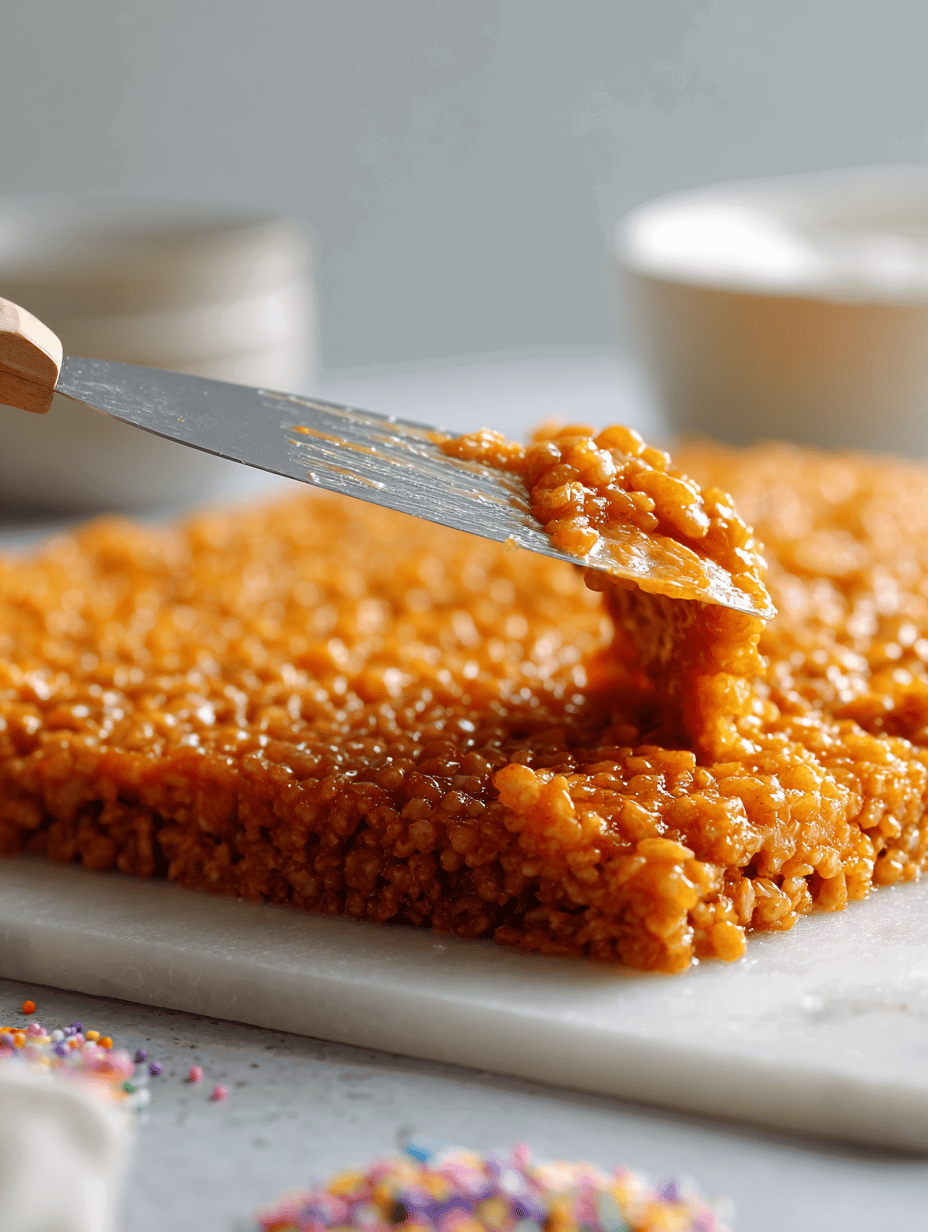
- Divide the mixture into the prepared pan. Press down gently with a spatula to level it out. Add sprinkles or candies now if you like.
- Let set at room temperature for at least 30 minutes. The edges should be firm, and the top slightly shiny but not sticky.
- Cut into squares or spooky shapes with cookie cutters. Serve when just firm enough to hold shape—no one wants a melty mess.
Mistakes and Fixes: What to Watch Out For
- FORGOT to grease the pan? Grease it quickly with butter or cooking spray—clean-up is easier and treats won’t stick.
- DUMPED in too many marshmallows at once? Stir constantly to avoid burning and uneven melting.
- OVER-TORCHED marshmallows? Start over with fresh ones—burnt marshmallows turn bitter and hard.
- SEPARATED mixture? Warm the mixture slightly and stir vigorously to bring it back together.
Quick Kitchen Fixes and Hacks
- When mixture is too sticky, splash in a little more Krispies and fold gently.
- When edges are uneven, patch with extra pressed Krispies or re-melt a tiny bit of marshmallow and dab on the cracks.
- When sprinkles sink in, lightly spray the top with a bit of water before adding them again.
- If you want a brighter orange, add a few drops of gel food coloring directly into the melted marshmallow mixture.
- For a smooth finish, dip your spatula in warm water and gently press down on the set treats.
Pumpkin Rice Krispie Treats
Equipment
- Large saucepan
- Greased 9x13 inch pan
- Spatula
Ingredients
- 3 tablespoons butter salted or unsalted
- 10 oz marshmallows large, fluffy bags
- 0.5 cup pumpkin puree canned or homemade
- 4 cups Rice Krispies classic or gluten-free
- 1 teaspoon ground cinnamon optional, for warmth
- food coloring gel orange gel food coloring adjust to desired vibrancy
Instructions
- Grease your 9x13 inch pan with a little butter or cooking spray and set aside. In a large saucepan, melt the butter over low heat, filling your kitchen with a warm, buttery aroma.
- Add the marshmallows gradually to the melted butter, stirring constantly with a spatula. Continue stirring until the marshmallows are completely melted and glossy, with a soft bubbling sound filling the air.
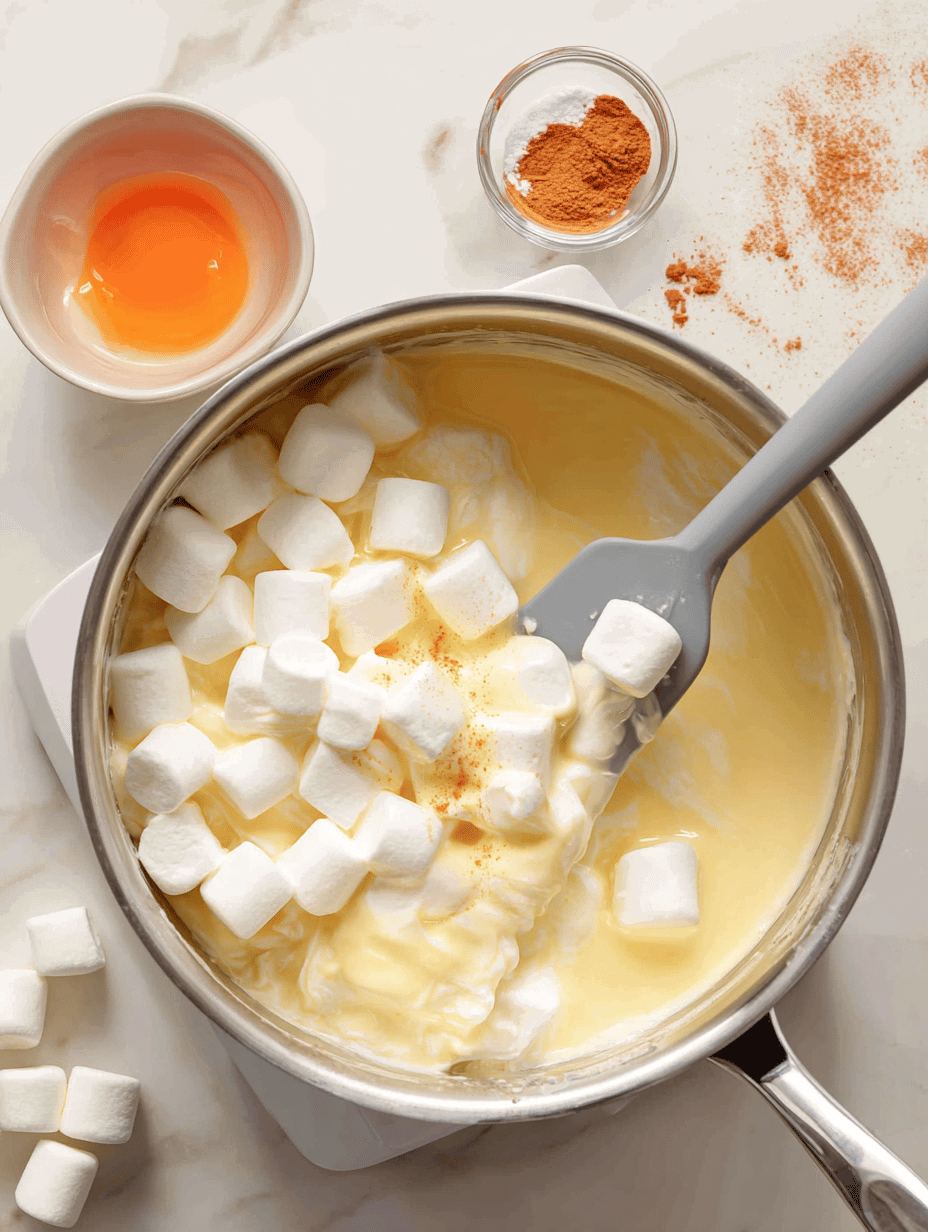
- Stir in the pumpkin puree and ground cinnamon, mixing quickly until the mixture turns a warm, pumpkin-orange hue and becomes smooth and slightly thickened.
- Remove the pan from heat. Immediately add the Rice Krispies, folding gently with a spatula until they are evenly coated and the mixture is thick and crackling softly.
- Pour the mixture into your prepared pan. Use a spatula or your hands (greased if necessary) to press it down evenly, creating a firm, compact layer. Add colorful sprinkles or candies on top if you like.
- Let the treats set at room temperature for at least 30 minutes, or until they are firm and slightly shiny on top. This helps them hold their shape and become chewy yet tender.
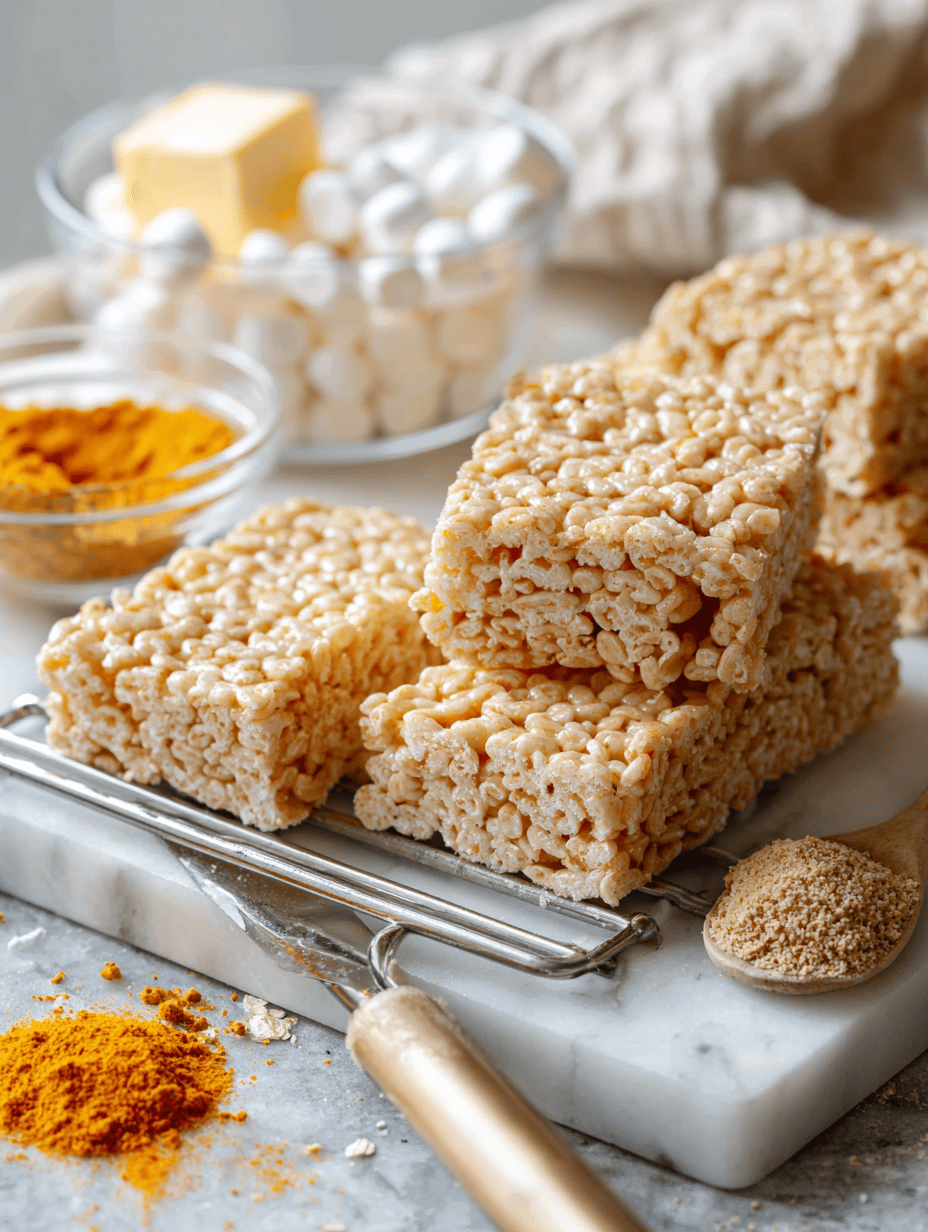
- Once cooled, cut into squares or use cookie cutters to shape spooky designs. Serve and enjoy these vibrant, crunchy, melty Halloween treats!
Notes
Nutrition

hi there,
i’m James
The home cook and food blogger behind Beyond the Bayou Blog. Cooking has always been my happy place.
know more