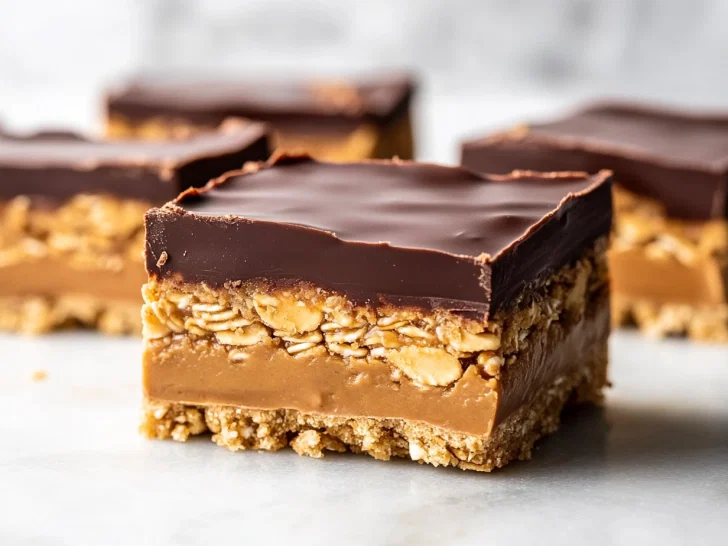
Sometimes, I crave something sweet but don’t want to mess with the oven. These no-bake peanut butter bars are a lifesaver on busy days, or when the kitchen’s too hot. I love how you get that perfect combo of creamy peanut butter and just enough crunch without any fuss.
They’re like a little pocket of nostalgia, reminding me of childhood snack times but with a grown-up twist. Plus, they come together in minutes, which is great because I’m usually chasing my own tail. The best part? No clean-up, just a spoon and a pan.
From the perspective of someone who loves quick, satisfying treats that don’t require oven time, focusing on the simplicity and texture.
Why These Bars Matter to Me
- I love how these bars come together in no time, perfect for last-minute cravings.
- There’s a certain satisfaction in pressing that sticky mixture into the pan.
- I feel proud when I share these—everyone always asks for the recipe.
- They remind me of simpler times, when treats were quick and satisfying.
My Inspiration for These No-Bake Bars
Growing up, my mom always kept a stash of these in the fridge. They were her go-to after-school snack—sweet, salty, and just the right amount of chewy. I started making my own batch when I needed something quick but homemade. It’s amazing how a handful of ingredients can turn into comfort. Now, I keep a batch in the freezer for when friends drop by or I need a little pick-me-up.
Background and Trivia on No-Bake Peanut Butter Bars
- Inspired by childhood no-bakes, but made more refined with real peanut butter.
- Graham cracker crumbs give a nostalgic crunch, popular in American treats.
- No-bake bars gained popularity during wartime when baking supplies were scarce.
- The combination of peanut butter and honey is a classic, dating back to early 20th century recipes.
Ingredient Insights for Better Bars

- Peanut Butter: I prefer creamy for smoothness, but crunchy adds texture. Vivid, oozy, nutty.
- Honey: Brings sweetness and helps hold everything together. Swap with maple syrup for a different flavor.
- Graham Cracker Crumbs: Provide crunch and sweetness. Use crushed cookies or cereal for variety.
- Chocolate Chips: Add melty richness or skip for a peanut-centric flavor. Use dark or milk depending on preference.
- Butter or Margarine: Helps bind the mixture. For dairy-free, try coconut oil for a subtle aroma.
Key Ingredients and Their Quirks
Peanut Butter:
- It’s creamy, smooth, and oozy when melted; watch for oozing goodness.
- It behaves during mixing, becoming glossy and pliable, making it easier to press into the pan.
Graham Cracker Crumbs:
- They give a nostalgic crunch and absorb moisture, keeping bars firm.
- Their fine texture melts into the mixture seamlessly, providing structure.
Substitutions for Dietary Needs and Flavor Tweaks
- Dairy-Free: Use almond or cashew butter instead of peanut butter for nutty, rich flavor.
- Sweetener: Swap honey with agave syrup or coconut nectar for a vegan option.
- Crunch: Use crushed pretzels or cereal for a salty crunch.
- Chocolate: Drizzle with dairy-free chocolate or omit entirely for a pure peanut butter hit.
- Add-ins: Mix in dried coconut, seeds, or dried fruit for variety.
Equipment & Tools
- 8-inch square pan: To hold and shape the bars.
- Parchment paper: For easy removal and clean slicing.
- Microwave or double boiler: To melt peanut butter and sweetener.
- Spatula or spoon: To mix and press the mixture.
- Sharp knife dipped in hot water: To cut clean slices.
Step-by-Step Guide to No-Bake Peanut Butter Bars
- Line an 8-inch square pan with parchment paper, leaving edges hanging for easy lifting.
- In a microwave-safe bowl, melt 1 cup (240 g) peanut butter with 1/4 cup (60 ml) honey or maple syrup, about 30 seconds. Stir until smooth.
- Add 1 1/2 cups (150 g) graham cracker crumbs or crushed cookies to the peanut butter mixture. Mix until evenly coated.
- Fold in 1/2 cup (80 g) mini chocolate chips or chopped nuts if desired.
- Press the mixture evenly into the prepared pan with a spatula or the back of a spoon, smoothing the top.
- Refrigerate for at least 2 hours until firm and set.
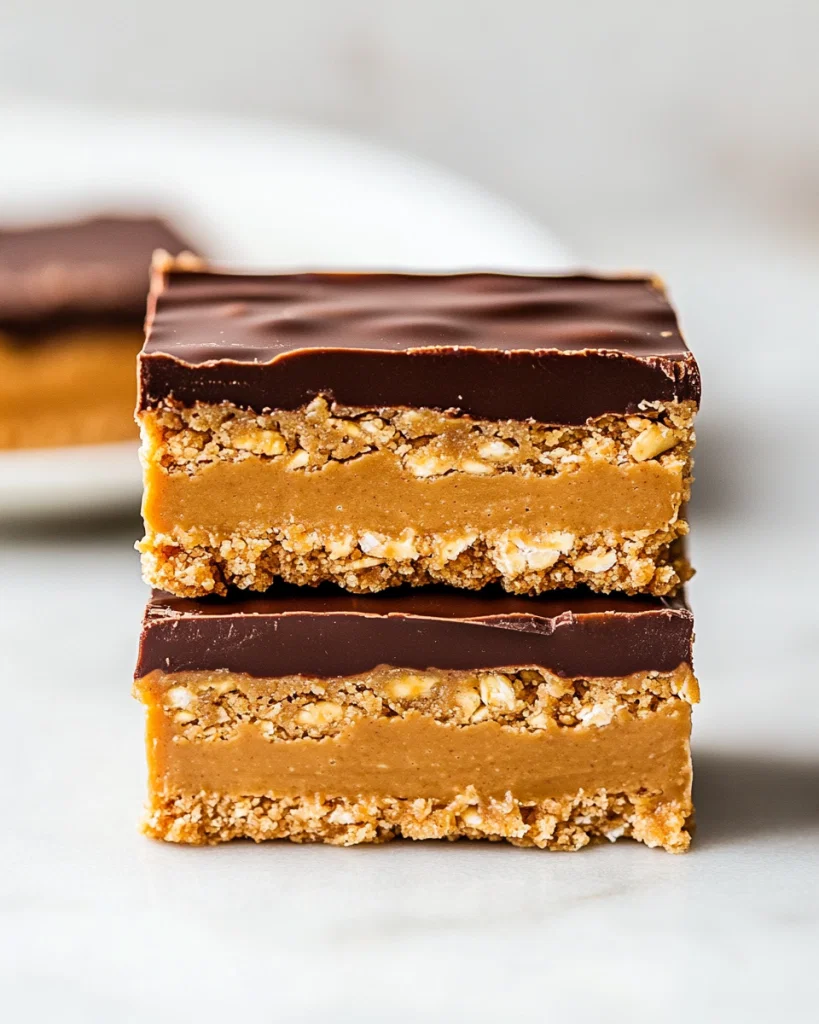
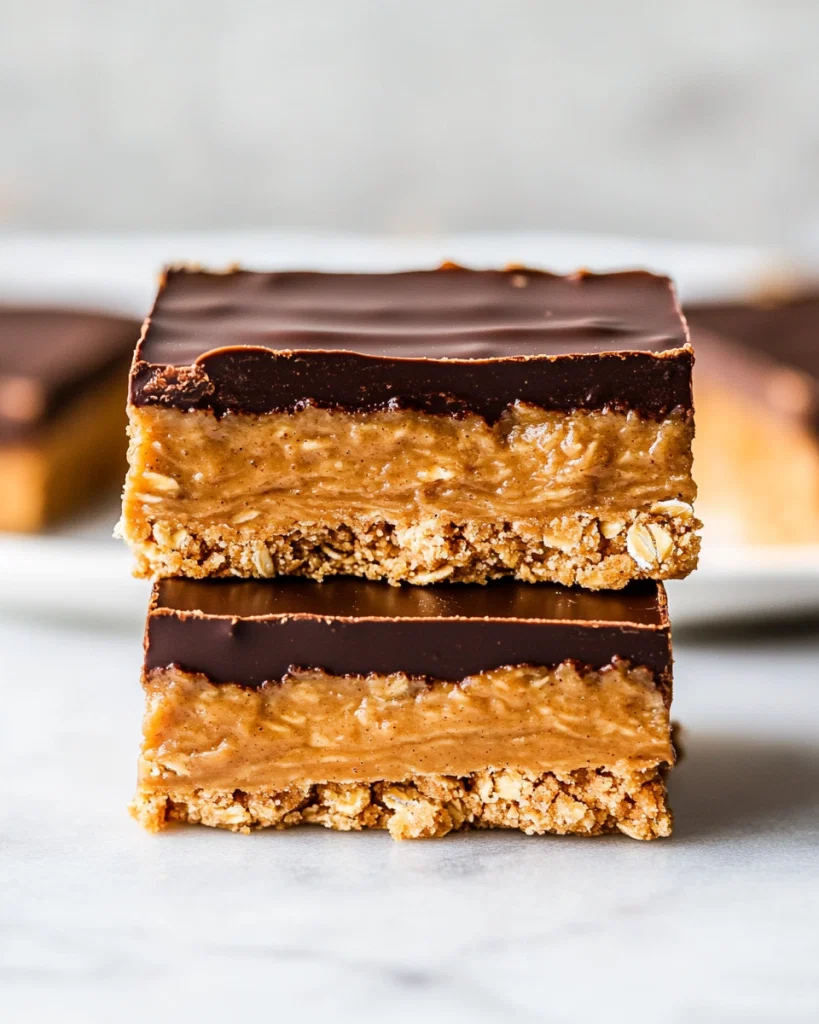
- Use the parchment overhang to lift the whole block out of the pan. Slice into squares or rectangles.
- Serve immediately or store in an airtight container in the fridge.
Chill the bars at least 2 hours in the fridge. Slice with a hot knife, serve directly from the fridge.
How to Know It’s Done
- Mixture holds together when pressed, not too sticky.
- Bars are firm and set after chilling.
- Edges are clean and sharp when sliced.
No-Bake Peanut Butter Bars
Equipment
- 8-inch square pan
- Microwave or double boiler
- Spatula or spoon
- Sharp knife dipped in hot water
Ingredients
- 1 cup Peanut Butter Creamy preferred
- 1/4 cup Honey or maple syrup
- 1 1/2 cups Graham Cracker Crumbs or crushed cookies
- 1/2 cup Mini Chocolate Chips optional
Instructions
- Line your 8-inch square pan with parchment paper, leaving some overhang on the sides for easy removal.
- In a microwave-safe bowl, combine the peanut butter and honey. Microwave in 30-second bursts, stirring well after each, until the mixture is smooth, glossy, and fragrant—about 1 minute total.
- Add the graham cracker crumbs to the melted mixture and stir until evenly coated and thickened—this will look crumbly but sticky enough to hold together.
- Fold in the mini chocolate chips if using, distributing them throughout the mixture for bursts of chocolate in every bite.
- Using a spatula or the back of a spoon, press the mixture firmly into the prepared pan, spreading it out evenly and smoothing the top. You should hear a slight crunch as you press down.
- Place the pan in the refrigerator and chill for at least 2 hours, or until the mixture is firm and set. The bars will become dense and chewy as they cool.
- Once chilled, lift the entire block out of the pan using the parchment overhang. Place on a cutting board and use a hot, sharp knife dipped in hot water to slice into squares or rectangles.
- Serve immediately or store in an airtight container in the fridge for up to a week. For longer storage, wrap tightly and freeze for up to 3 months.
Nutrition
Tips & Tricks for Perfect Bars
- MIX: Use fresh peanut butter for the best flavor and smooth texture.
- PRESS: Use the back of a spatula or a glass to press down evenly.
- CHILL: Let the bars chill for at least 2 hours, or overnight for cleaner cuts.
- SUB: Swap honey with maple syrup for a different sweetness profile.
- ADD: Mix in mini marshmallows or dried fruit for variety.
Common Mistakes and How to Fix Them
- FORGOT to chill? Pop the tray back in the fridge for 30 minutes. The bars will firm up.
- DUMPED too much honey? Add more graham crumbs to balance sweetness and stickiness.
- OVER-TORCHED the chocolate? Use a gentle double boiler next time, low heat, and stir constantly.
- SLICED unevenly? Dip your knife in hot water and wipe clean between cuts for cleaner slices.
Quick Fixes for Common Issues
- When mixture is too sticky, add more graham crumbs.
- Splash a little hot water on the knife for cleaner cuts.
- Patch over cracks by pressing them back together with a spoon.
- Shield your fingers with parchment when pressing down.
- When chocolate isn’t melting smoothly, add a tiny splash of vegetable oil.
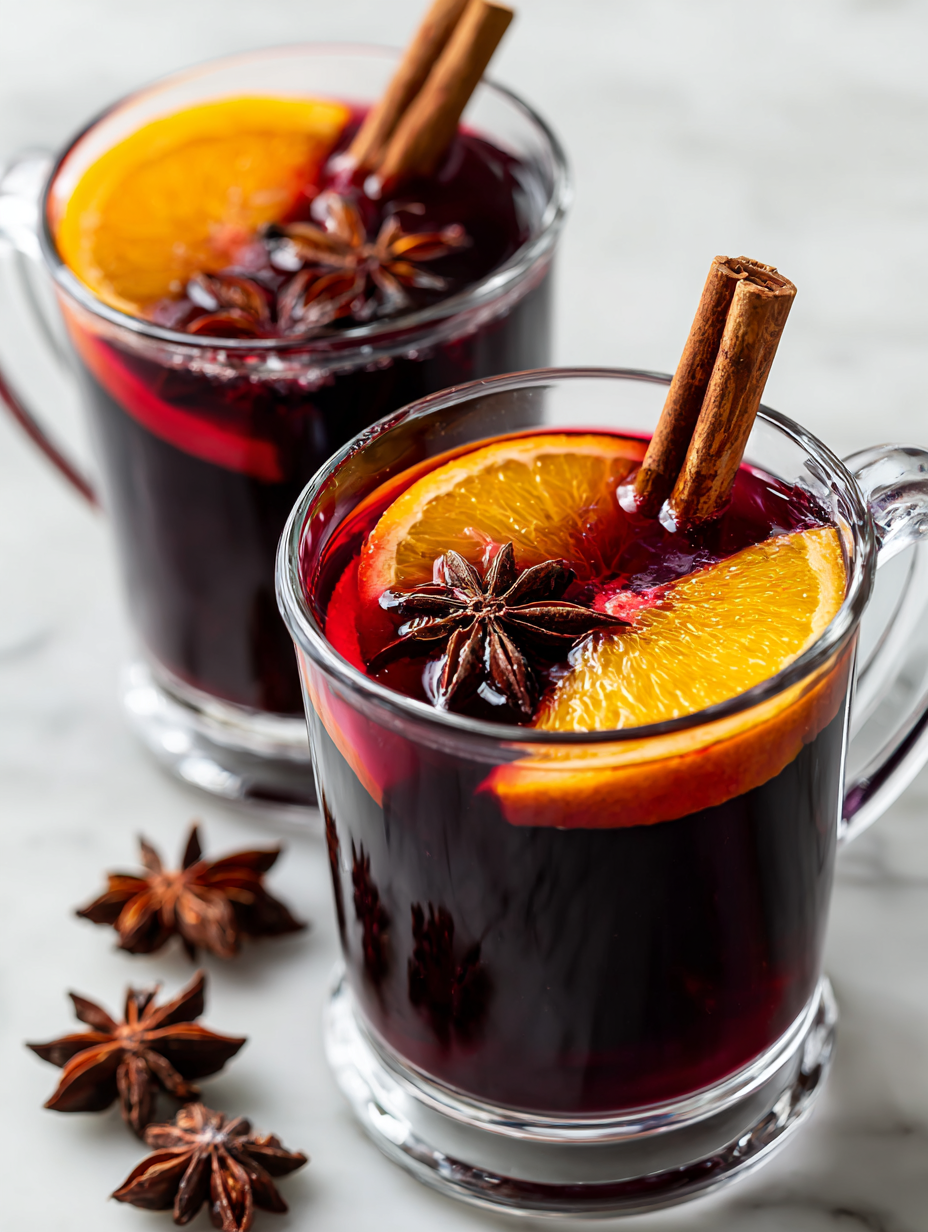
What to Serve With No-Bake Peanut Butter Bars
- Cold milk
- Coffee
- Hot chocolate
- Vanilla ice cream
- Fresh berries
- Chocolate sauce drizzle
Make-Ahead and Storage Tips
- Prepare and press the mixture into the pan a day ahead. Keep covered in the fridge.
- Bars stay fresh for up to a week in an airtight container in the fridge.
- For longer storage, freeze the bars wrapped tightly in plastic wrap and foil, up to 3 months.
- Refrigerate or thaw at room temp for 10–15 minutes for softer texture.
10 Practical Q&As: No-Bake Peanut Butter Bars
1. Can I use crunchy peanut butter?
Use smooth, creamy peanut butter for easier mixing and a richer flavor. Crunchy can work, but it makes the texture chunkier.
2. Can I add chocolate chips or other mix-ins?
Yes, but the bars will be less smooth and more textured. Adjust the mix-ins accordingly.
3. Why do I need parchment paper?
Line your pan with parchment paper, leaving some overhang for easy removal. It keeps the bars tidy.
4. How long do I need to chill the bars?
Let the mixture chill in the fridge for at least 2 hours, or until firm. This helps everything set properly.
5. Can I freeze these bars?
Store in an airtight container in the fridge for up to a week, or freeze for longer storage.
6. Can I use natural peanut butter?
Use natural peanut butter for a more authentic, less salty flavor. Adjust sweetness if you prefer sweeter.
7. Why is my mixture too sticky or too dry?
Mix well to ensure even distribution of peanut butter and sweetener. It helps the bars hold together.
8. How do I get the bars to set evenly?
Use a metal spatula or the back of a spoon to press the mixture evenly into the pan.
9. What’s the best way to cut the chilled bars?
Chill the bars in the fridge for the best texture—firm, not crumbly or greasy.
10. How do I cut the bars without crumbling?
Use a sharp knife dipped in hot water for clean cuts. Wipe after each slice.
Once these bars are chilled and firm, they cut like a dream—smooth, not crumbly. I keep a batch stashed in the fridge, ready for that sweet craving or a quick gift.
They’re a reminder that sometimes, the simplest recipes are the most satisfying. Plus, they’re endlessly adaptable—swap in honey, maple syrup, or even a dash of vanilla. No-bake treats like this make life a little easier, and a lot sweeter.

hi there,
i’m Austin
A photographer who loves to cook. During the day, I take pictures, but at night, I dive into the world of flavors and recipes.
know more