
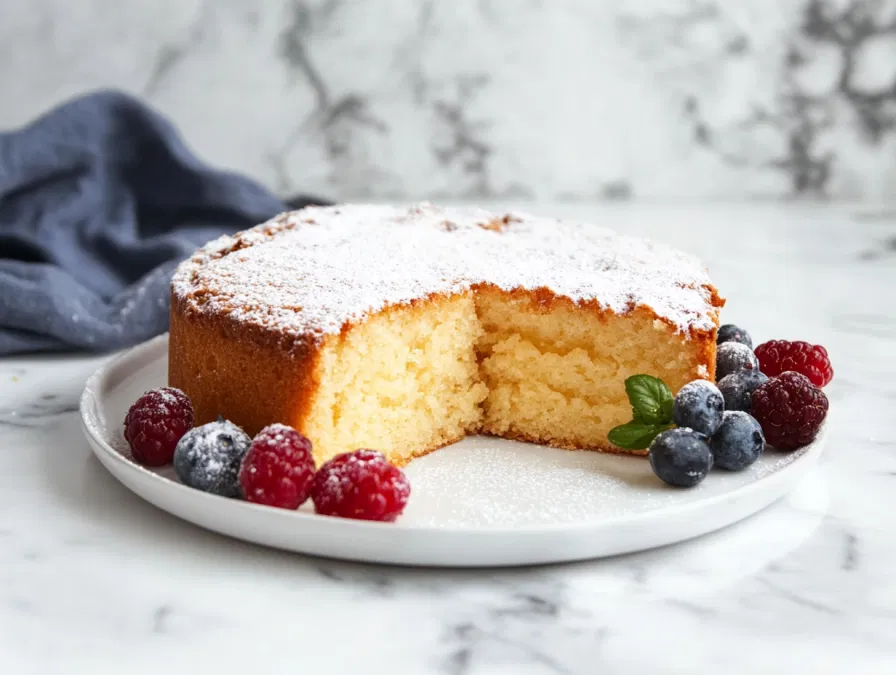
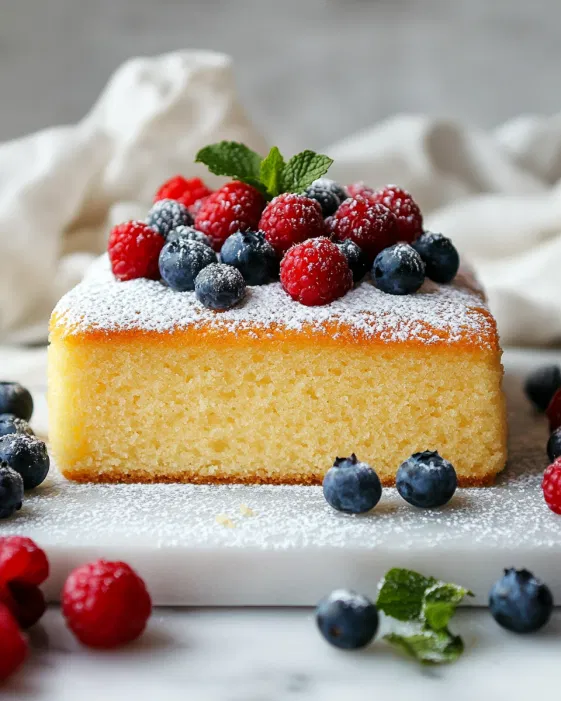
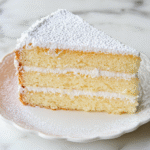
This easy sponge cake is one of those classic bakes that never goes out of style. Light, airy, and softly sweet, it’s perfect for tea-time, birthdays, casual desserts, or even as a simple base for layered cakes.
The beauty of a sponge cake lies in its delicate texture and how effortlessly it pairs with berries, cream, or just a dusting of powdered sugar.
Why I Love This Recipe
- What makes this recipe so dependable is its simplicity.
- With just a few pantry staples like eggs, sugar, and flour, you get a cake that feels elegant without being complicated.
- It’s soft, fluffy, and versatile enough for everyday baking or special occasions.
Spotlight on Key Ingredients

Eggs
Texture: Thick and foamy when whipped
Flavor: Mild and rich
Prep Tip: Use room-temperature eggs for better volume
Common Mistake: Under-whipping leads to a dense cake
Flour
Texture: Fine and dry
Flavor: Neutral
Prep Tip: Always sift before folding
Common Mistake: Overmixing once added can deflate the batter
Ingredient Substitutions for Different Needs
- Extra Flavor: Add lemon zest
- Lighter Sweetness: Reduce sugar slightly
- Gluten-Free: Use cake-style gluten-free flour blend
- Rich Version: Add whipped cream while serving
- Fruit Variation: Top with strawberries or raspberries
Easy Sponge Cake Recipe
Equipment
- Measuring Spoons and Cups
- Stand mixer or electric hand mixer
- Spatula
- 8-Inch Round Cake Pan
- Oven and Oven Mitts
- Cooling Rack
- Toothpicks
Ingredients
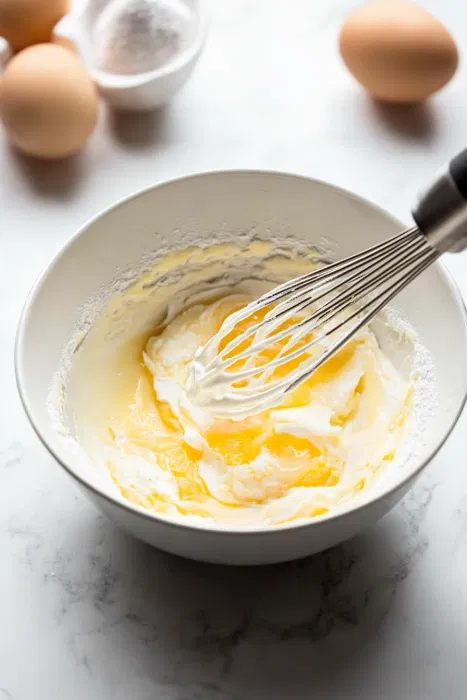
- 4 Large Eggs
- 1 cup Granulated sugar
- 1 cup All-purpose flour
- ½ teaspoon baking powder
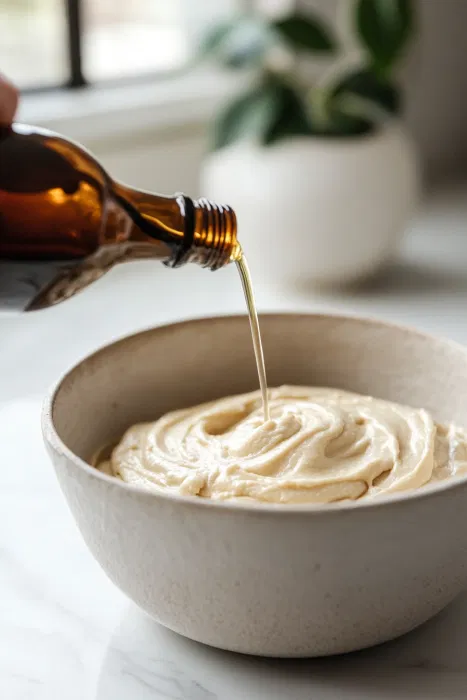
- 1 teaspoon vanilla extract optional
- Pinch of salt
Optional
- Powdered sugar
- Fresh berries
Instructions
- Preheat and PrepPreheat my oven to 350°F and line my cake pan.Getting this step done early makes the rest feel smooth.
- Whip the Eggs and SugarIn a large bowl, beat the eggs and sugar for 5–7 minutes until pale, thick, and fluffy. This step is what gives the cake its signature lightness.
- Add VanillaMix in the vanilla extract, simple but important.
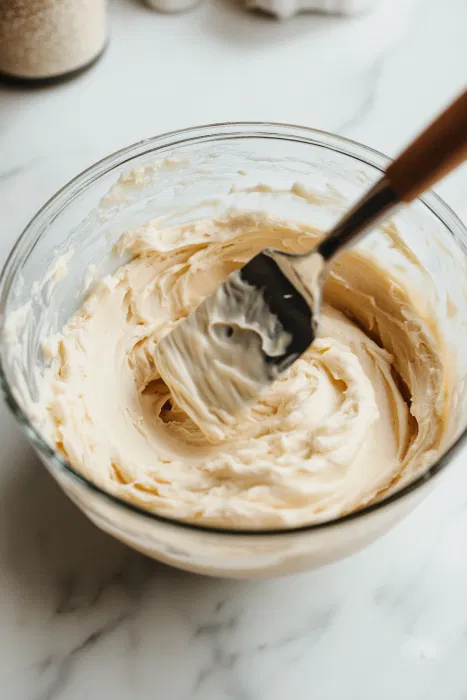
- Sift the Dry IngredientsIn another bowl, sift together the flour, baking powder, and a pinch of salt.Sifting keeps the cake airy.

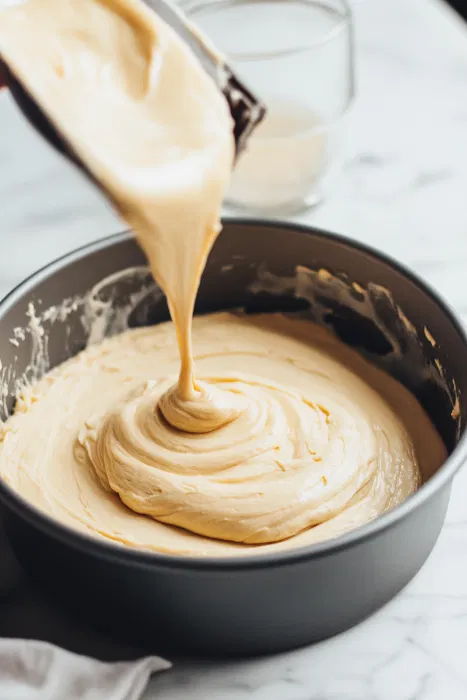
- Fold GentlyFold the dry mixture into the egg mixture slowly, using a spatula.No rushing, just soft, gentle turns until the batter comes together.
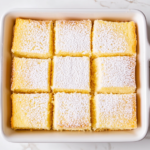
- Pour and SmoothPour the batter into the cake pan, smoothing the top lightly.
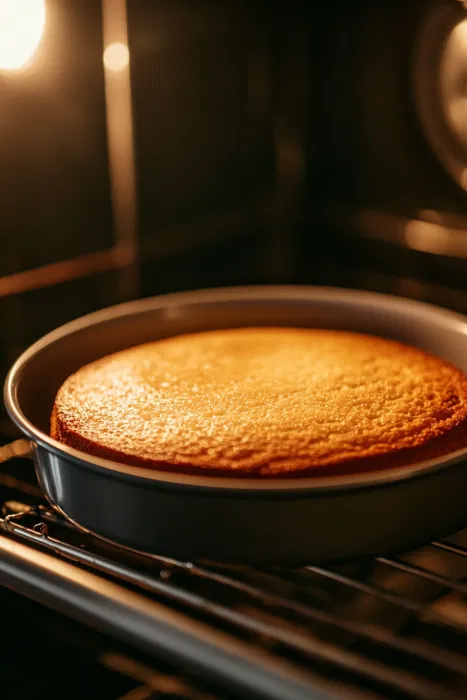
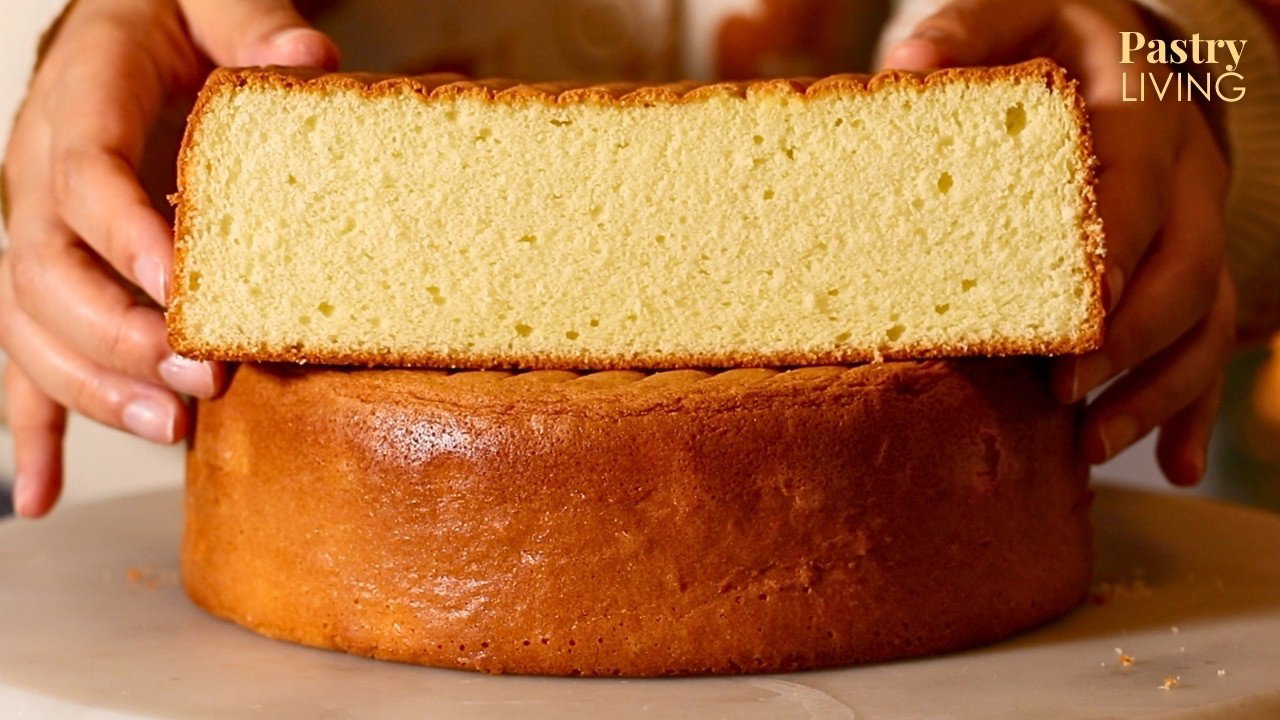
- BakeBake the sponge for 25–30 minutes until the top is golden and a toothpick comes out clean.
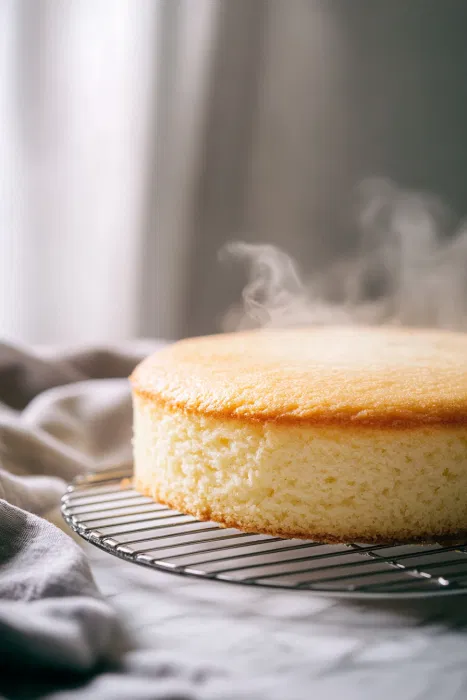
- Cool and RestLet it cool in the pan for a few minutes, then move it to a rack so it keeps its softness.
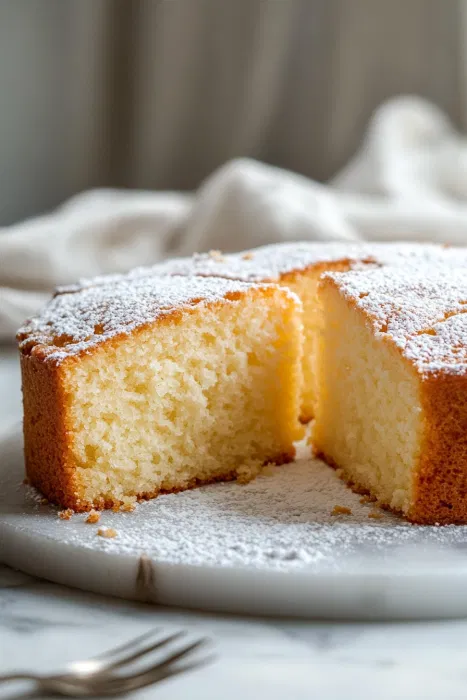
- Slice and ServeDust powdered sugar over the top (because it always looks pretty) and slice while still a bit warm.
Notes
- Aerate Eggs: Beat eggs until pale for a light sponge cake texture. Avoid overmixing.
- Gentle Folding: Fold dry ingredients gently to preserve airiness, preventing a dense sponge cake.
- Precise Baking: Adhere to recommended time; overbaking leads to dryness in sponge cake perfection.
Nutrition
How to Know It’s Done?
- The top is lightly golden
- The cake springs back when touched
- A toothpick comes out clean
- The edges slightly pull away from the pan
- The center feels set
What to Serve With This Cake
- Fresh strawberries
- Whipped cream or a light vanilla cream
- A cup of tea or iced coffee
- A drizzle of honey or chocolate syrup
Cooking Tips and Tricks
- Beat eggs long enough for volume
- Fold very gently
- Do not overbake
- Cool on a rack
- Slice with a serrated knife
Tips & Easy Fixes
- Eggs Not Whipped Enough: Make sure to beat eggs until light and fluffy; this helps the sponge rise and gives a soft texture.
- Cake Too Dense: Gently fold in flour to avoid deflating the batter. Avoid overmixing.
- Edges Browning Too Fast: Reduce oven temperature slightly or use an oven thermometer to check accuracy.
- Cake Sticking to Pan: Grease and line the pan with parchment paper to ensure easy release.
- Cake Too Dry: Do not overbake; check doneness with a toothpick before the suggested bake time ends.
- Underbaked Center: Bake until a toothpick inserted comes out clean. If the center is still wet, add a few more minutes.
- Flavor Enhancements: Add vanilla extract or lemon zest for extra aroma.
- Serving Suggestions: Dust with powdered sugar, top with berries, or layer with cream for a simple dessert.
Make-Ahead and Storage Tips
- Store at room temperature for 2 days
- Keep covered
- Refrigerate if topped with cream
- Freeze slices for up to 1 month
- Warm slightly before serving
Texture & Flavor Profile
Lightness: Very high
Sweetness: Mild
Softness: High
Richness: Light
Finish: Airy and delicate
Variations to Try
- Lemon sponge
- Berry topped version
- Chocolate drizzle
- Cream-filled layer cake
- Citrus zest version
Frequently Asked Questions
- Can I use cake flour?
Yes, it makes the sponge even lighter. - Why is my sponge dense?
Usually because the eggs were not whipped enough. - Can I make it ahead?
Yes, it stores well for 1–2 days. - Can I freeze it?
Yes, wrap slices individually. - Best topping?
Powdered sugar and berries. - Can I use oil?
Traditional sponge usually doesn’t need it. - How do I keep it soft?
Store covered once cooled. - Can I layer it?
Yes, it works beautifully for layered cakes. - Why sift flour?
It helps keep the texture airy. - Best served warm or cool?
Both work, but slightly warm is lovely.

hi there,
i’m Austin
A photographer who loves to cook. During the day, I take pictures, but at night, I dive into the world of flavors and recipes.
know more
Sandra
Saturday 22nd of February 2025
Not a good recipe, cake was a flop
Anne Carter
Saturday 1st of March 2025
Sorry to hear that, Sandra! This recipe usually turns out light and fluffy, so I’d love to help troubleshoot. Did anything seem off with the batter or baking process? Sometimes small things like overmixing or oven temperature can affect the outcome. Let me know—I’d be happy to help!
Ria
Thursday 13th of February 2025
The finished sponge is not the over baked ones in the tins.
James Taylor
Tuesday 18th of February 2025
Hi Ria! 😊 The final sponge cake in the photos might look a bit different due to lighting, toppings, or slight variations in baking. If your cake turned out drier than expected, it could be due to overbaking or overmixing the batter. Let me know if you need any tips—I’d love to help!
Nitzia
Thursday 21st of November 2024
Do you use a whisk attachment or beater?
Anne Carter
Tuesday 3rd of December 2024
Hi Nitzia! 😊 Great question! You can use either, but I usually use a whisk attachment to get the eggs nice and fluffy. If you don’t have a whisk attachment, a beater will work just fine too—just make sure to beat the eggs until they’re thick and pale. Hope that helps, and happy baking!
Sandy
Thursday 21st of November 2024
I tried this recipe to use as the bottom to a Disney Zebra Dome recipe. Unfortunately it came out awful. It indicates to spread the batter between two pans which makes for extremely thin cakes which burned and I had to literally chisel it out of the pan. I think I should have put it on the center or even top shelf of the oven and for fewer minutes. Not sure what I did wrong.
For my purposes I will buy an angle food or pound cake and use that for the base of the domes.
Anne Carter
Tuesday 3rd of December 2024
Hi Sandy, I’m so sorry to hear the recipe didn’t work out as expected for your Zebra Dome base. It does sound like the thin batter and placement in the oven could have played a part. For next time, using the center rack and keeping a close eye on baking time might help prevent over-baking.
That said, using an angel food or pound cake is a fantastic idea for your domes—great creativity on your part! Thank you for sharing your experience, and I hope your next batch turns out beautifully! 😊