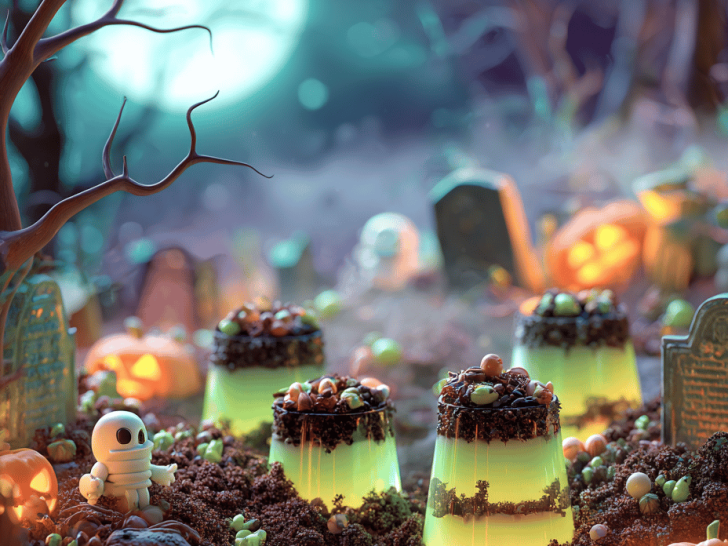
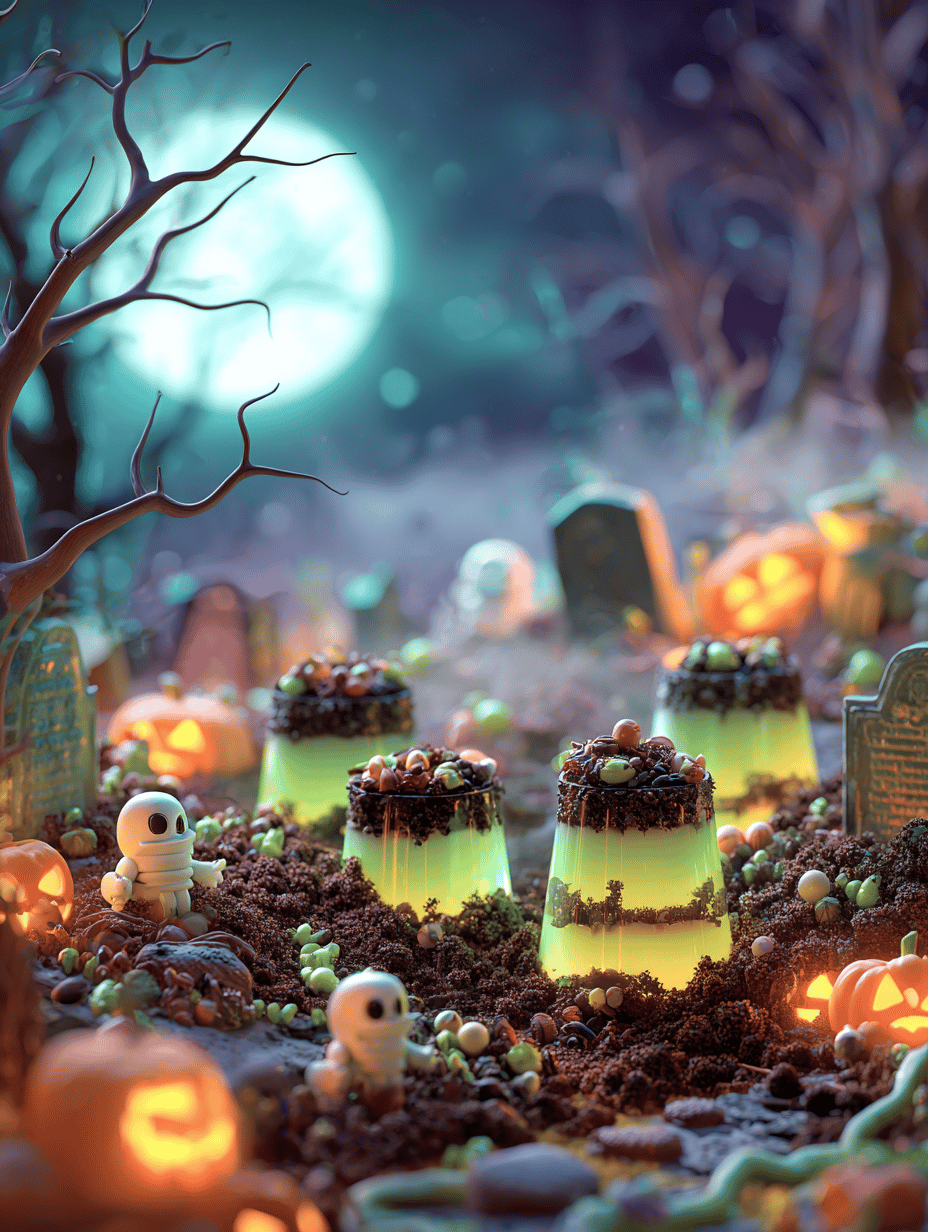
Why I Love This Spooky Dessert
Honestly, these graveyard pudding cups are my secret weapon for Halloween parties. They’re simple enough to whip up last minute, but look so eerie and impressive with minimal effort. Plus, digging through layers of chocolate and cookie crumbs feels oddly satisfying—like unearthing tiny treasures.
There’s something about creating a mini nightscape in cups that sparks my nostalgia. I remember making similar treats as a kid, but this version feels more refined and a little mischievous. It’s the kind of dessert that invites curiosity—kids love the spooky vibe, and adults get a little playful too.
What I Love About Making These
- Seeing the surprise in kids’ eyes when they spot the “graveyard” setup—pure joy mixed with a dash of chaos.
- Getting my hands dirty crushing cookies—those crumbs are basically edible confetti that make every layer feel like a tiny adventure.
- That moment when I pipe on the “tombstones” and they stand tall, a little crooked—just like real grave markers.
- Relishing the chaos of decorating—candy, cookies, sprinkles—nothing has to be perfect, just fun and spooky.
Ingredient Breakdown: What Makes These Cups Feel Like a Nightscape
- Chocolate pudding: I love a rich, smooth pudding—silky and not too sweet. If you’re avoiding dairy, coconut milk makes a nice creamy stand-in.
- Crushed oreo cookies: These add that dark, earthy crunch that mimics soil. Swap in chocolate graham crackers if Oreos aren’t your thing.
- Gummy worms and candy skulls: Oozy, chewy, and a pop of color. When I use gummy worms, I always warm them slightly for a glossy, smoky look.
- Whipped cream: Fluffy and light—brightens the whole cup. For a dairy-free version, coconut whipped cream is a good swap.
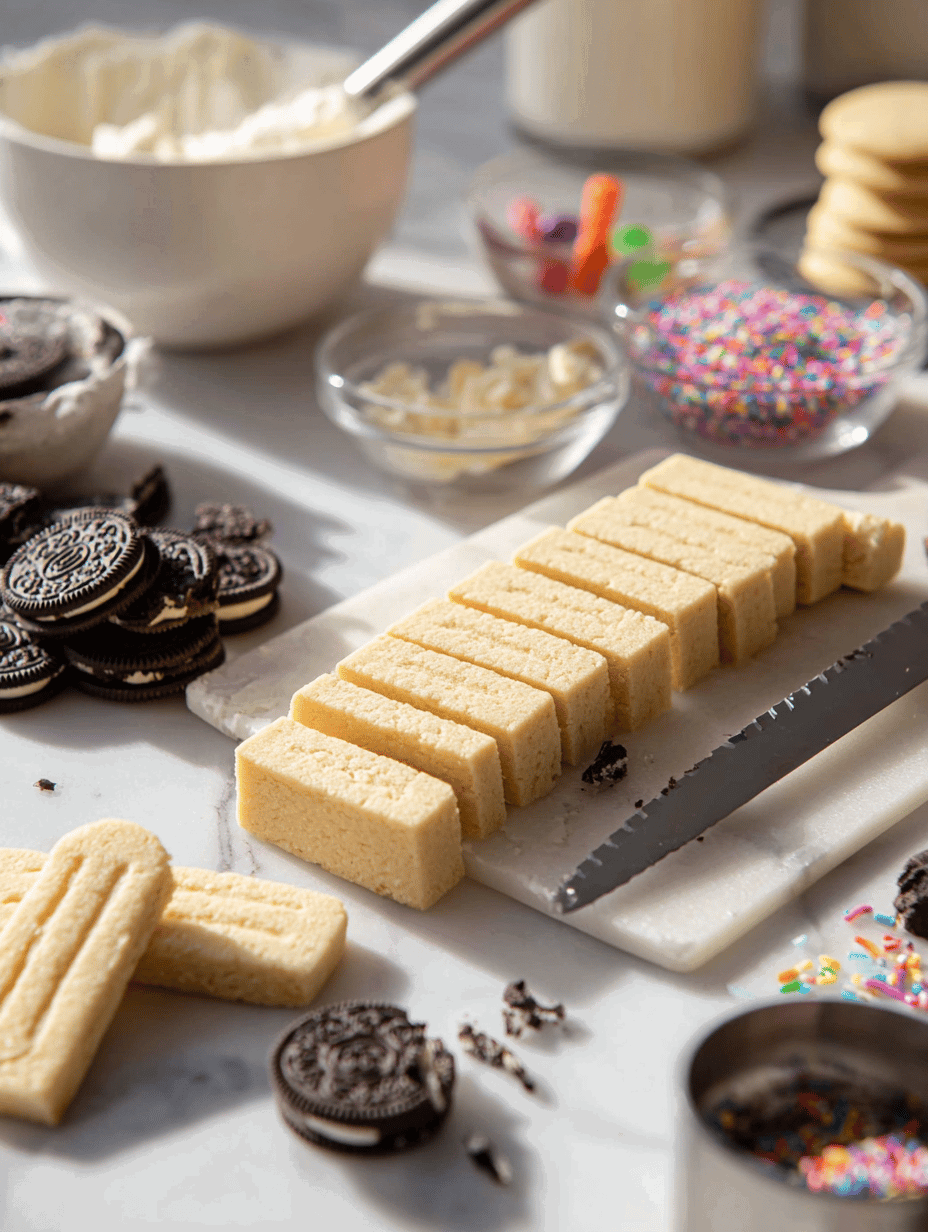
- Chocolate cookies or biscuits: For tombstones, I use shortbread or biscotti—easy to cut and sturdy enough to stand tall.
Making the Graveyard in Miniature: Step-by-Step Guide
Equipment & Tools
- Clear plastic cups—big enough for a good layer of pudding and toppings.
- Mixing bowls—one for pudding, one for crushed cookies.
- Spatula and spoon—pretty obvious, but essential for smooth layers.
- Piping bag or plastic sandwich bag—if you want to make tombstones or ghost shapes.
- Small knife or cookie cutter—helpful for shaping tombstones from cookies.
Steps
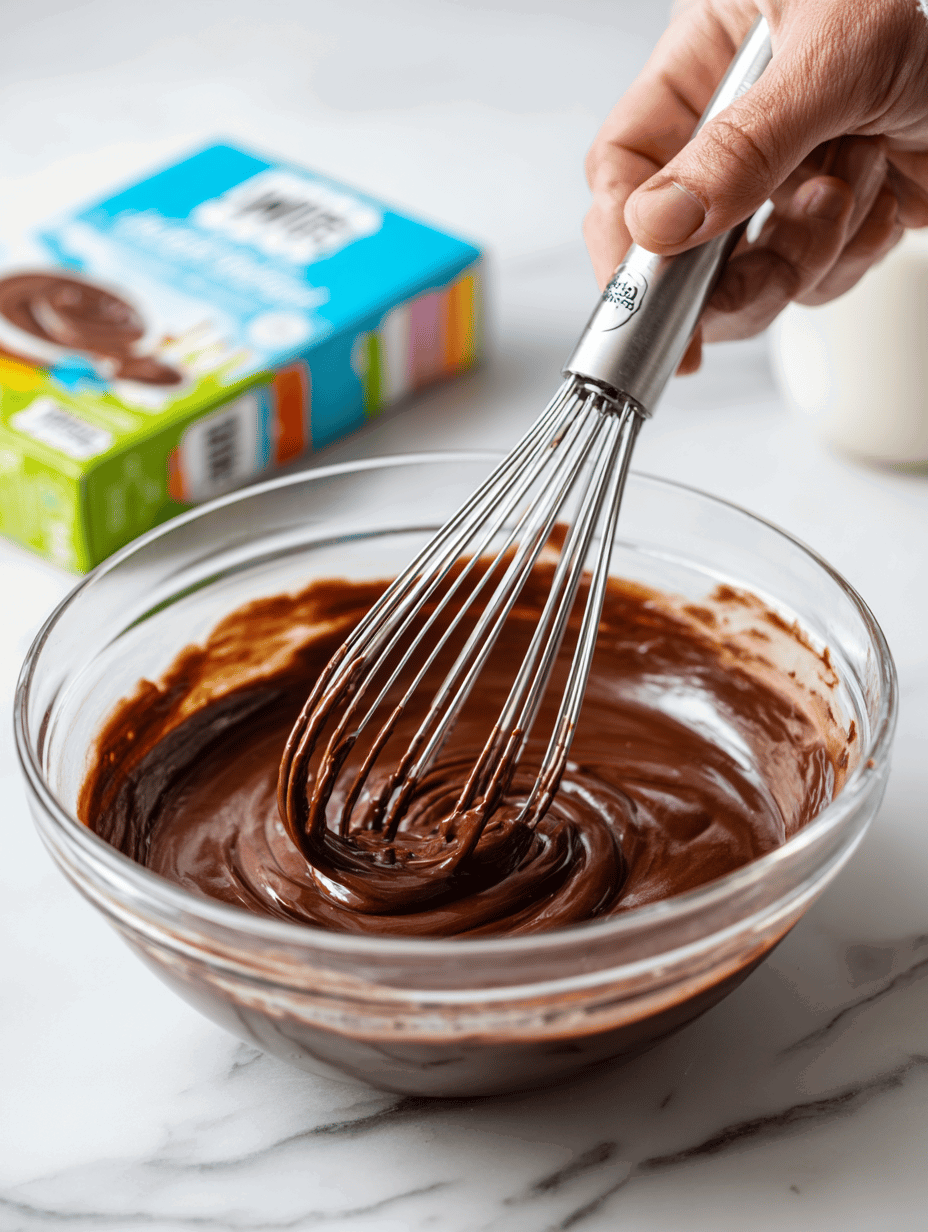
- Prepare pudding: Follow your recipe or box instructions. Chill in the fridge for at least 30 minutes so it’s firm enough to layer.
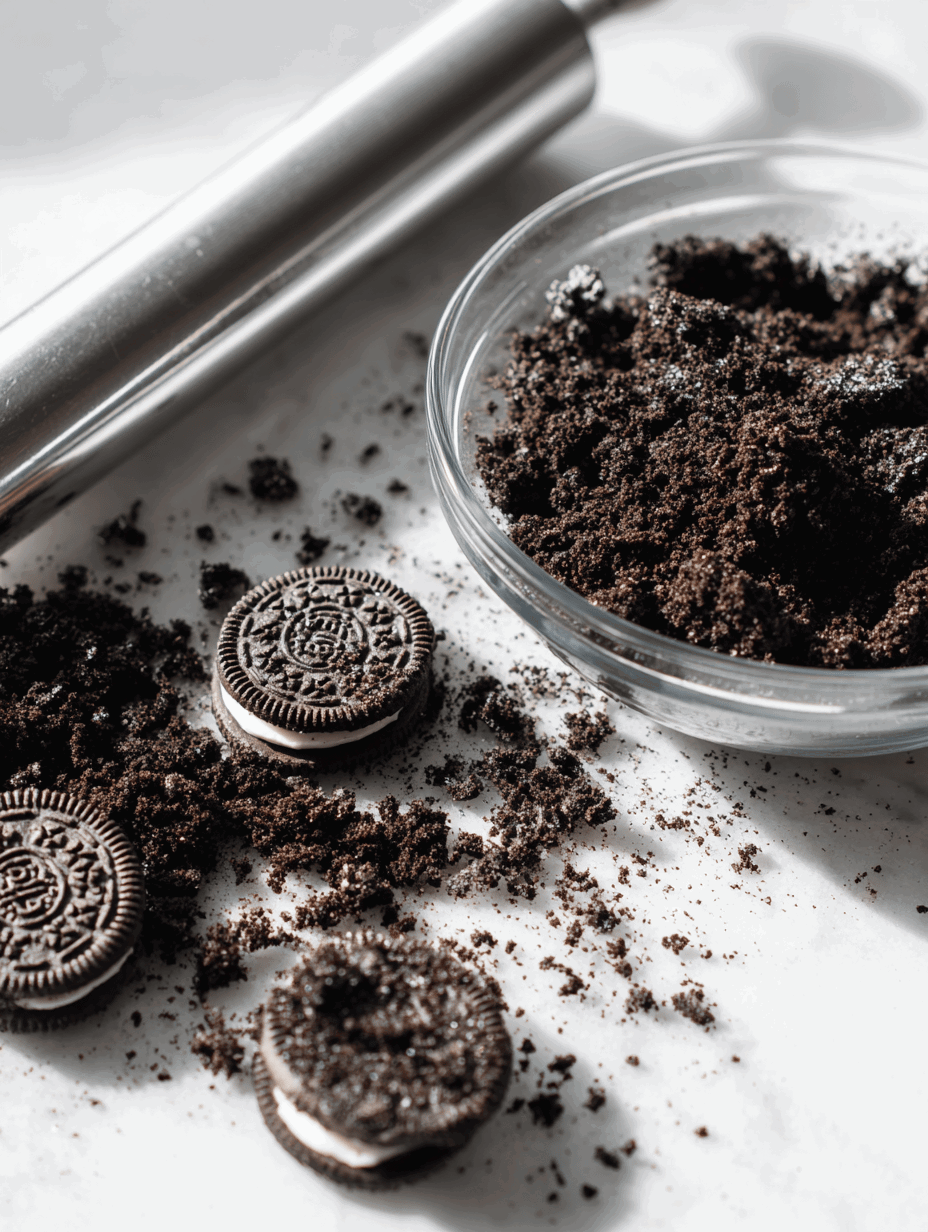
- Crush cookies: Use a rolling pin or food processor until crumbs resemble soil—don’t overdo it, some bigger chunks are good.
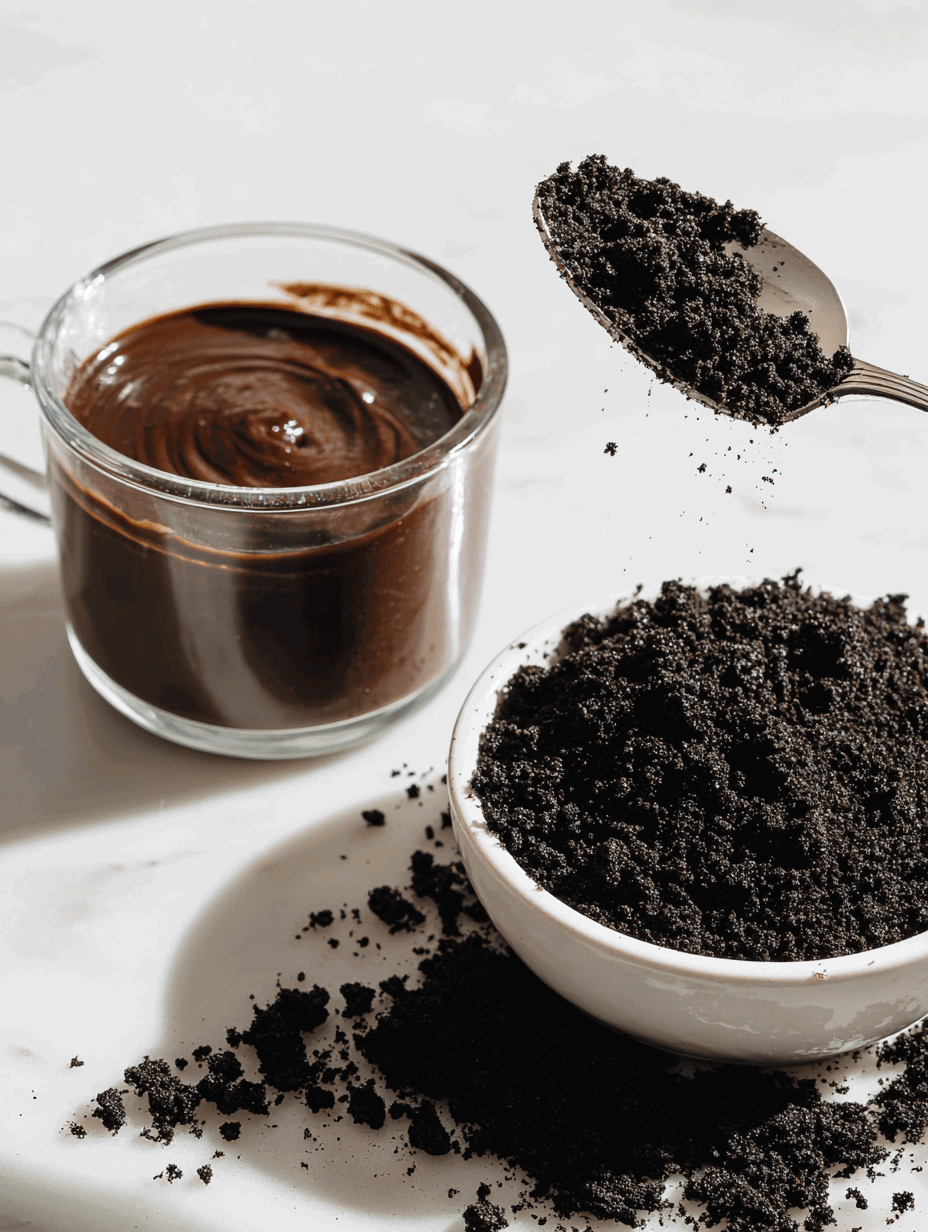
- Layer the base: Spoon a thick layer of pudding into each cup. Sprinkle crushed cookies generously on top—this is your earth layer.
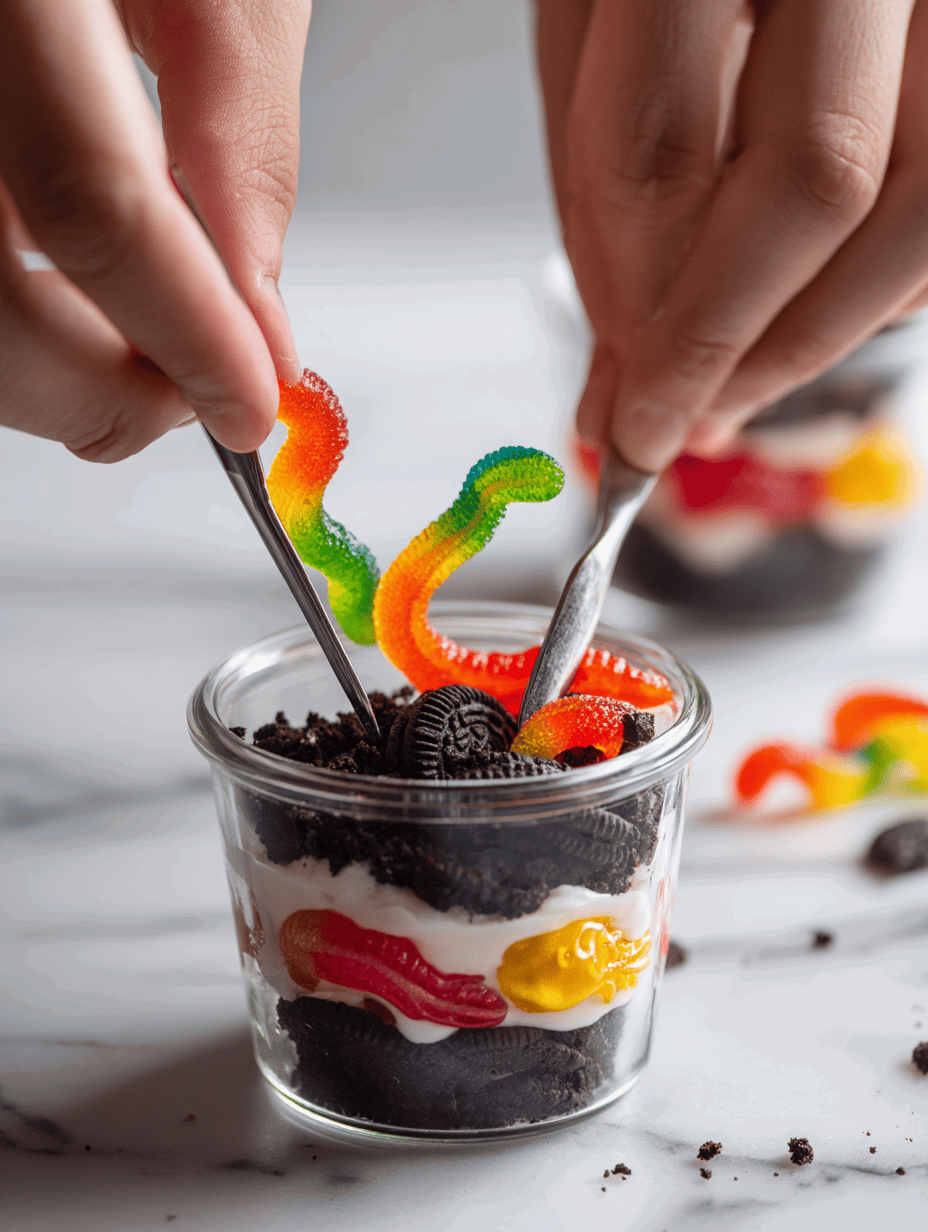
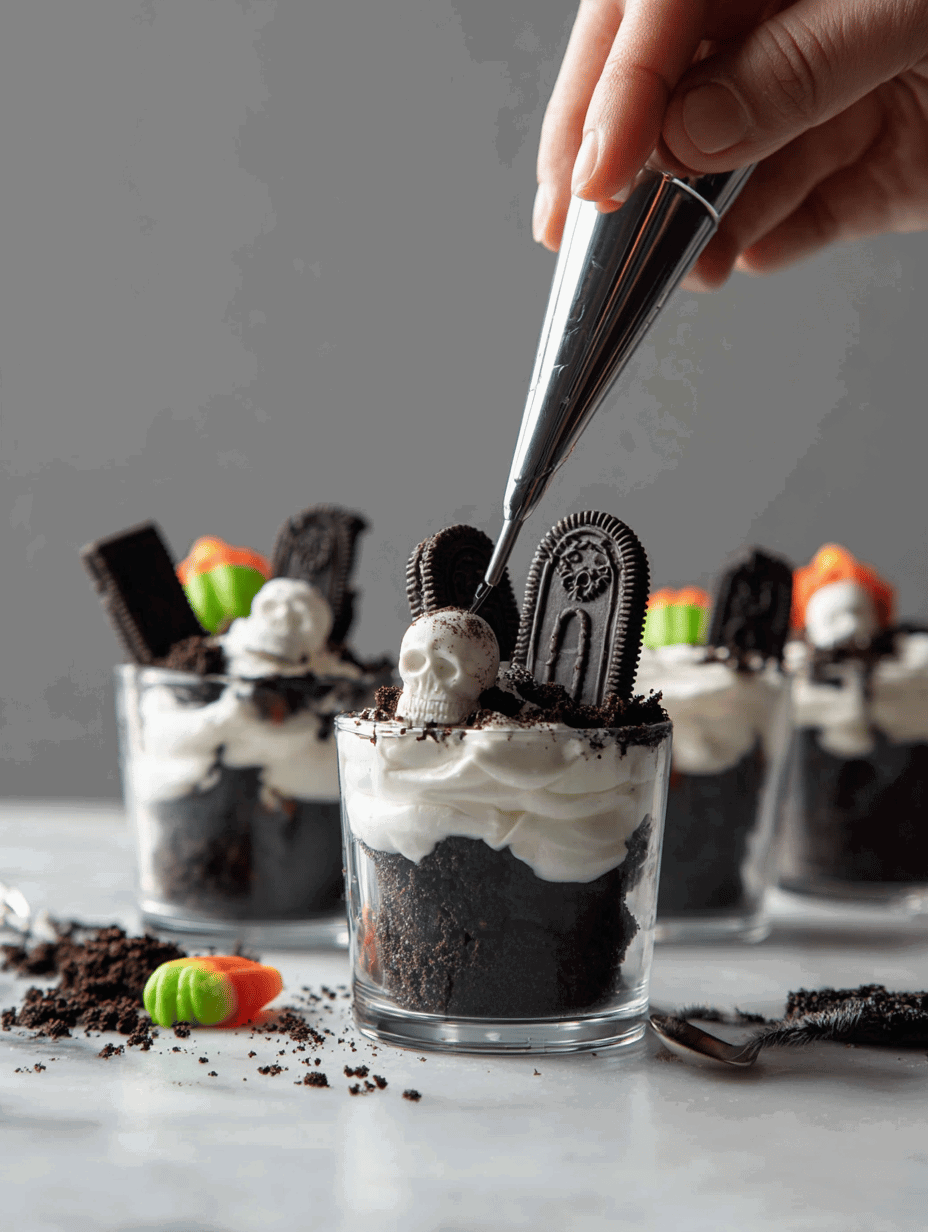
- Add toppings: Place gummy worms and candy skulls on top—bury some a little into the crumbs for authenticity.
- Make tombstones: Cut cookies or biscotti into small rectangles. Use icing or melted chocolate to write spooky messages or just leave plain.
- Assemble: Stick tombstones into the crumb layer, then pipe whipped cream around them to resemble fog, if desired.
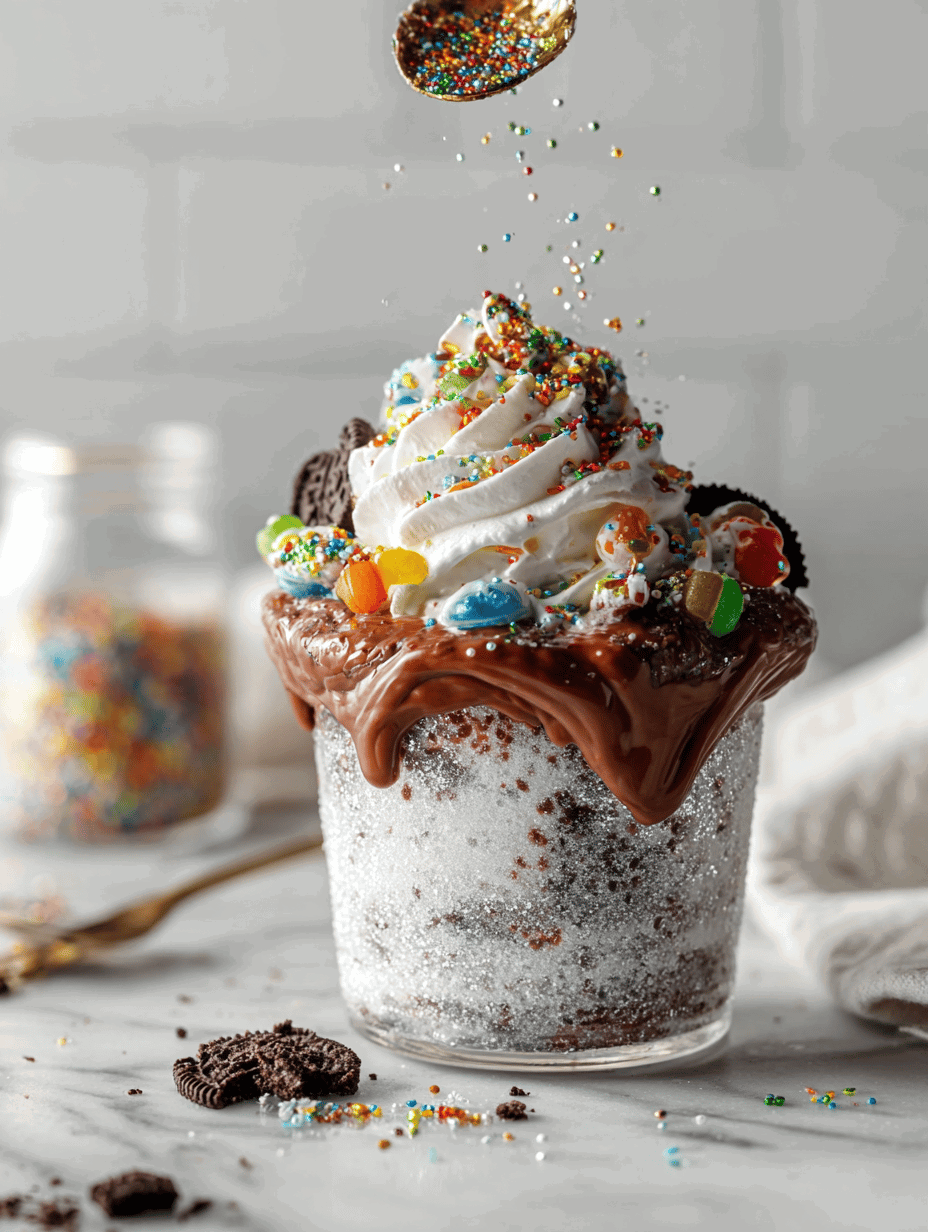
- Finish: Add sprinkles or edible glitter for shimmer. Chill cups for 15–20 minutes before serving for best set.
Checkpoints & How to Know It’s Done
- Chocolate pudding jiggles slightly when nudged—settled but still soft.
- Crumb layer looks moist but not soggy—firm enough to hold toppings.
- Decorations stay in place, not sliding off—tombs should be sturdy.
Mistakes and Fixes to Keep in Mind
- FORGOT to chill the pudding? No worries—pop it back in the fridge for 15 mins, it firms right up.
- DUMPED too many crumbs? Lighten up—add a touch more pudding or whipped cream to balance the soil look.
- OVER-TORCHED tombstones? Use a gentle heat to melt chocolate—less smoky, more polished.
- SIDED with a soggy bottom? Drain excess moisture from toppings or use dry cookies for stability.
Quick Kitchen Fixes for Spooky Success
- When pudding is too runny, fold in a bit more whipped cream to thicken.
- Splash a few drops of black food coloring into whipped cream for extra gloom.
- Patch cracks with a dab of melted chocolate or icing—quick and invisible.
- Shield delicate decorations from melting by chilling cups an extra 10 mins before serving.
- When gummy worms are too stiff, warm briefly in the microwave for a glossy, oozy look.
These little cups aren’t just treats—they’re a tiny, edible scene that turns a simple dessert into a spooky story. Perfect for Halloween, but honestly, they’re a reminder that sometimes chaos in the kitchen makes the best memories. No matter how they turn out, they’ll get smiles and maybe a few giggles—especially when kids realize they’re digging into a mini graveyard.
Spooky Graveyard Pudding Cups
Equipment
- Clear plastic cups
- Spatula and spoon
- Piping bag or plastic sandwich bag
- Small knife or cookie cutter
Ingredients
- 1 box chocolate pudding mix follow package instructions
- 1 1/2 cups milk to prepare pudding
- 1 cup crushed Oreo cookies for soil layer
- 4 gummy worms slightly warmed for gloss
- 4 candy skulls for decoration
- 1 cup whipped cream or coconut whipped cream
- 4 shortbread cookies or biscotti for tombstones
- optional edible glitter or sprinkles for shimmer
Instructions
- Mix the chocolate pudding powder with cold milk according to package instructions, then whisk until smooth and set in the fridge to chill for at least 30 minutes.
- Crush the Oreos into fine crumbs using a rolling pin or food processor, leaving some bigger pieces for texture.
- Spoon a generous layer of chilled pudding into each clear cup, filling about one-third of the way up.

- Sprinkle a thick layer of crushed cookies over the pudding to resemble dark soil.
- Place gummy worms and candy skulls on top of the cookie layer, burying some slightly into the crumbs for a realistic effect.
- Cut shortbread cookies or biscotti into small rectangles to serve as tombstones; use icing or melted chocolate to write spooky messages if desired.
- Insert the tombstones into the crumb layer, standing upright, and pipe whipped cream around their bases to resemble fog or mist.
- Sprinkle edible glitter or colorful sprinkles on top for shimmer, then chill the cups in the fridge for 15–20 minutes to set everything.
- When ready to serve, ensure the toppings are firm and decorations are stable. Serve chilled for a fun, spooky treat that looks just like a mini graveyard.

![Cannoli Recipe [Irresistible Mini Italian Desserts]](https://cdn.beyondthebayoublog.com/wp-content/uploads/2024/06/Cannoli-Recipe-Irresistible-Mini-Italian-Desserts-150x150.png)